
DIY Loom Tutorial
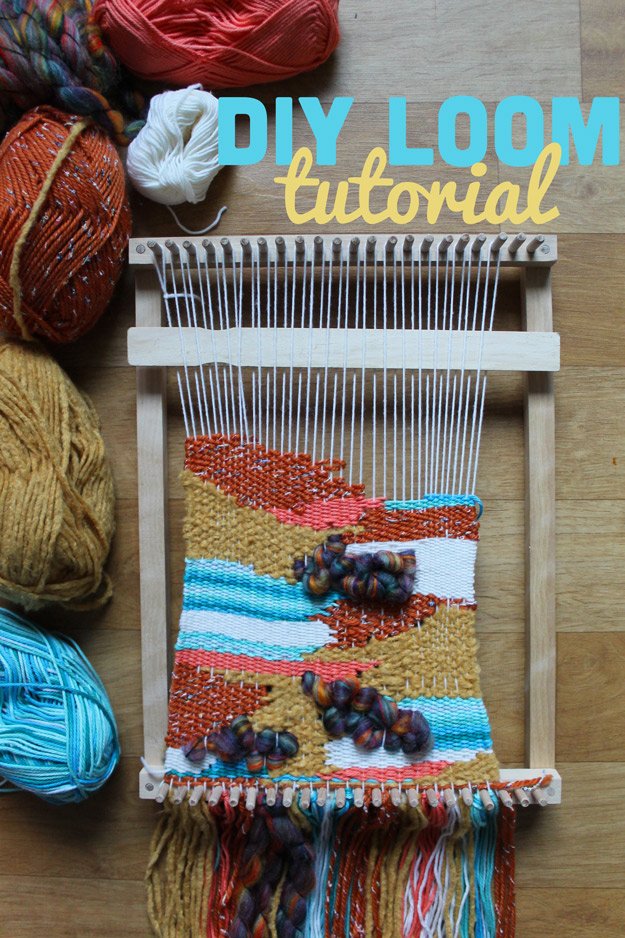 As promised, here is my DIY Loom Tutorial. As you may have read in my weaving resources for beginners post, weaving is a new to me, just for fun craft and so far I really, really love it. But! Nothing comes into a crafters life without a little DIYing to begin the whole process. When I decided I finally wanted to try weaving I was held back by the fact that looms are either A) HUGE B) Expensive or C) Impossible (to me) to find in Korea.So I waited and watched from the sidelines, until I saw this loom and thought, "I can totally make that". So this summer I picked up all the supplies I would need at hobby lobby for less than $10, my ever indulgent father cut the dowels down to size and then I loaded the supplies up and they and I flew back to Korea, where my wonderful, doting husband built the loom for me! Now I am a happy weaver with a beautiful, DIY loom.Here is how you too can join me on my mission to weave and watch Parks & Rec all day, every day.
 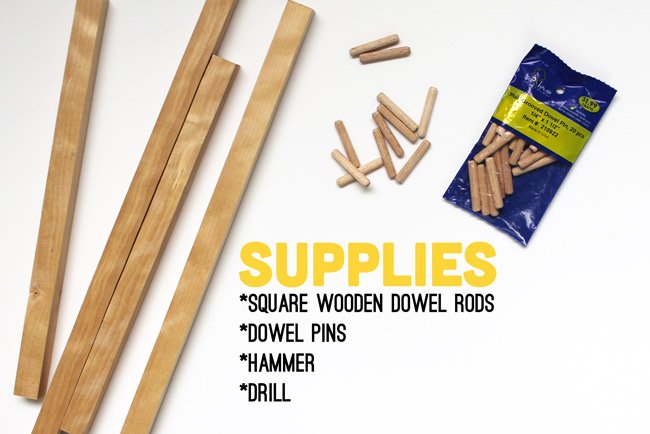 Supplies:
- 3/4in square wooden dowel rods (2 that are 36in long will leave you with a little extra)
- Wooden dowel pegs (about 60 pegs)
- Drill
- Hammer
- Optional: sandpaper, washi tape, stain
 Step 1: Cut your dowel rods down to size. This depends on how big you want your loom to be, so remember you can always make something smaller than your loom but never bigger. I cut mine down to be 12in wide by 16in tall. Any bigger than this and it wont really be a 'lap loom'.Step 2: Mark out the spacing for your pegs. I spaced mine at 1/2 an inch, but they are technically closer together since the pegs have a width to them, but we drilled in on the 1/2 inch marks.
  Step 3: Draw a line in the middle of your dowel exactly where you want to drill in for the peg placement.
  Step 4: Begin drilling! For the 1/4in pegs we used a 1/4in drill bit and wrapped washi tape around the drill where we needed to stop drilling to a) not split the wood/go all the way through and b) have the pegs sit at the same height.
  Step 5: Once all your holes are drilled, sand them down so that the splinters don't hurt you or snag your yarn.
 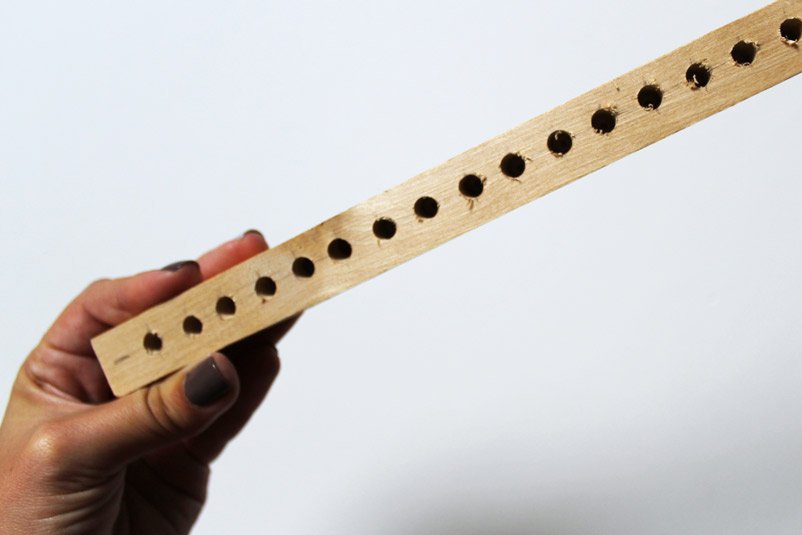 Step 5: Hammer in your pegs, making sure to hammer them down until they are at an even height and at the bottom of your drilled holes.
  Step 6: YAY! You're so close and its so pretty now and looks like a dinosaur (right?!), do any last-minute sanding clean up you need to.
 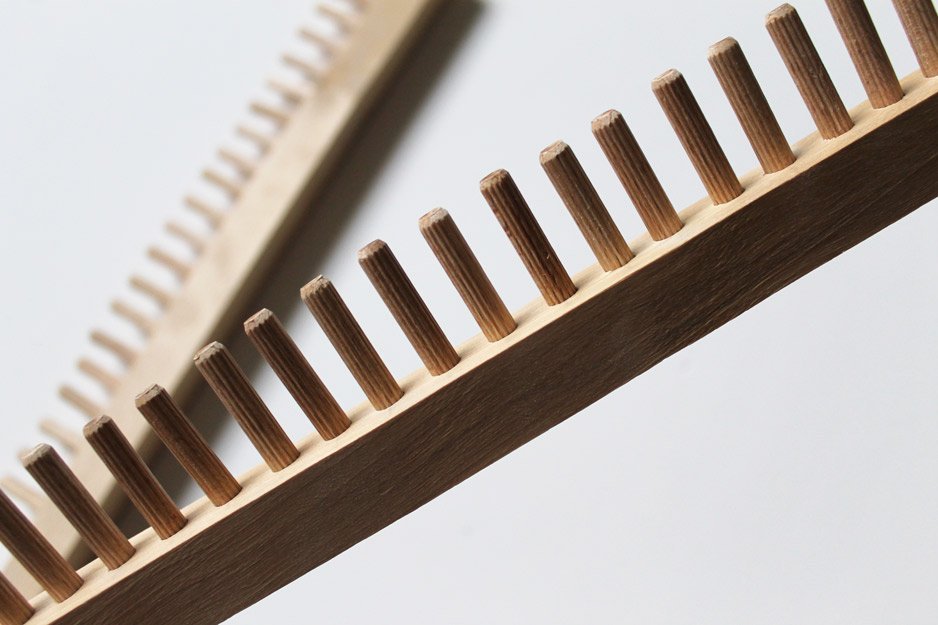 Step 7: This is the tricky one. You will line up your sides exactly how you want them to sit by stacking your peg sides ON TOP OF the flat sides (this way you can reach underneath while weaving without picking op your loom). In the middle of where they intersect you will mark the middle spots on both and then drill all the way through both of the dowel rods.
 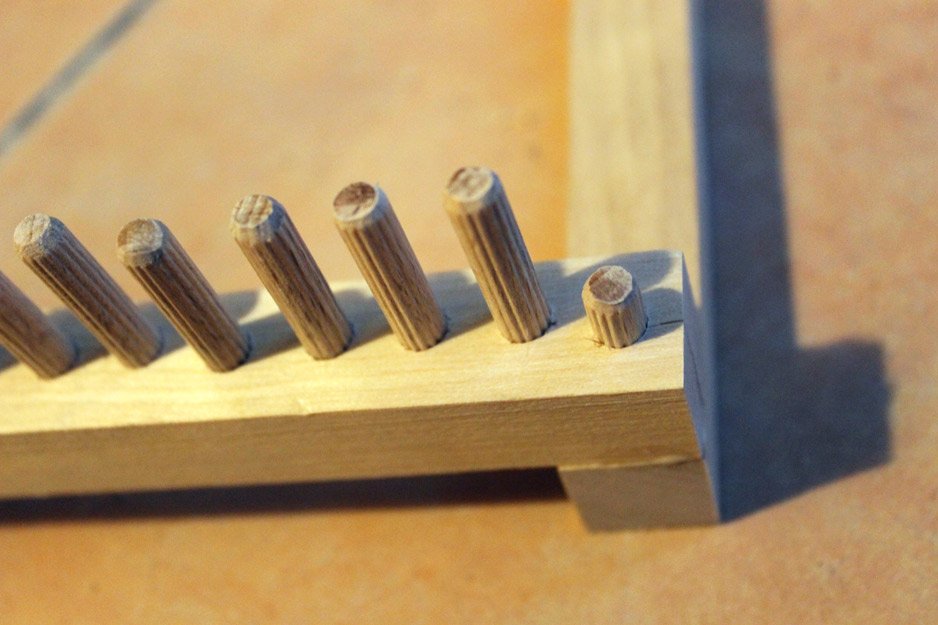 Step 8: Now you hammer (with a lot of muscle) a peg all the way through to connect the two rods! Of course you could always use wood glue, but this is more sturdy and a nice touch.
  Step 9: Enjoy your loom! You can always stain or paint it to make it look nicer if you would like to, but as long as you sanded it well you are good to begin weaving immediately!
  Now go have fun weaving! I cant wait to see what you make. If you are just getting started, or are looking for more inspiration, check out my last post on weaving resources.
  #PROGRESS!