
Lace Earring Tutorial Using Liquid Sculpey Clay
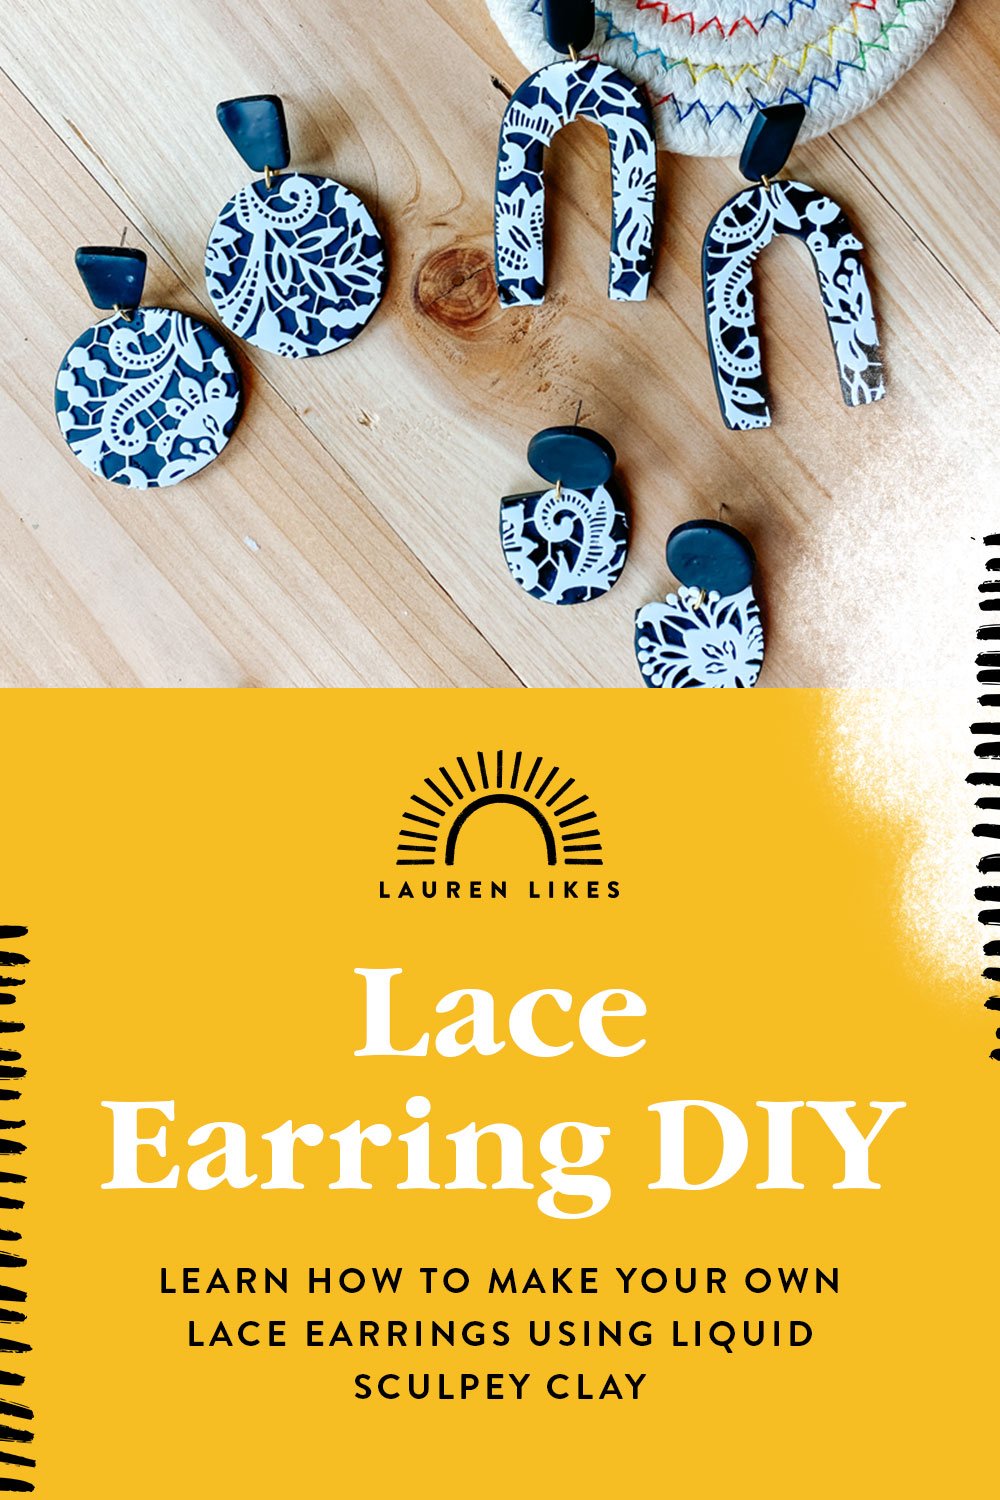
Feeling fancy? Let’s make some lace earrings today using Liquid Sculpey Clay!
Liquid clay may be my new favorite thing! It's incredibly easy, versatile, lightweight, flexible and bakes incredibly fast.
I made these lace overlay earrings using the Liquid Sculpey and the traditional Sculpey clay to create this showstopper of an effect and I would love to show you how.
Let’s get started!
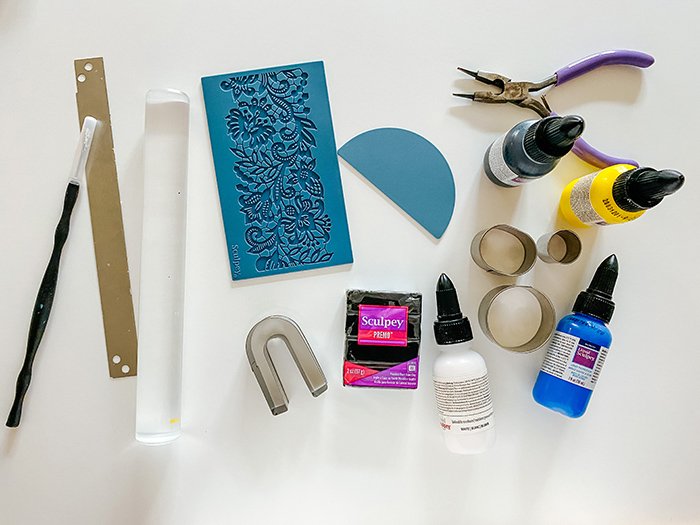
Supplies you’ll need:
Workspace
- Clean surface such as a tile, wax paper or desk
Tools
- This pack has all the tools you’ll need + some!
- Roller (included in mix pack)
- Clay blades are really handy (included in mix pack)
- A paperclip or tool like this (included in mix pack) or Dremel drill
- Scissors
Clay
Shapes + Molds
- Choose the cutters in the shapes you want.
- Scupley liquid clay molds
- Squeegee (comes in your mold pack)
Baking
- Baking Sheet
- Oven
Jewelry
- Earring backs (I use studs but you could easily use dangles)
- Jump rings
- Glue (I use Gorilla Glue)
- Optional: Sculpey Bake and Bond
- Jewelry tool
A note about your workspace:
You can use wax pape, a tile or just your table to work on. Just be sure it's really clean so your clay doesn’t pick up any fuzz or other colors, be sure to wipe it down and wash your hands between colors.
Let’s Create!
- To get started you need to condition your clay. You want it to be warm and smooth to the touch so it’s really malleable and then you won’t get any air bubbles when you bake. Start by rolling it in your hands to warm it up and smash smash smash it until it’s really easy to work with. If it gets too hot and it’s sticking to your hands just let it sit out for a few minutes or pop it in the fridge and then come back to it. But this is a really important step because you need it to be as conditioned as possible to keep it from bubbling when we bake it.

- Next, you’re going to want to roll out a flat slab. You can do this by lying two of the same thickness rulers side-by-side and using them as your guide to make sure your surface is even. Shoot for about a quarter of an inch thick. You don’t want to go too thin or it’ll be impossible to work with, shoot for the thickness of a quarter.

- Now for the fun part! Once your black clay is rolled out, simply use your shape cutters to cut out the shapes you would like for your backgrounds and tops. I did three different shapes to create some variety in my pairs.
- Be sure to use a paperclip to create holes in your jewelry where the jump rings will go before baking or you can use a Dremel after they have baked.
- Set these aside.

***QuickTip: I use the clay blades to peel the clay off my work surface if it gets stuck and then use my finger to smooth around the edges of the clay to get off any bits left from the cutters.
- Prep your Liquid Sculpey clay and molds. Preheat your oven to 275 and allow the mold to warm up. Let it be warm enough to still touch - don’t get burned!


- With the mold warm, stir your clay well, then begin pouring your liquid clay into the mold. Use the squeegee to spread it around evenly filling all the holes and popping any bubbles.
- Once the mold is full, with some medium-firm force pull the squeegee back and forth, wiping it off in between, until your mold is clean outside of the impressed portions.
***note you can see below that I did not clean my mold well enough before baking and had this thin layer that was in my finished piece making it unusable, so aim for as clean as possible around the edges.


BAKING
Now it’s time to bake! I recommend doing a test bake before you begin. Grab a small chunk of white clay and bake it in your oven at 275 and check it every 10 minutes for 50 minutes. Make sure it does not change colors, if it does adjust the temperature and try again with a new piece.
To bake souffle or premo regular clay I bake my clay at 275° for 50 minutes.
For liquid clay bake for 15 minutes at 275.
Let everything cool for about 30 minutes.
***Things to remember before baking: Create your hole for the jump rings and attach your backs if using Bake and Bond.
CREATING YOUR EARRINGS
Lastly, it’s time to create your earrings!


First up, simply pull your lace out of the molds! Then I traced the shape cutters I used onto the lace and used sharp kitchen scissors to cut it out. Then I used Gorilla Glue to attach the lace to the black backgrounds. Let dry completely. Once the glue dried I cut around the edges again to create a perfect match between the lace and the black backs.


To finish, using your jewelry tool add a jump ring to connect your top and bottom pieces and then glue the stud back on or if you are using Bake and Bond you can attach the stud before baking.


Now it’s time to dress up and wear your gorgeous new earrings!! I love that you can create a really fancy earring on a DIY budget + have fun!


If you create these, please show me! Tag me on instagram @laurenlikesblog so I can see. And remember there are so many molds and colors available, that the possibilities are endless!
Thank you so much to Sculpey for partnering with me to create this post. All opinions and ideas are my own and please know that I only work with companies whose products I already own, use, and love.
KEEP CREATING!
If you want to keep creating with your extra clay, why not create an airplant holder?! See the tutorial here.
Want to make more earrings? Learn to create your own Blue Ridge Mountain inspired earrings using Sculpey here.
Want to shop my earrings? Check out my Etsy shop here.