
Clay Suncatcher DIY Tutorial With Sculpey

Who’s ready for the most magical crafting season of the year?!?! I LOVE giving handmade gifts that people can actually use and love all year round for the holidays. And one thing everyone loves: disco rainbows!
Today Im teaming up with Sculpey to teach you how to make these gorgeous, lightweight, clay wall hanging sun catchers that include rainbow prisms that will create a beautiful decor peace all day, every day that has some surprise magic at golden hour!
Let’s get started!

CLAY
Sculpey just released two new colors, Ivory and Yellow Ochre in their Souffle line, just in time for fall, so I scooped these up plus cinnamon and latte to create a very neutral, fall feeling vibe for this piece, but you can use any colors that fit your home!
Souffle is one of my favorite types of clay as its colors are gorgeous but also because of its flexibility - literally! This is an oven-baked clay that is super strong but also flexible after baking so you can continue crafting with it - you can even stitch into it!! Clay is lightweight and holds up to everyday use really well. Plus! It won't dry out - it stays usable for multiple projects if you don’t use a whole bar, I just keep mine sealed in an airtight container.
Grab your favorite colors from sculpey.com and let’s gather our supplies and get started!

SUPPLIES
Workspace
Clean surface such as a tile, wax paper or smooth desk
Tools
Roller (included in mix pack)
Clay blades are really handy (included in mix pack)
A paperclip or tool like this (included in mix pack) or Dremel drill
Scissors
Clay
Souffle Pumpkin (I started with this color in my original design but at the last minute left it out so my wall hanging was more neutral colors)
Shapes
I hand cut all of my shapes with an Exacto knife but you could use shape cutters from Sculpey or cookie cutters
Baking
Baking Sheet
Oven
Attaching the pieces
Jump rings or cord
Cord for hanging
Rainbow prisms:
A note about your workspace:
You can use wax paper or a tile or just your table to work on. Just be sure it's really clean so your clay doesn’t pick up any fuzz or other colors, so be sure to wipe it down and wash your hands between colors.
LET'S CREATE!
To get started You need to condition your clay. You want it to be warm and smooth to the touch so it’s really malleable so you don’t get any air bubbles when you bake. Start by rolling it in your hands to warm it up and smash smash smash it until it’s really easy to work with. If it gets too hot and it’s sticking to your hands just let it sit out for a few minutes or pop it in the fridge and then come back to it. But this is a really important step because you need it to be as conditioned as possible to keep it from bubbling when we bake it.

Next you’re going to want to roll out a flat slab. You can do this by lying two of the same thickness rulers side-by-side and using them as your guide to make sure your surface is even. Shoot for about a quarter of an inch thick. You don’t want to go too thin or it’ll be impossible to work with, so ere on the side of thicker than thinner.
Now is when the fun starts!
I sketched out my design a few times to have a general idea of what I wanted to create, but you can always make it up as you go! I also decided the order in which I wanted my clay pieces to hang so I could create the right shapes in the right colors - but as you’ll see once you’ve got your pieces created the possibilities are endless!
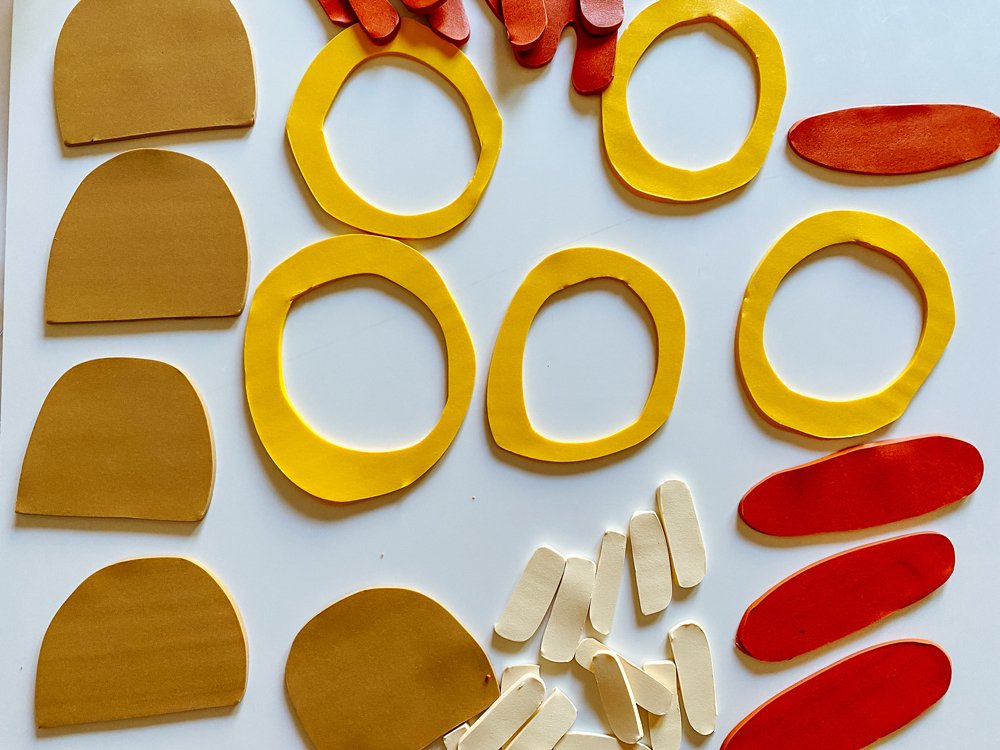
Once my clay was conditioned I simply rolled it out and hand-cut my pieces. I had to try a few times on certain shapes to get them the way I wanted + the right proportion/sizes.
If you mess up, simply ball up your clay and roll it out flat again, and cut again! Clay is SO forgiving and you can rework it 1000 times if you need to, so don’t be afraid - go for it!

Once I had cut all my shapes and played around with a ton of different configurations, it was time to bake!
At this step, you need to decide if you will poke holes to hang with a paperclip or if you will use a drill, like a Dremel, once they’ve baked.
Simply make a hole that is big enough to fit a jump ring or piece of string through at each place your shapes will connect. Don’t get too close to the edge or too far in, try to find a safe space near the edge but leave a solid line between the hole and edge of the clay to prevent it from ripping.
QuickTip: I use the clay blades to peel the clay off my work surface if it gets stuck.
BAKING
Now it’s time to bake! I recommend doing a test bake before you begin. Grab a small chunk of white clay and bake it in your oven at 275 and check it every 10 minutes for 40 to 50 minutes. Make sure it does not change colors. I bake my clay at 275° for 40 to 50 minutes.
Let them cool for about 30 minutes.

ASSEMBLE YOUR WALL HANGING
Lastly, it’s time to create your wall hanging! Using your jewelry tool add a jump ring to connect your all of your pieces together.
Last, I used string (you could use fishing wire so it's transparent) to add in my rainbow prism and then I tied a string up top to hang it by.

Now, it’s time to hang in an area that gets direct sun at some point in the day and watch those disco rainbows dance throughout your home!
I hope you create a lovely piece for your home and maybe even give one as a gift this holiday season! I hope this project brings you a lot of joy as you create it and a lot of beauty each day as you see it catch the sun and light up your home!

If you create your own, please show me! Tag me on instagram @laurenlikesblog so I can see.
Thank you so much to Sculpey for partnering with me to create this post. All opinions and ideas are my own and please know that I only work with companies whose products I already own, use, and love.