
DIY Terrazzo Mirrors with Sculpey Clay

If you want to feel like you're on a tropical island vacation every morning while you’re getting ready - this is the DIY polymer clay terrazzo mirror craft for you!
Today Im teaming up with Sculpey to teach you how to make these gorgeous, lightweight, clay terrazzo mirrors in funky abstract shapes that will help add a pop of color and joy to your morning routine!
Let’s get started!

CLAY
Sculpey just released a new color, Blackberry Pearl in their Premo line (exclusively on their website!), and it immediately gave me Berry Skittles vibes, which inspired the rest of my color choices, but you can use any colors that fit your home or office or whatever space you’ll use your mirror in!
Premo is one of my favorite types of clay as its colors are gorgeous but also because of its flexibility - literally! This is an oven-baked clay that is super strong but also flexible after baking so you can continue crafting with it - you can even stitch into it!! Clay is lightweight and holds up to everyday use really well. Plus! It wont dry out - it stays usable for multiple projects if you don’t use a whole bar, I just keep mine sealed in an airtight container.
Grab your favorite colors from sculpey.com and let’s gather our supplies and get started!

SUPPLIES
Workspace
Clean surface such as a tile, wax paper or smooth desk
Tools
Roller (included in mix pack)
Clay blades are really handy (included in mix pack)
Exacto Knife
Clay
Premo Blackberry Pearl (exclusive to Sculpey’s website!)
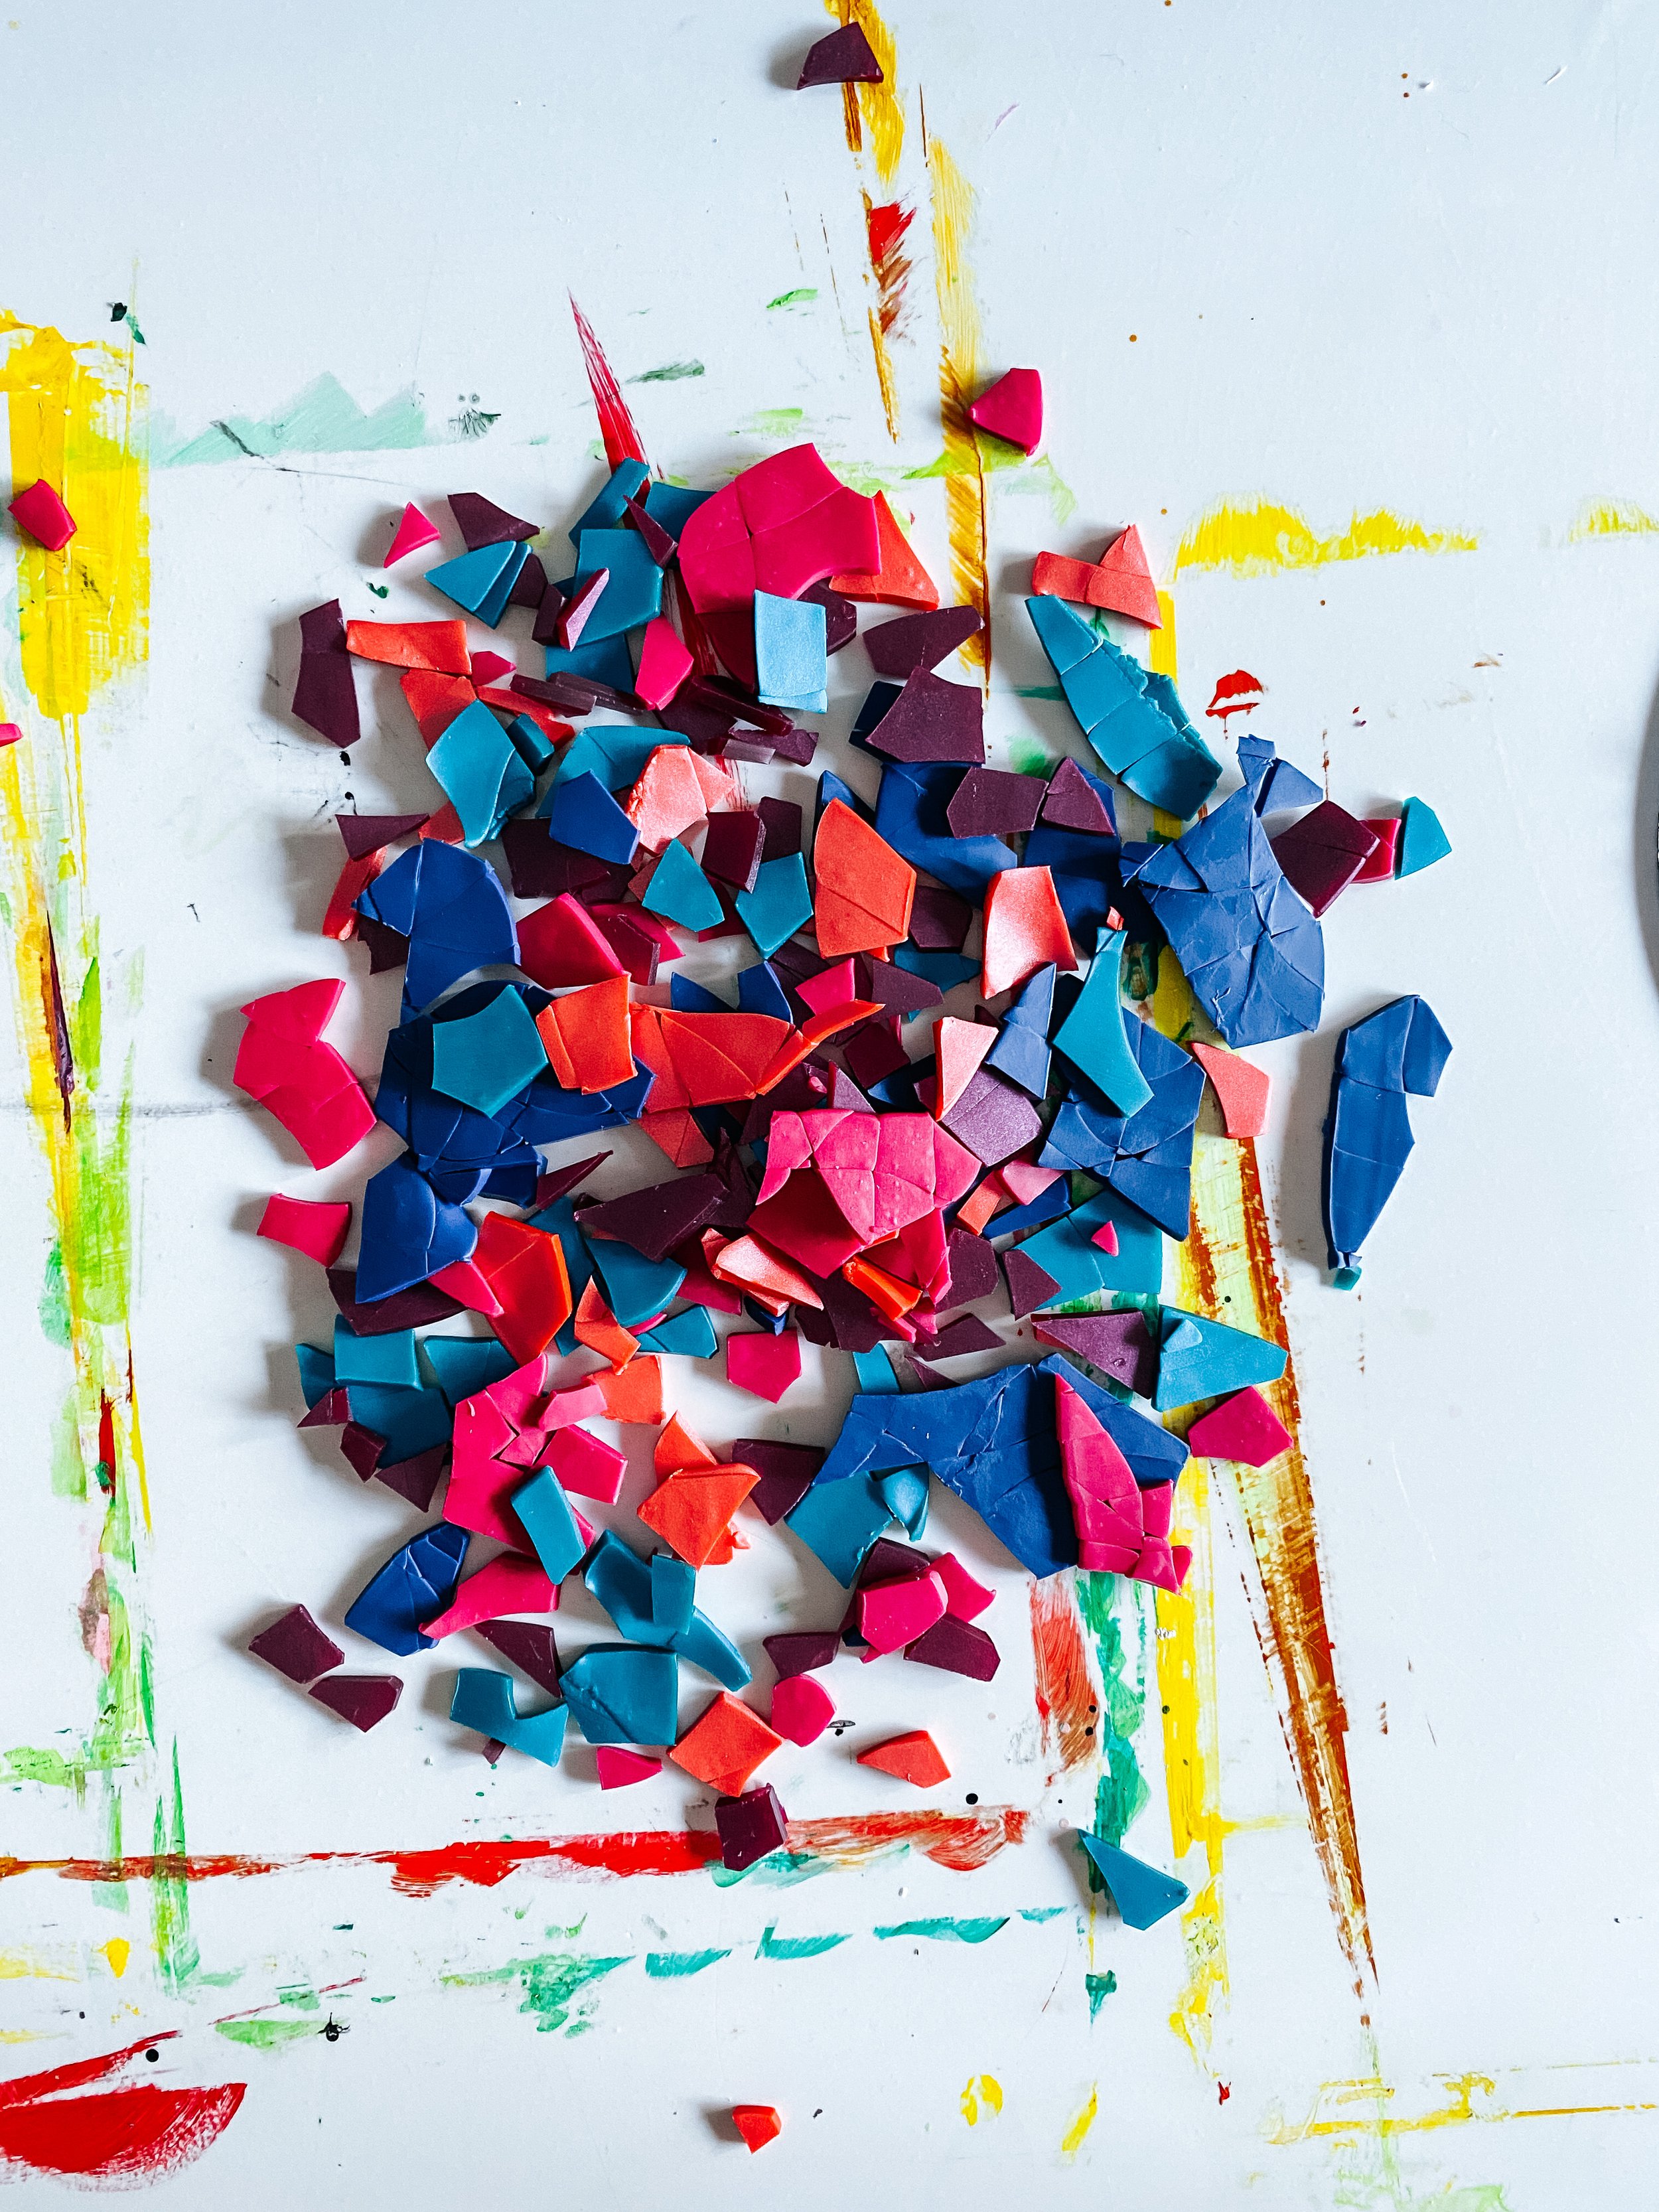
Terrazo
Terrazo: I hand cut all of my shapes with an exacto knife.
Baking
Baking Sheet
Oven
Piece of Paper
Mirrors:
I used these from amazon but any mirror will do
Molding Paste: this is the brand I used
Pallet knife
A note about your workspace:
You can use wax paper or a tile or just your table to work on. Just be sure it's really clean so your clay doesn’t pick up any fuzz or other colors, so be sure to wipe it down and wash your hands between colors.
LET'S CREATE!
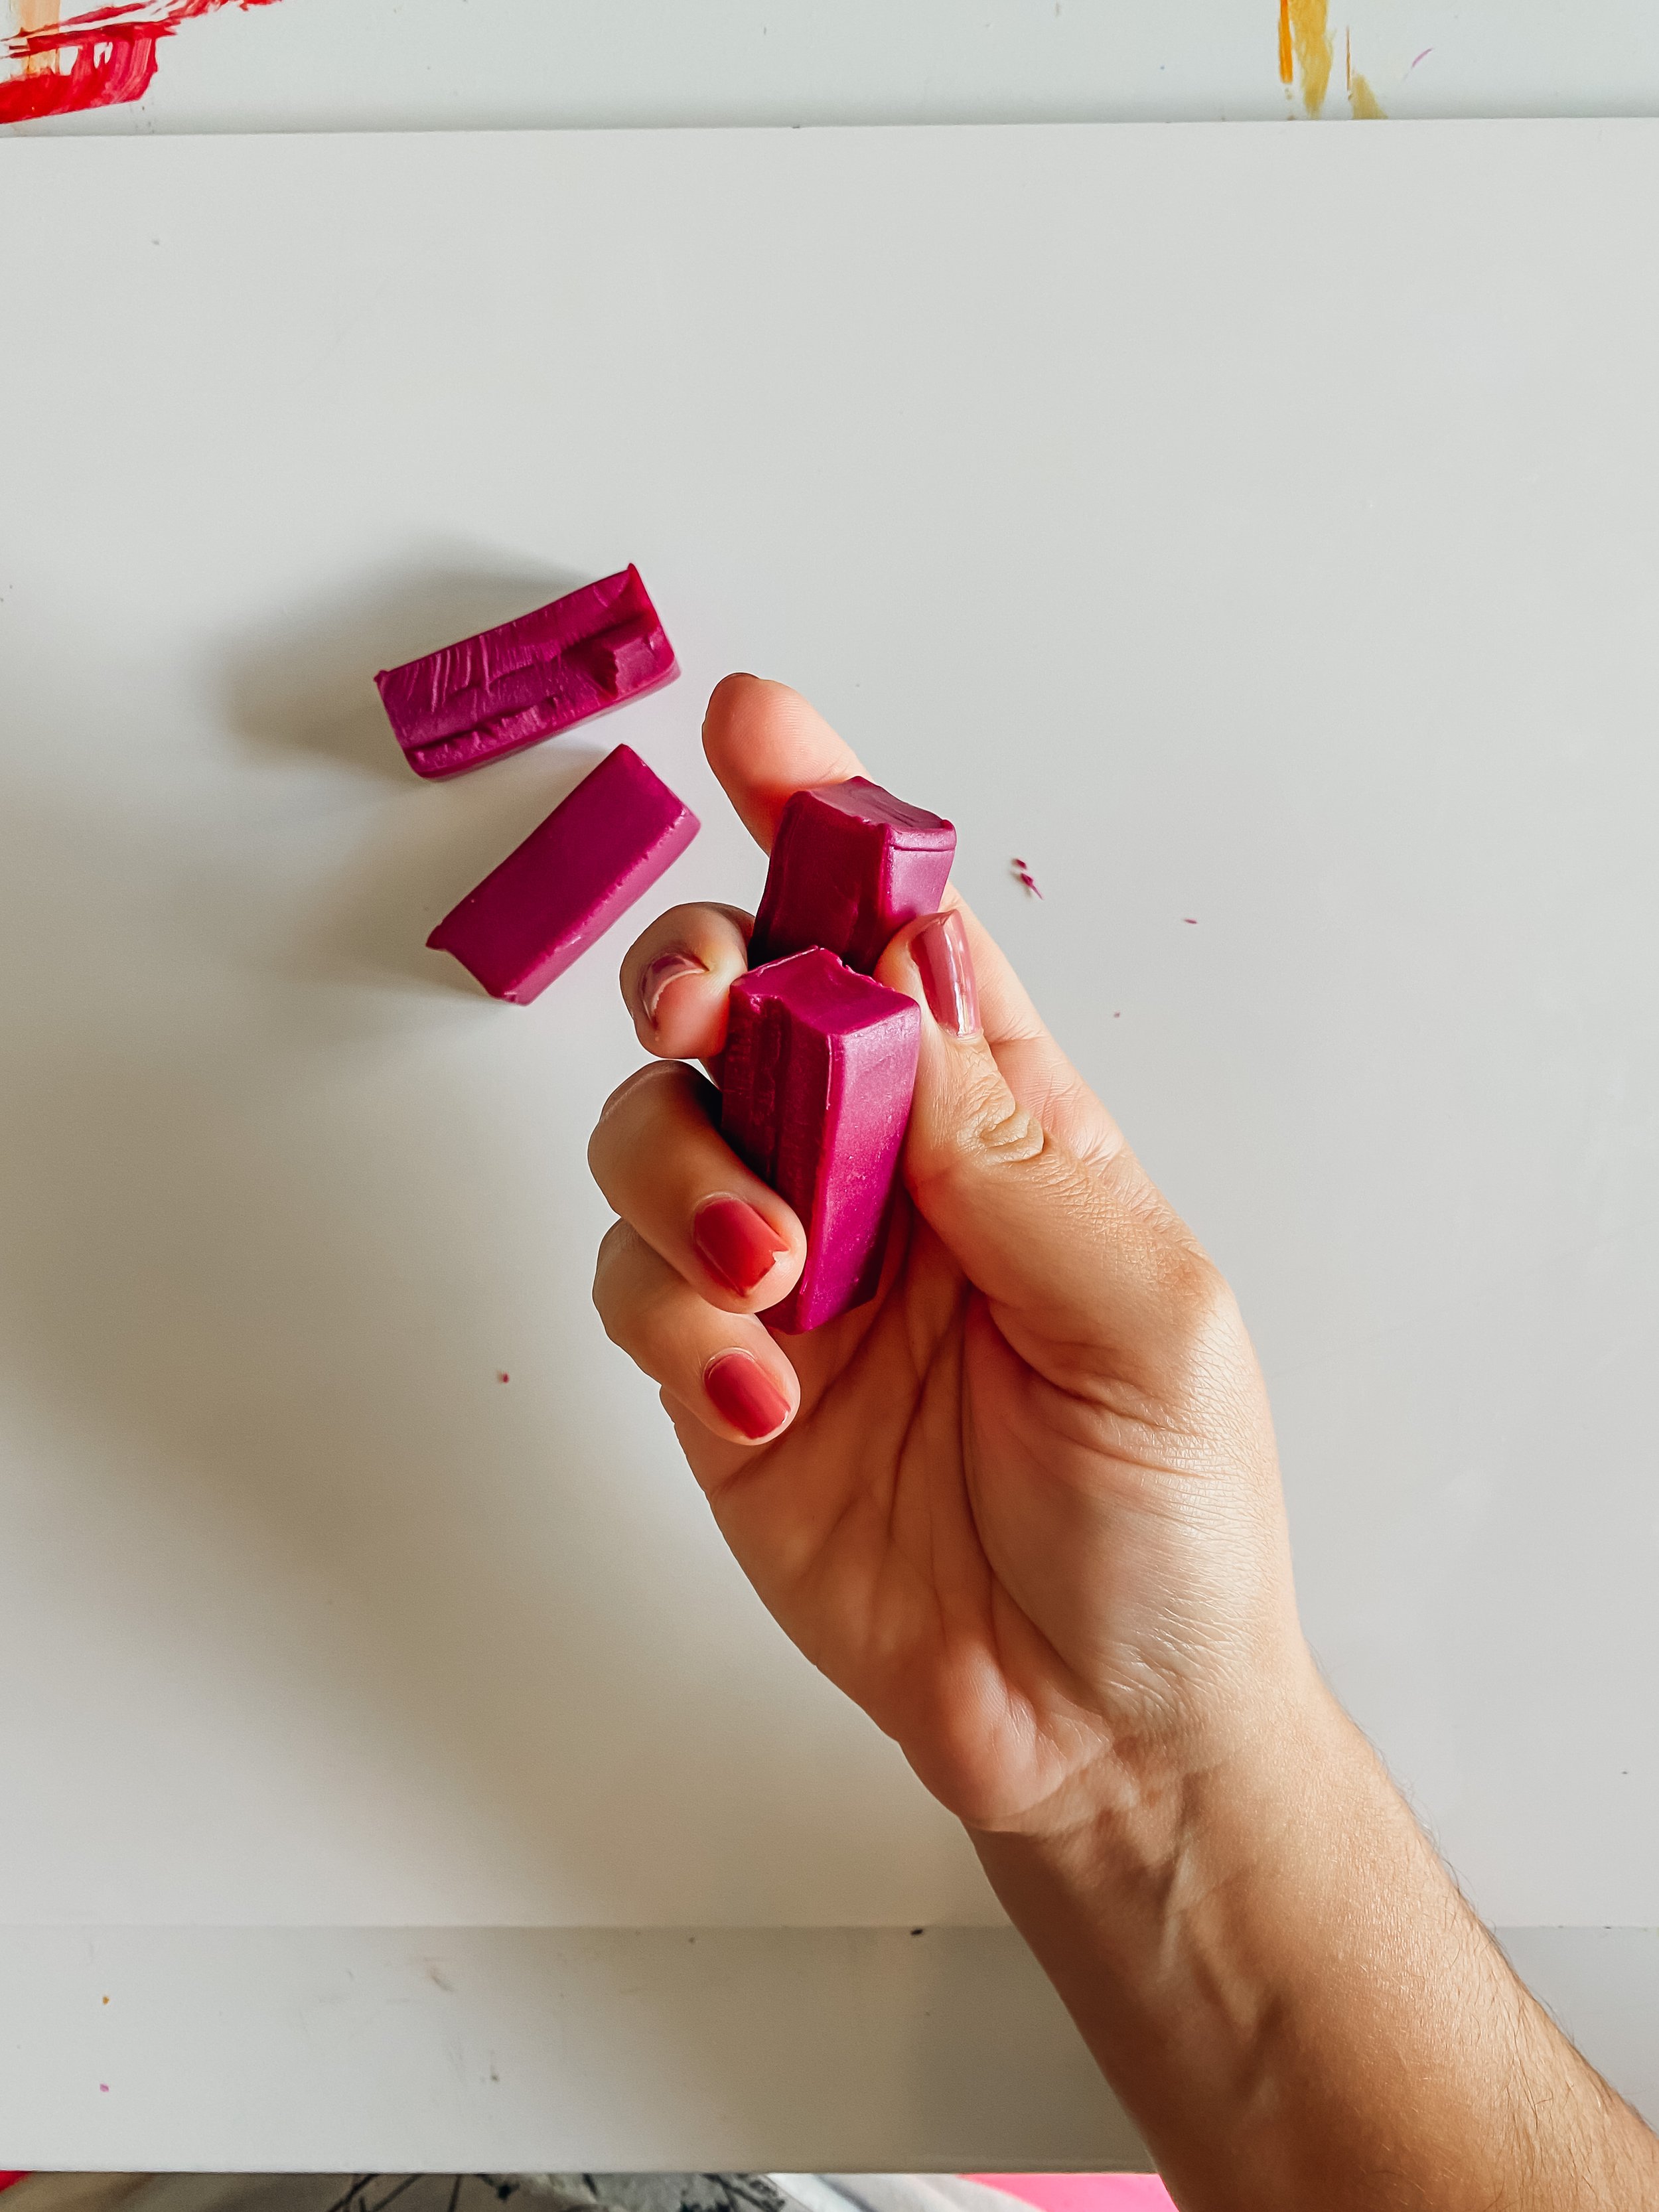
To get started you will need to condition your clay. You want it to be warm and smooth to the touch so it’s really malleable so you don’t get any air bubbles when you bake. Start by rolling it in your hands to warm it up and smash smash smash it until it’s really easy to work with. If it gets too hot and it’s sticking to your hands just let it sit out for a few minutes or pop it in the fridge and then come back to it. But this is a really important step because you need it to be as conditioned as possible to keep it from bubbling when you bake it.
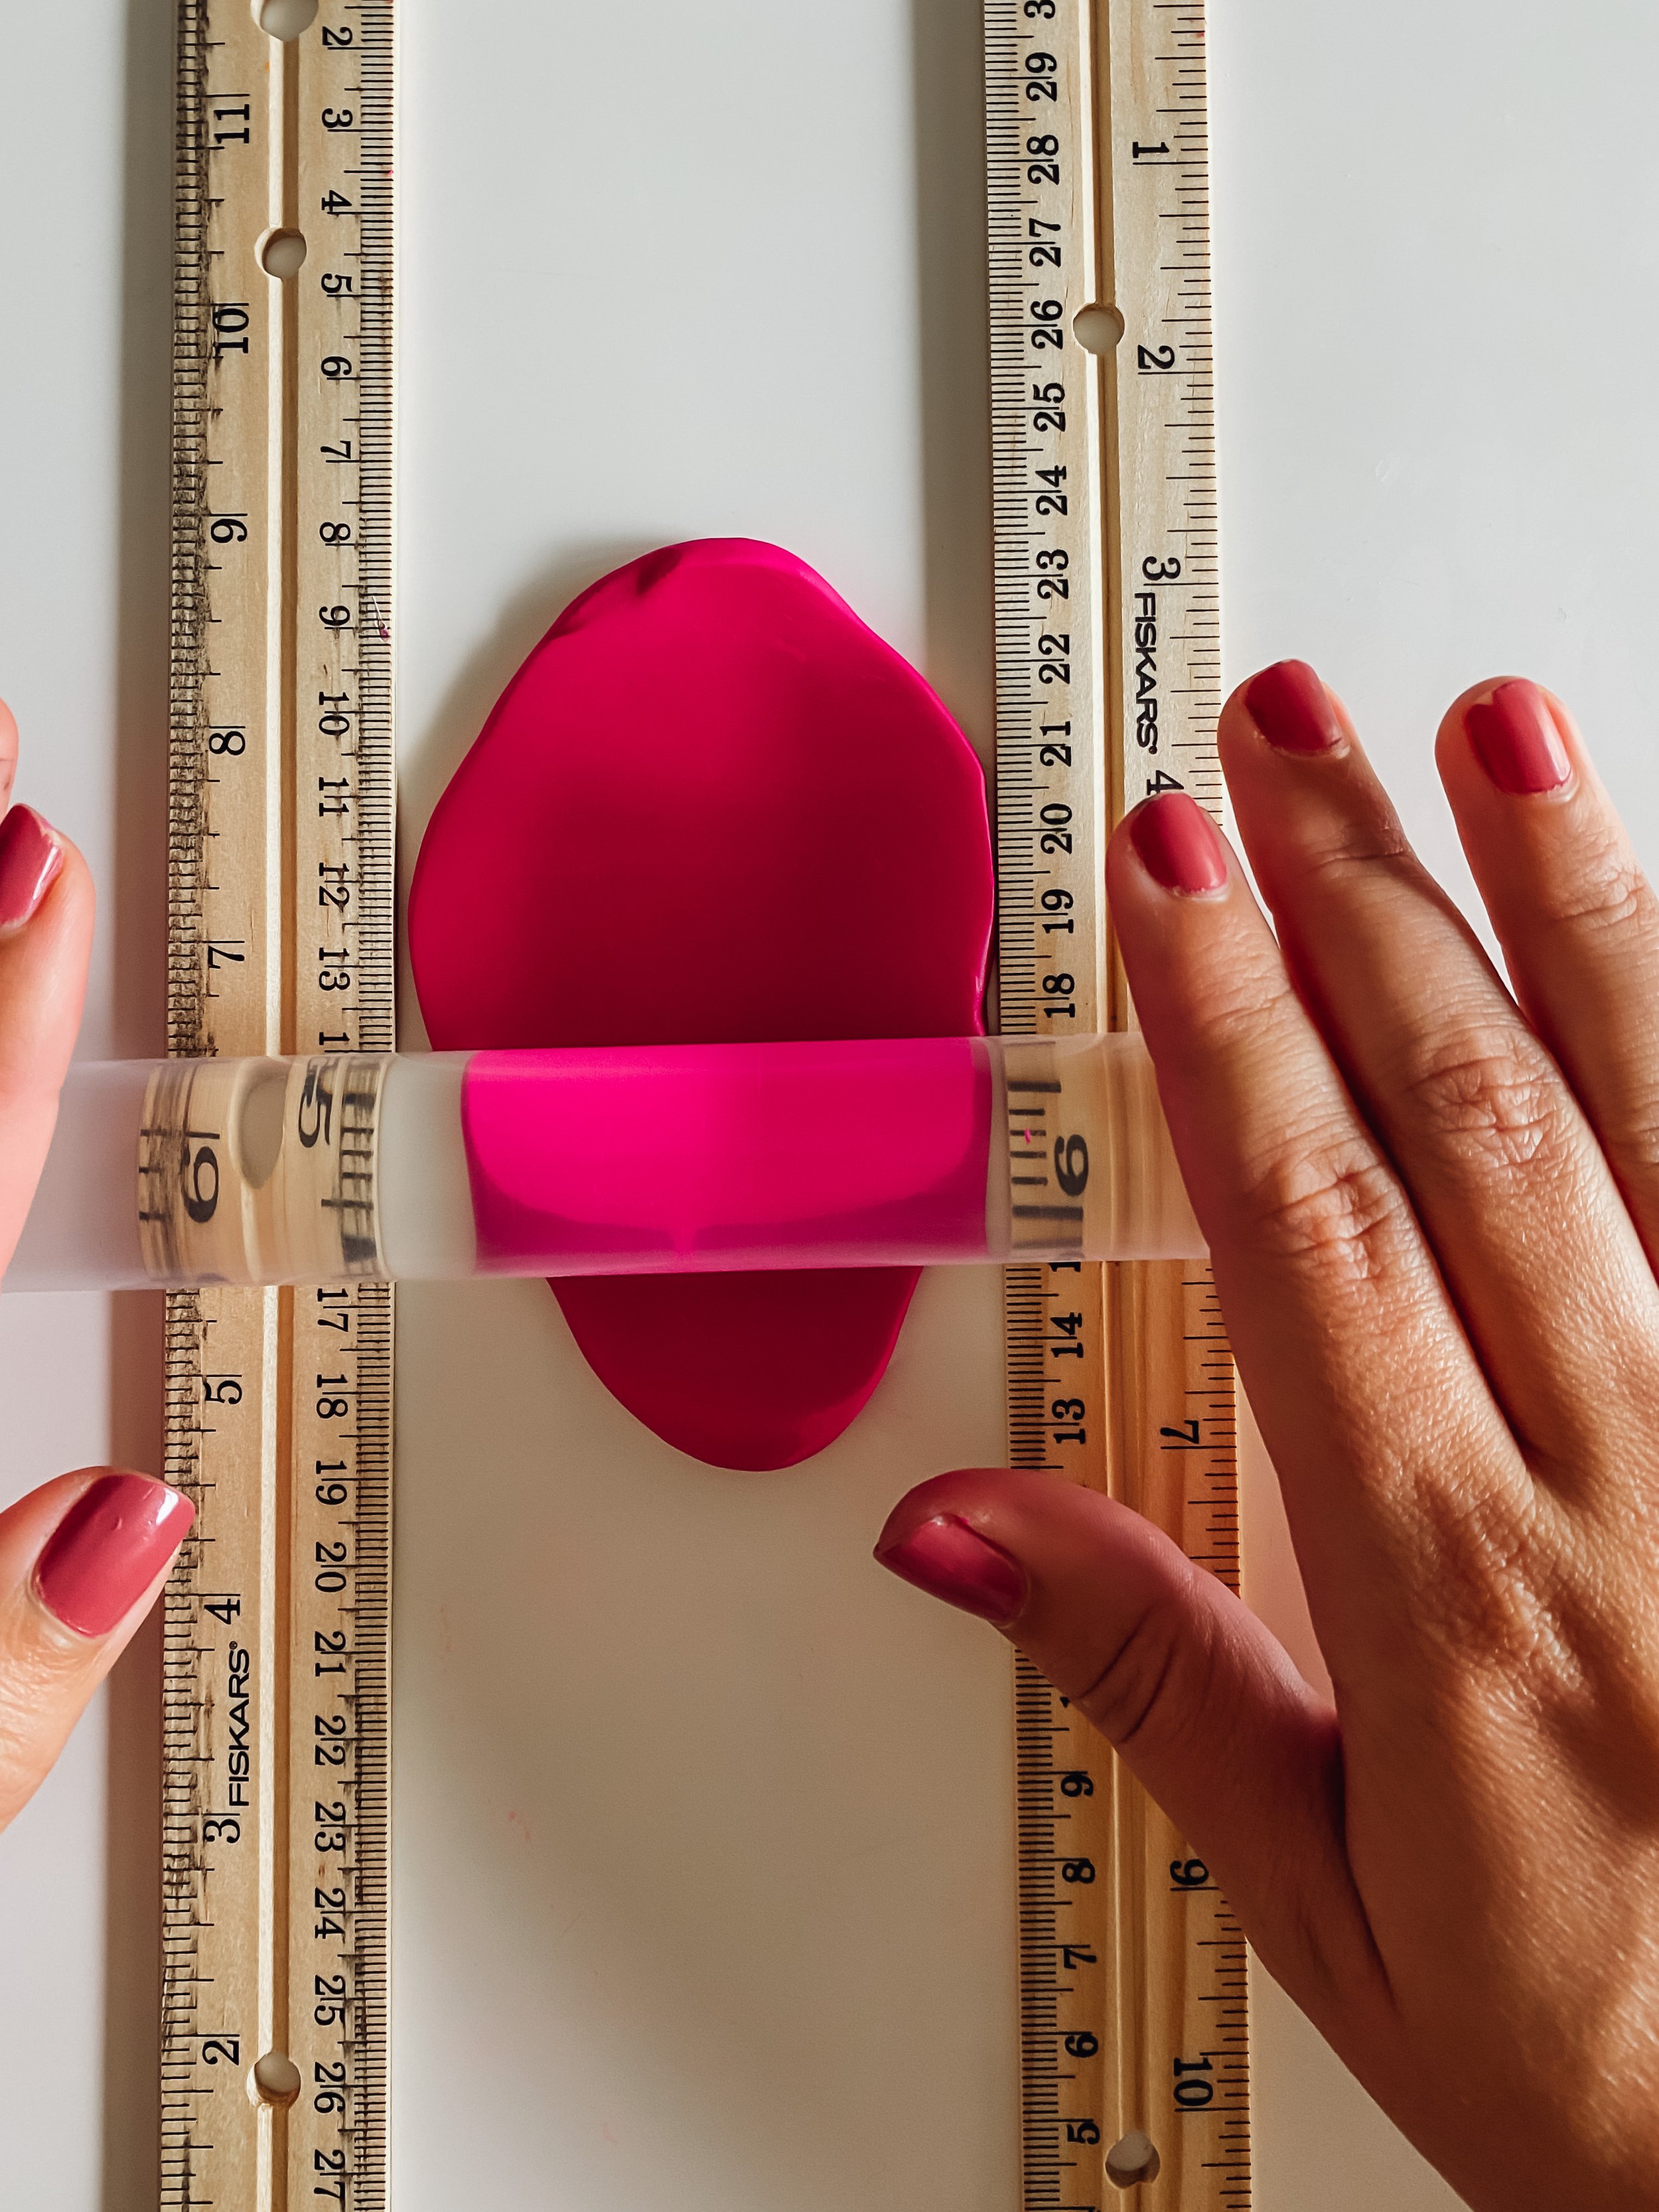
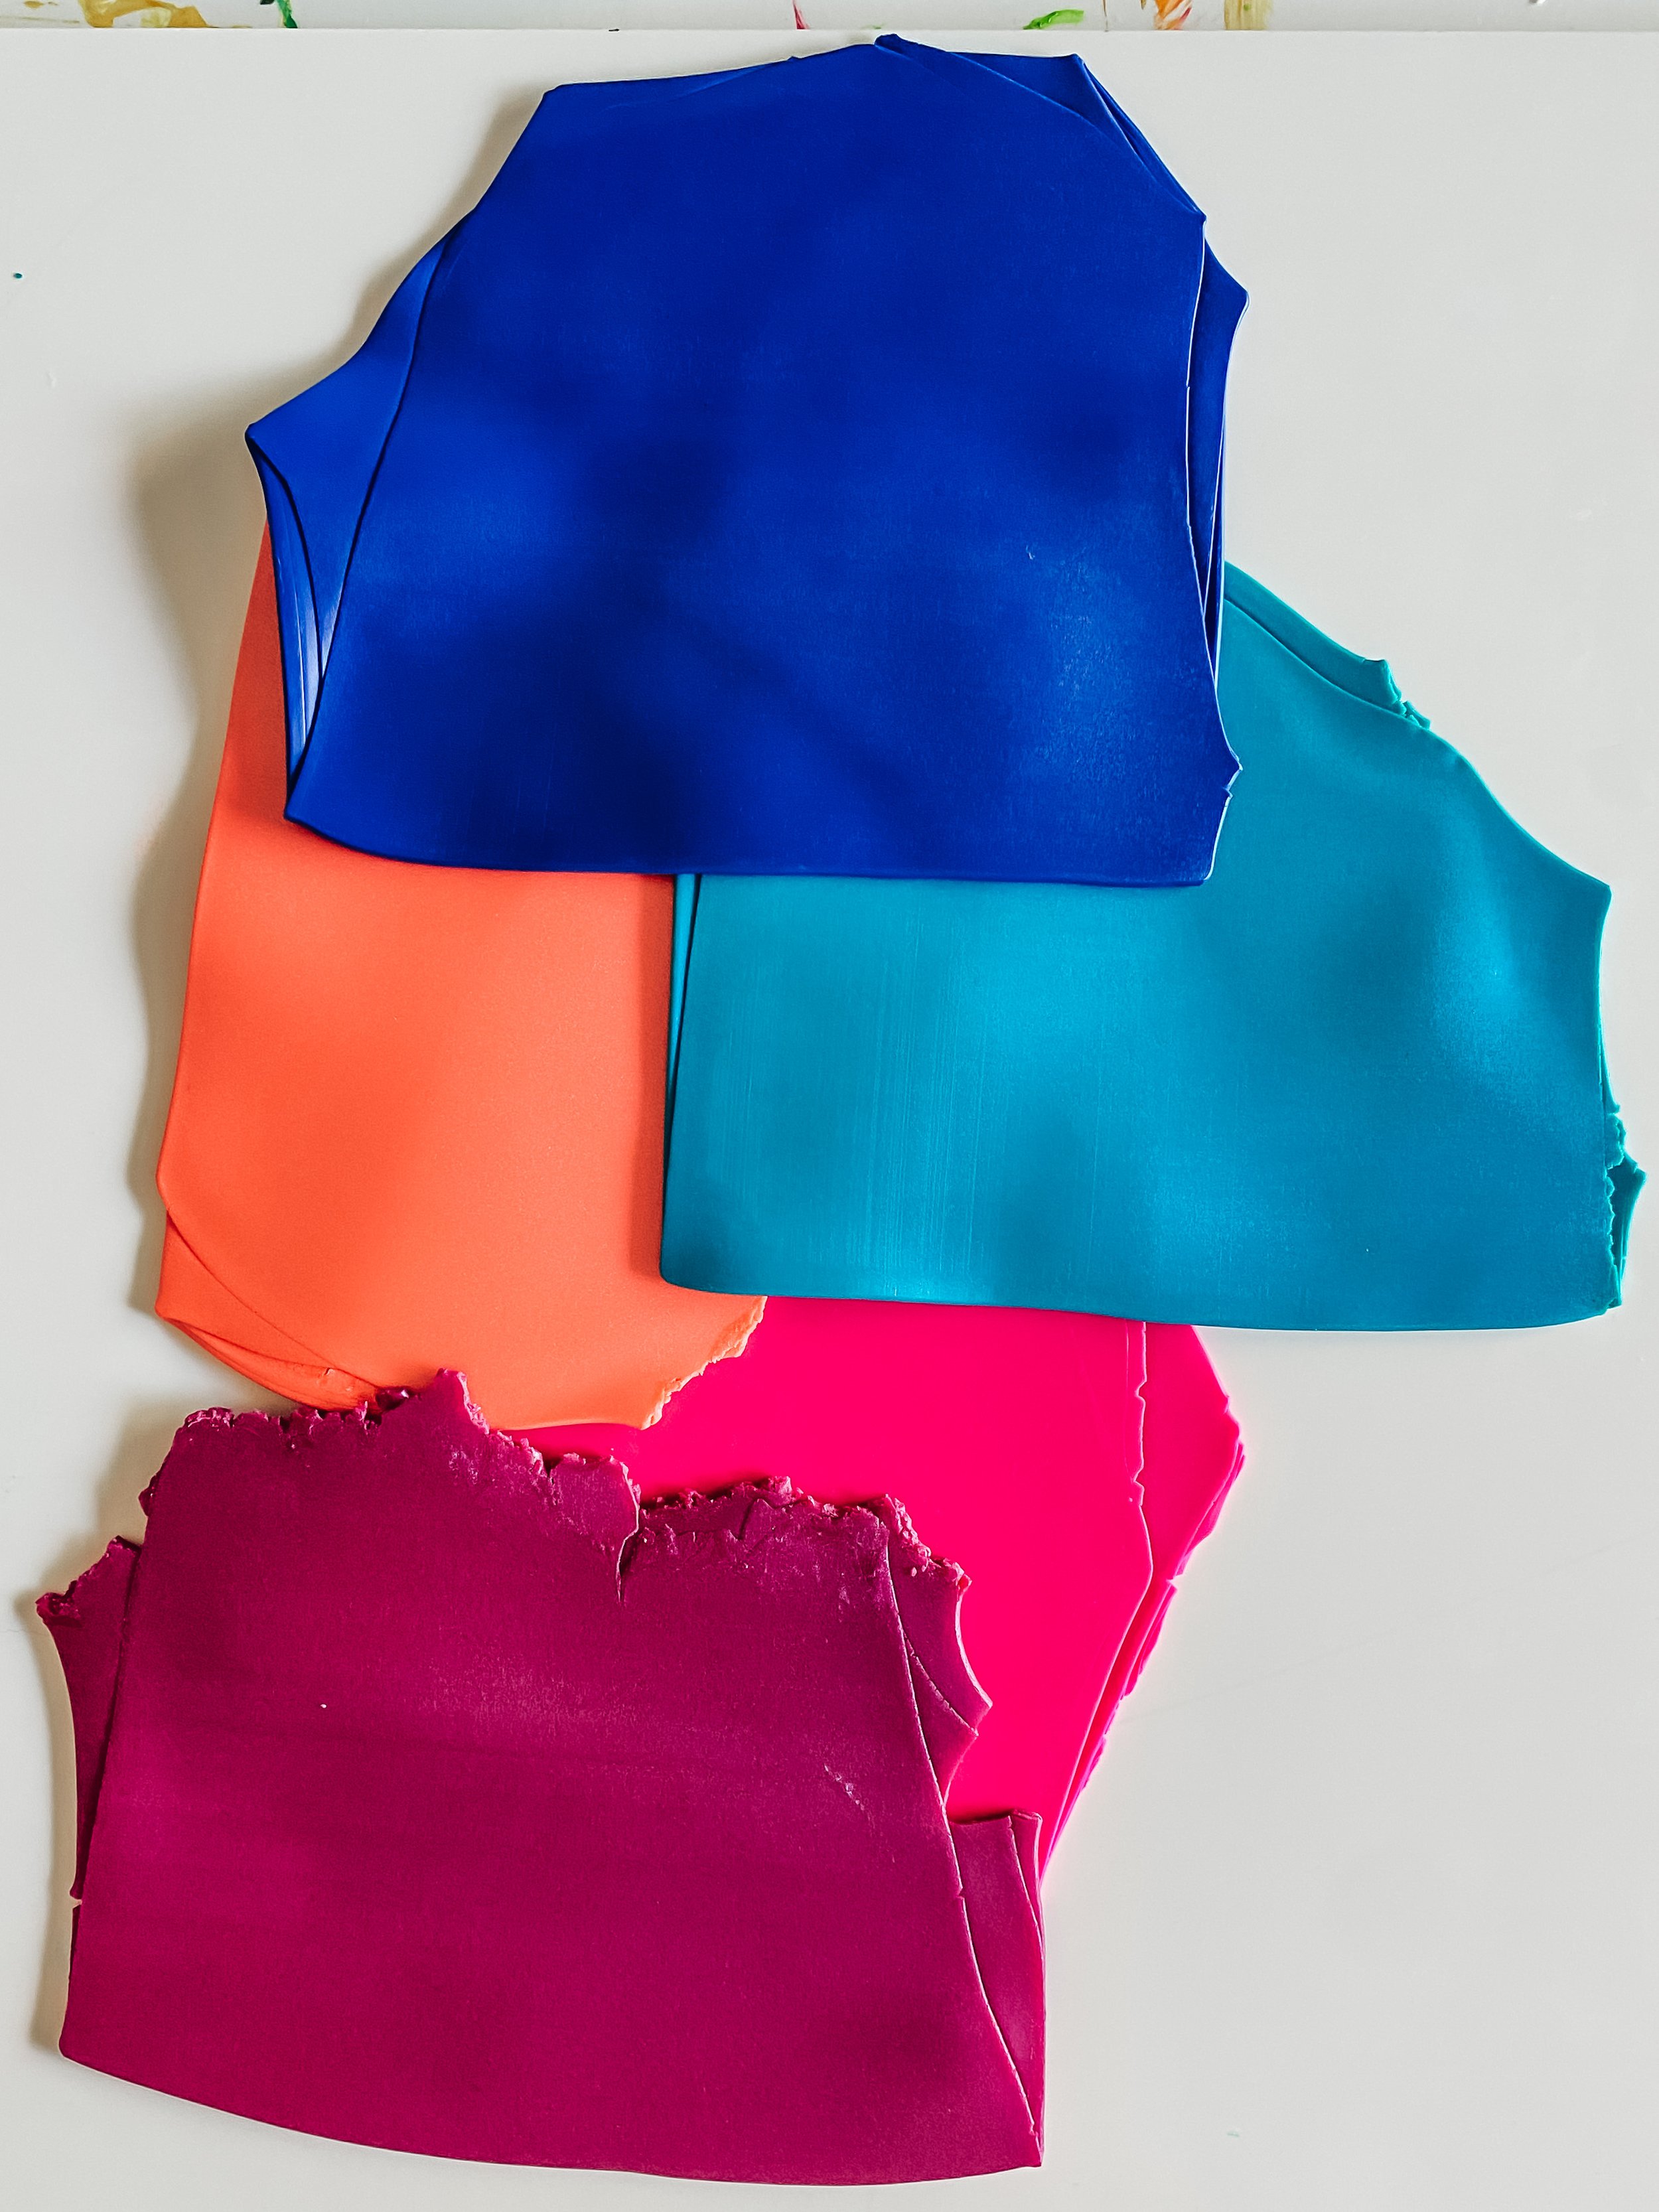
Next, you’re going to want to roll out a flat slab. You can do this by lying two of the same thickness rulers side-by-side and using them as your guide to make sure your surface is even. Shoot for about a quarter of an inch thick. You don’t want to go too thin or it’ll be impossible to work with, so ere on the side of thicker than thinner.
Now is when the fun starts!
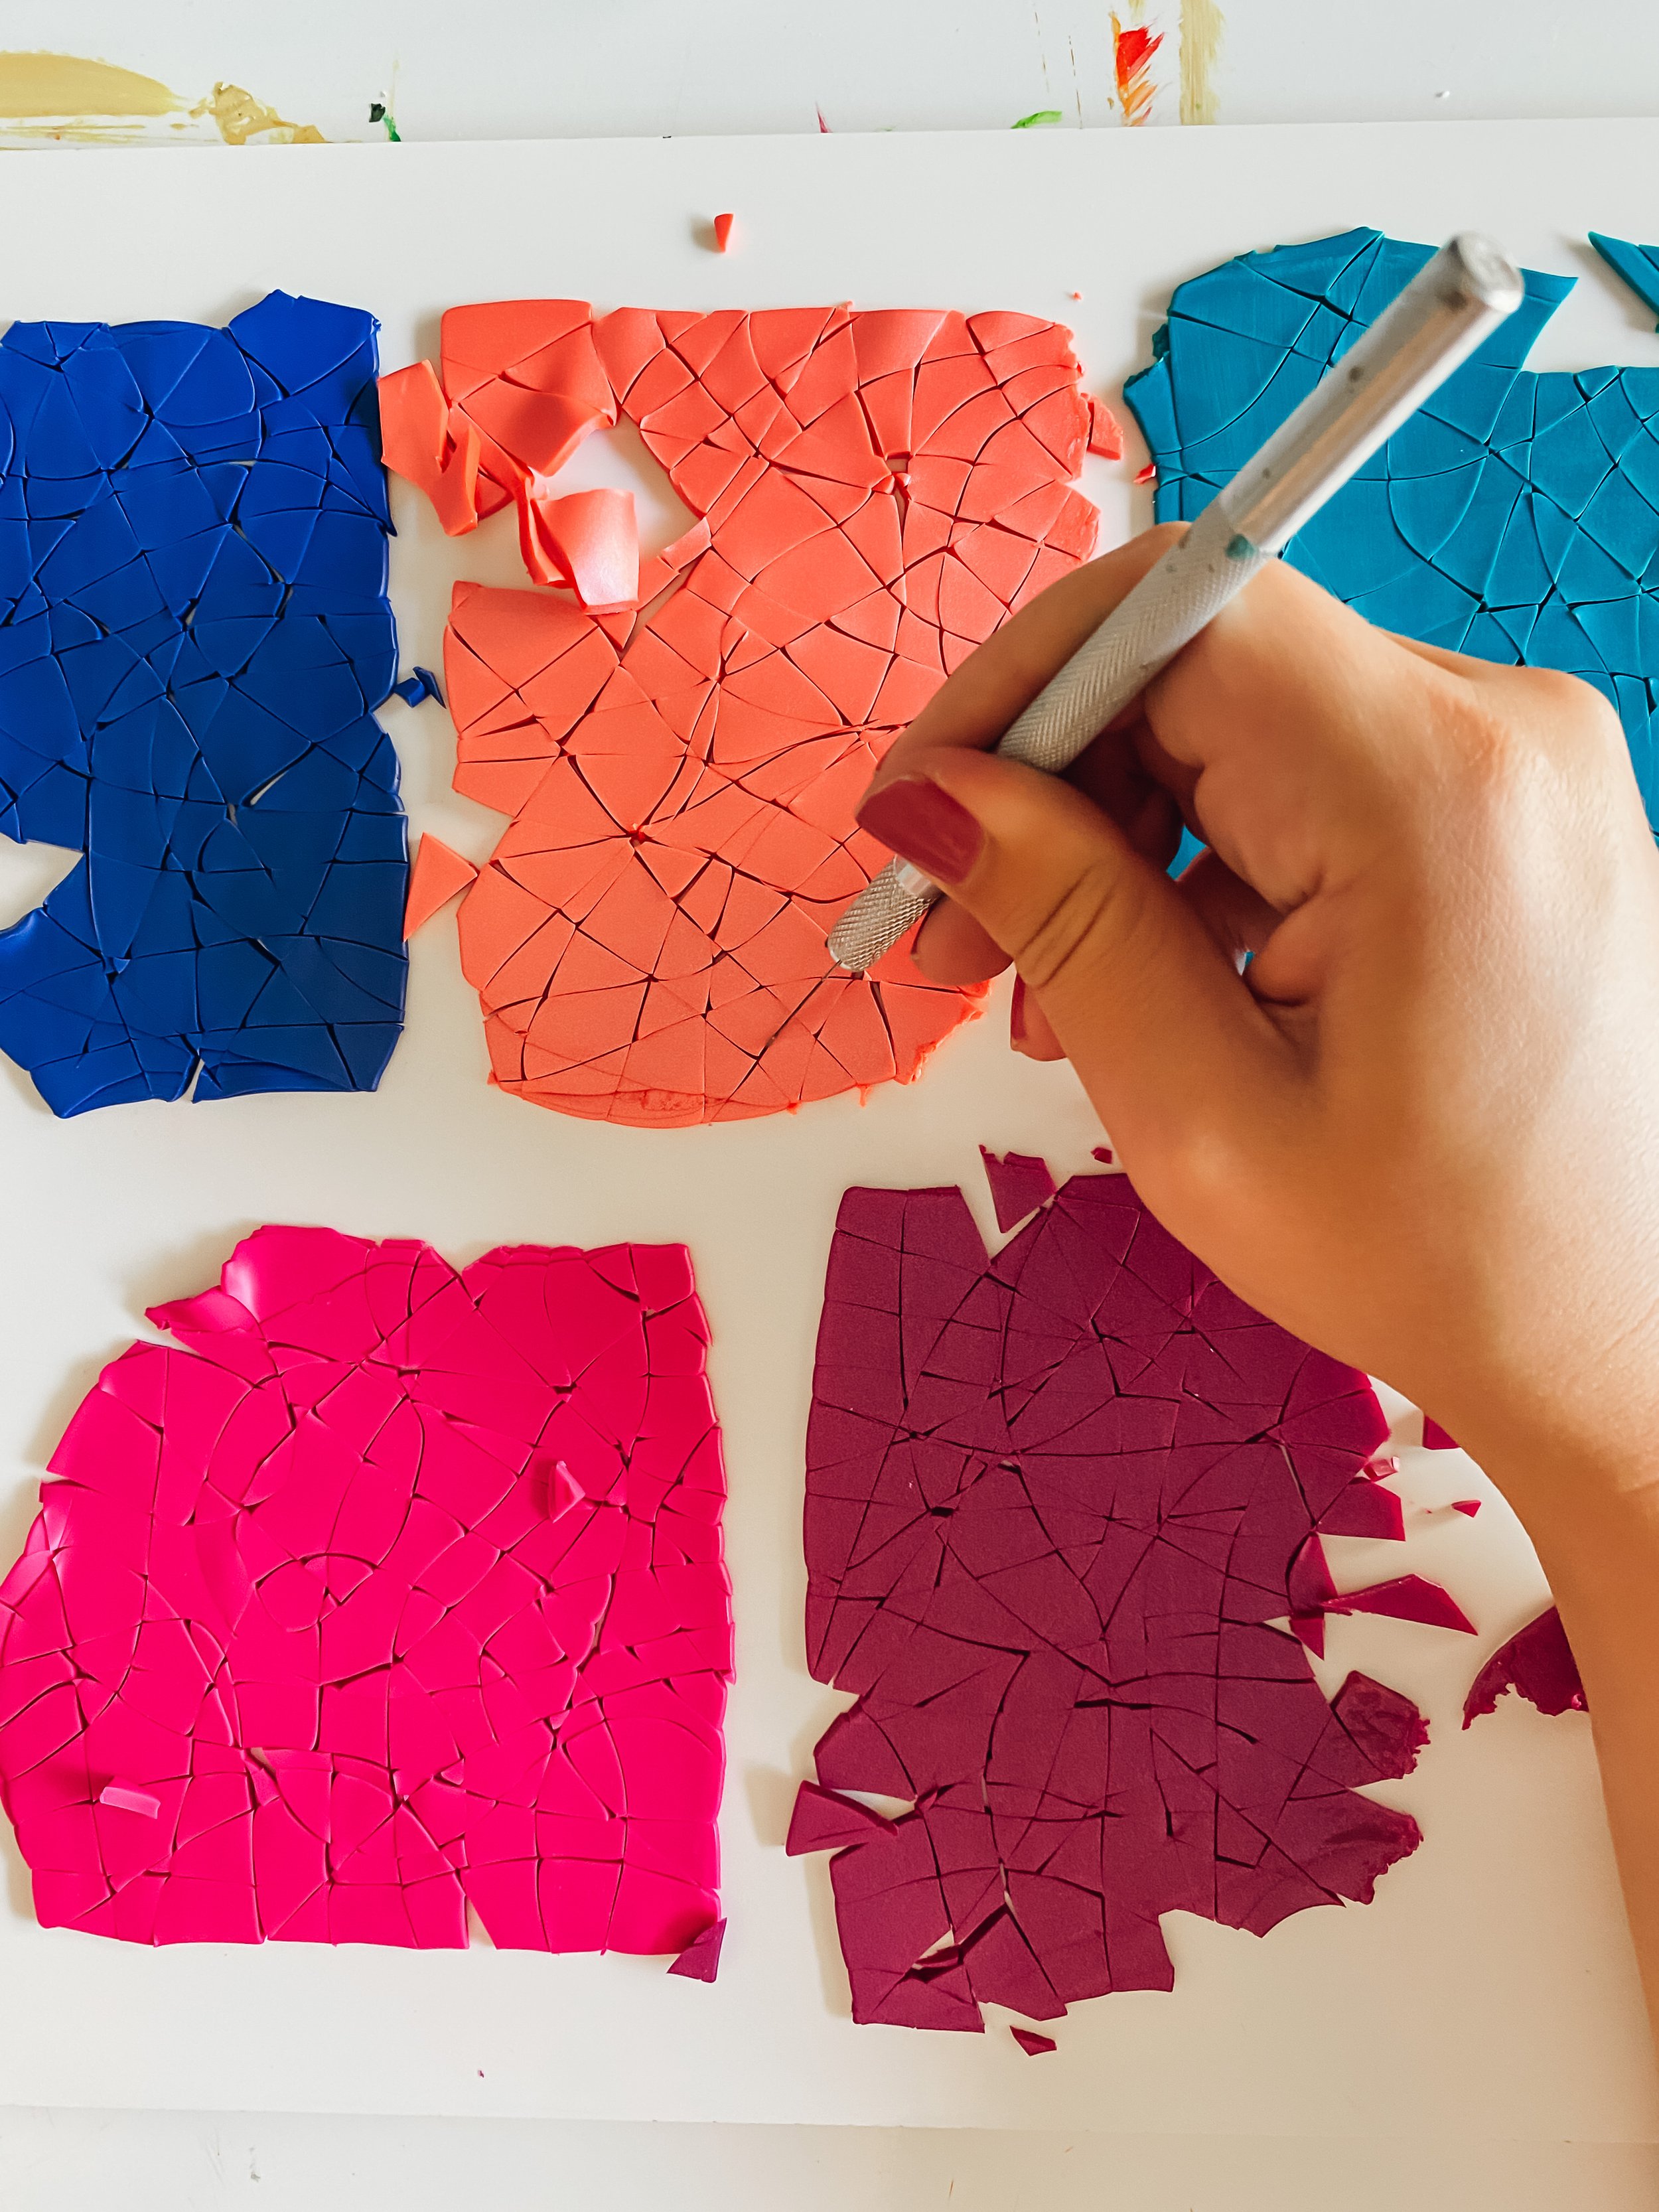
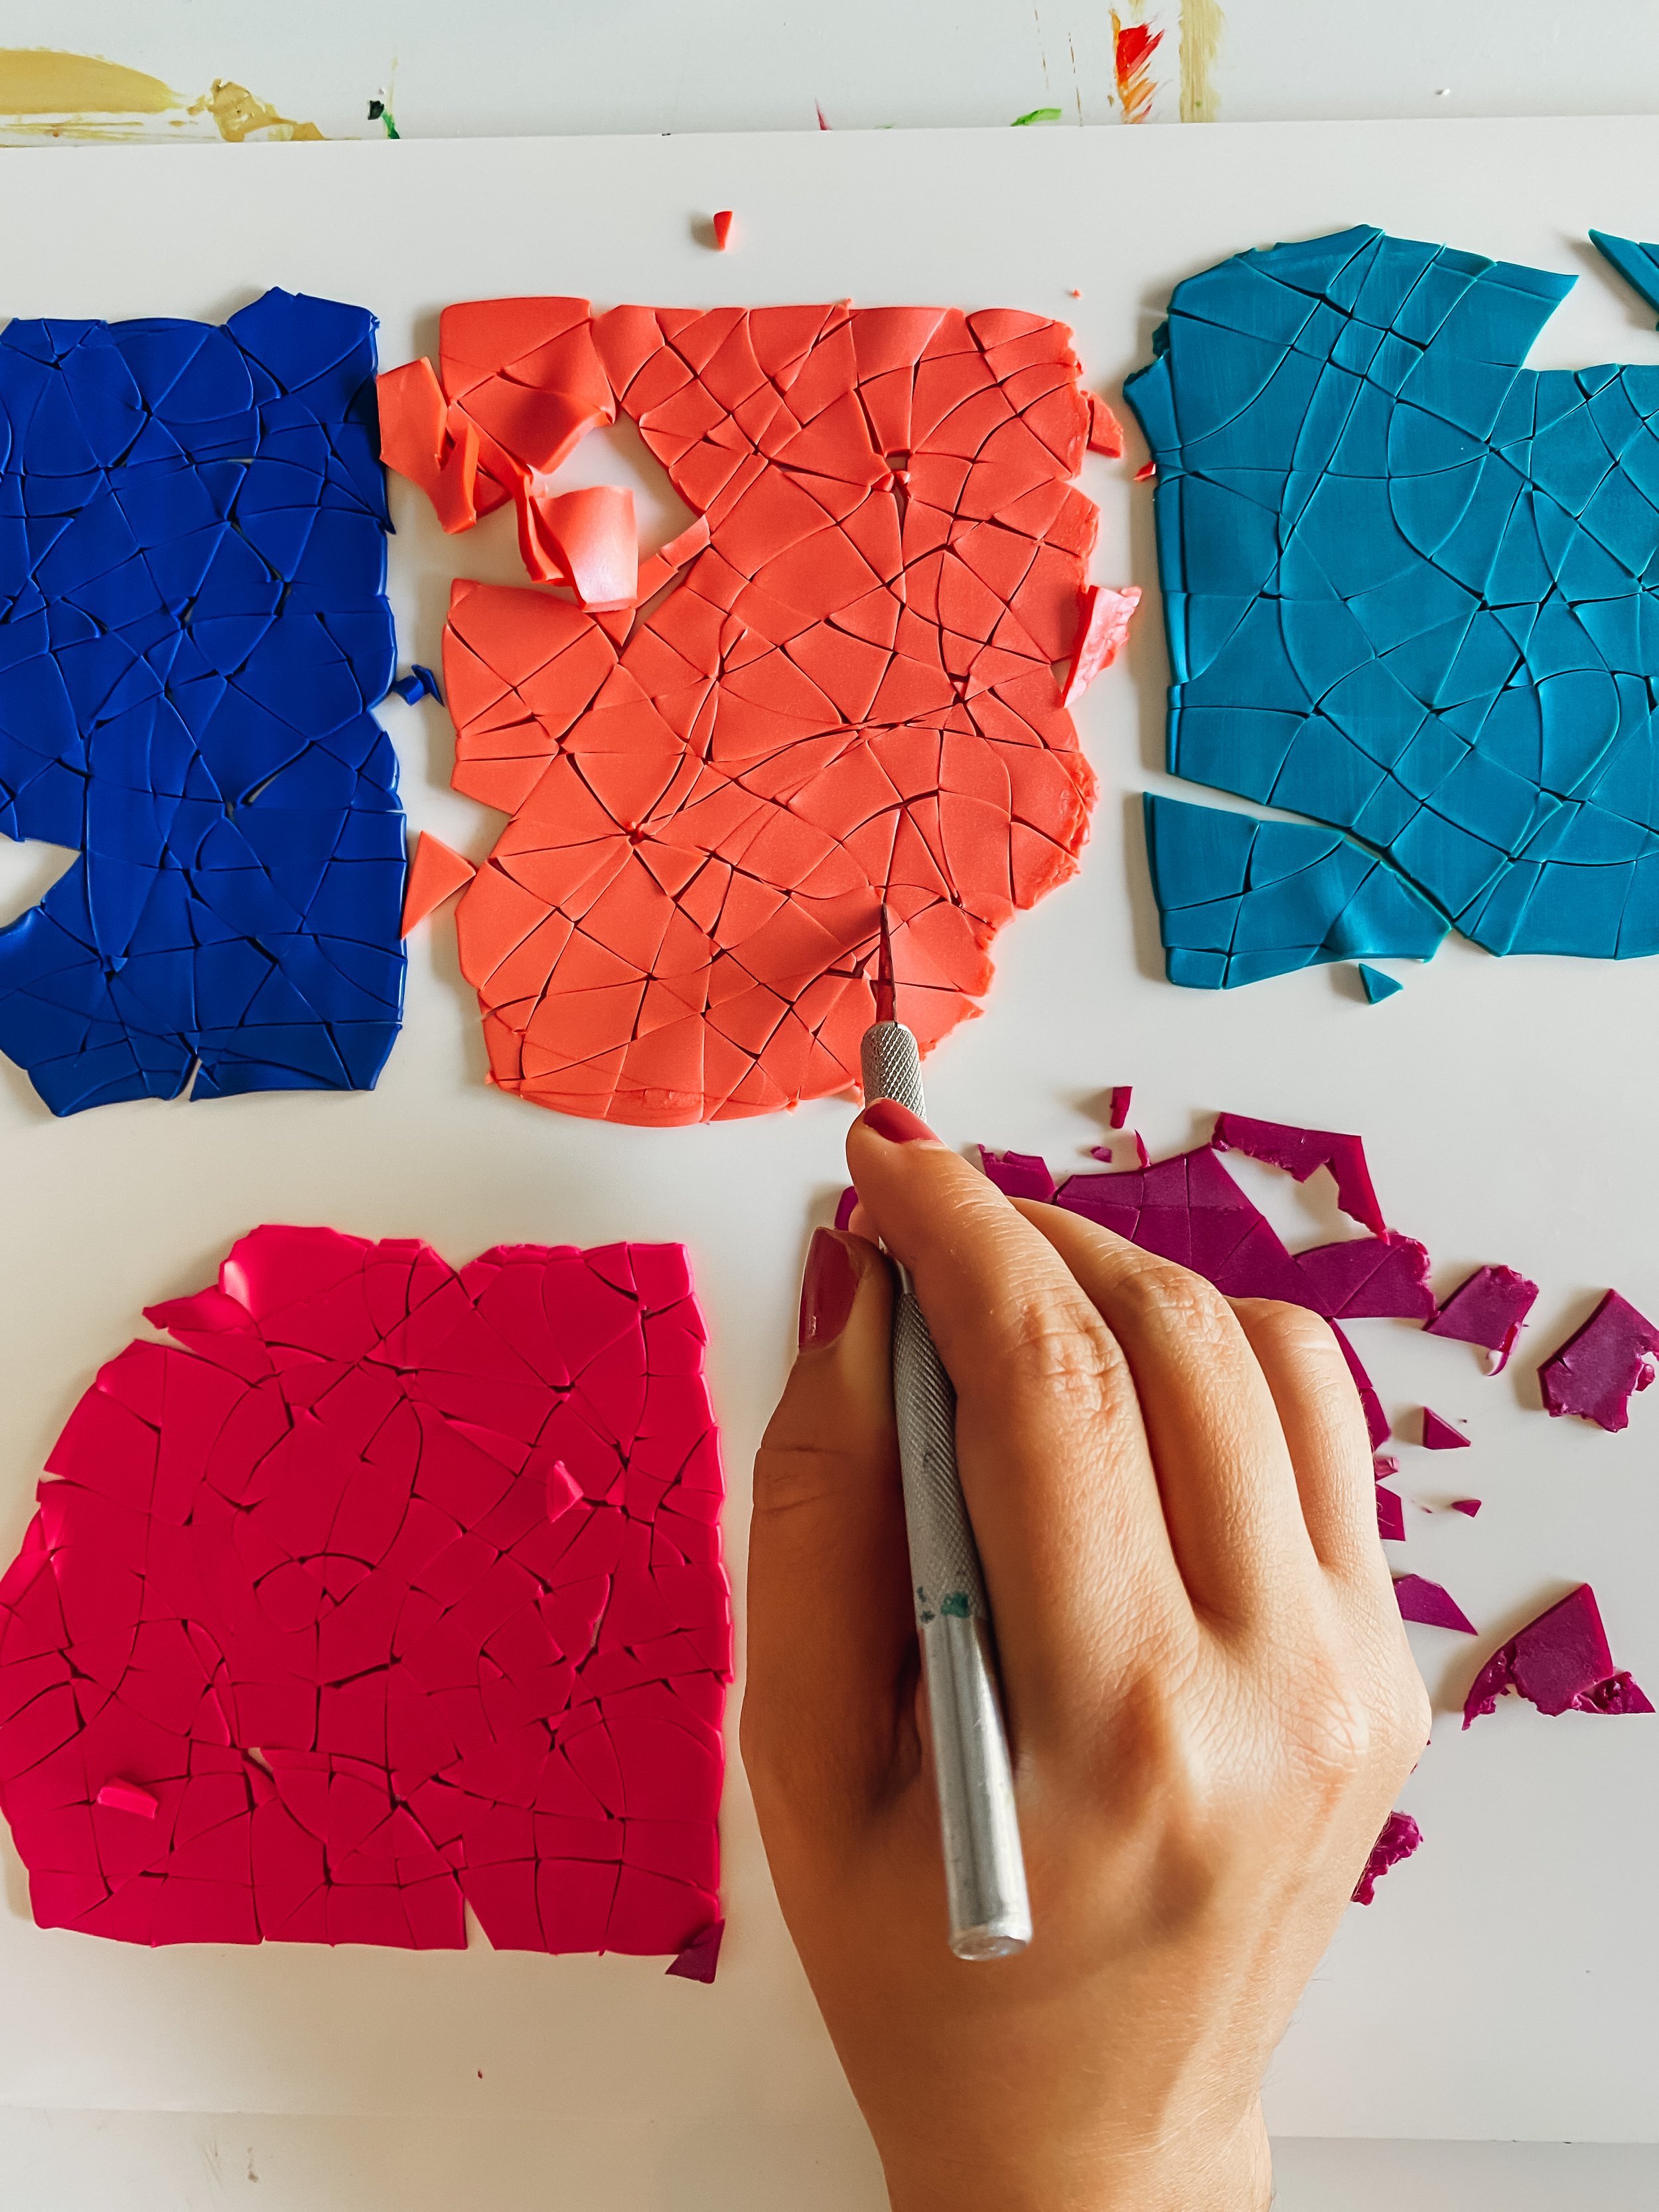
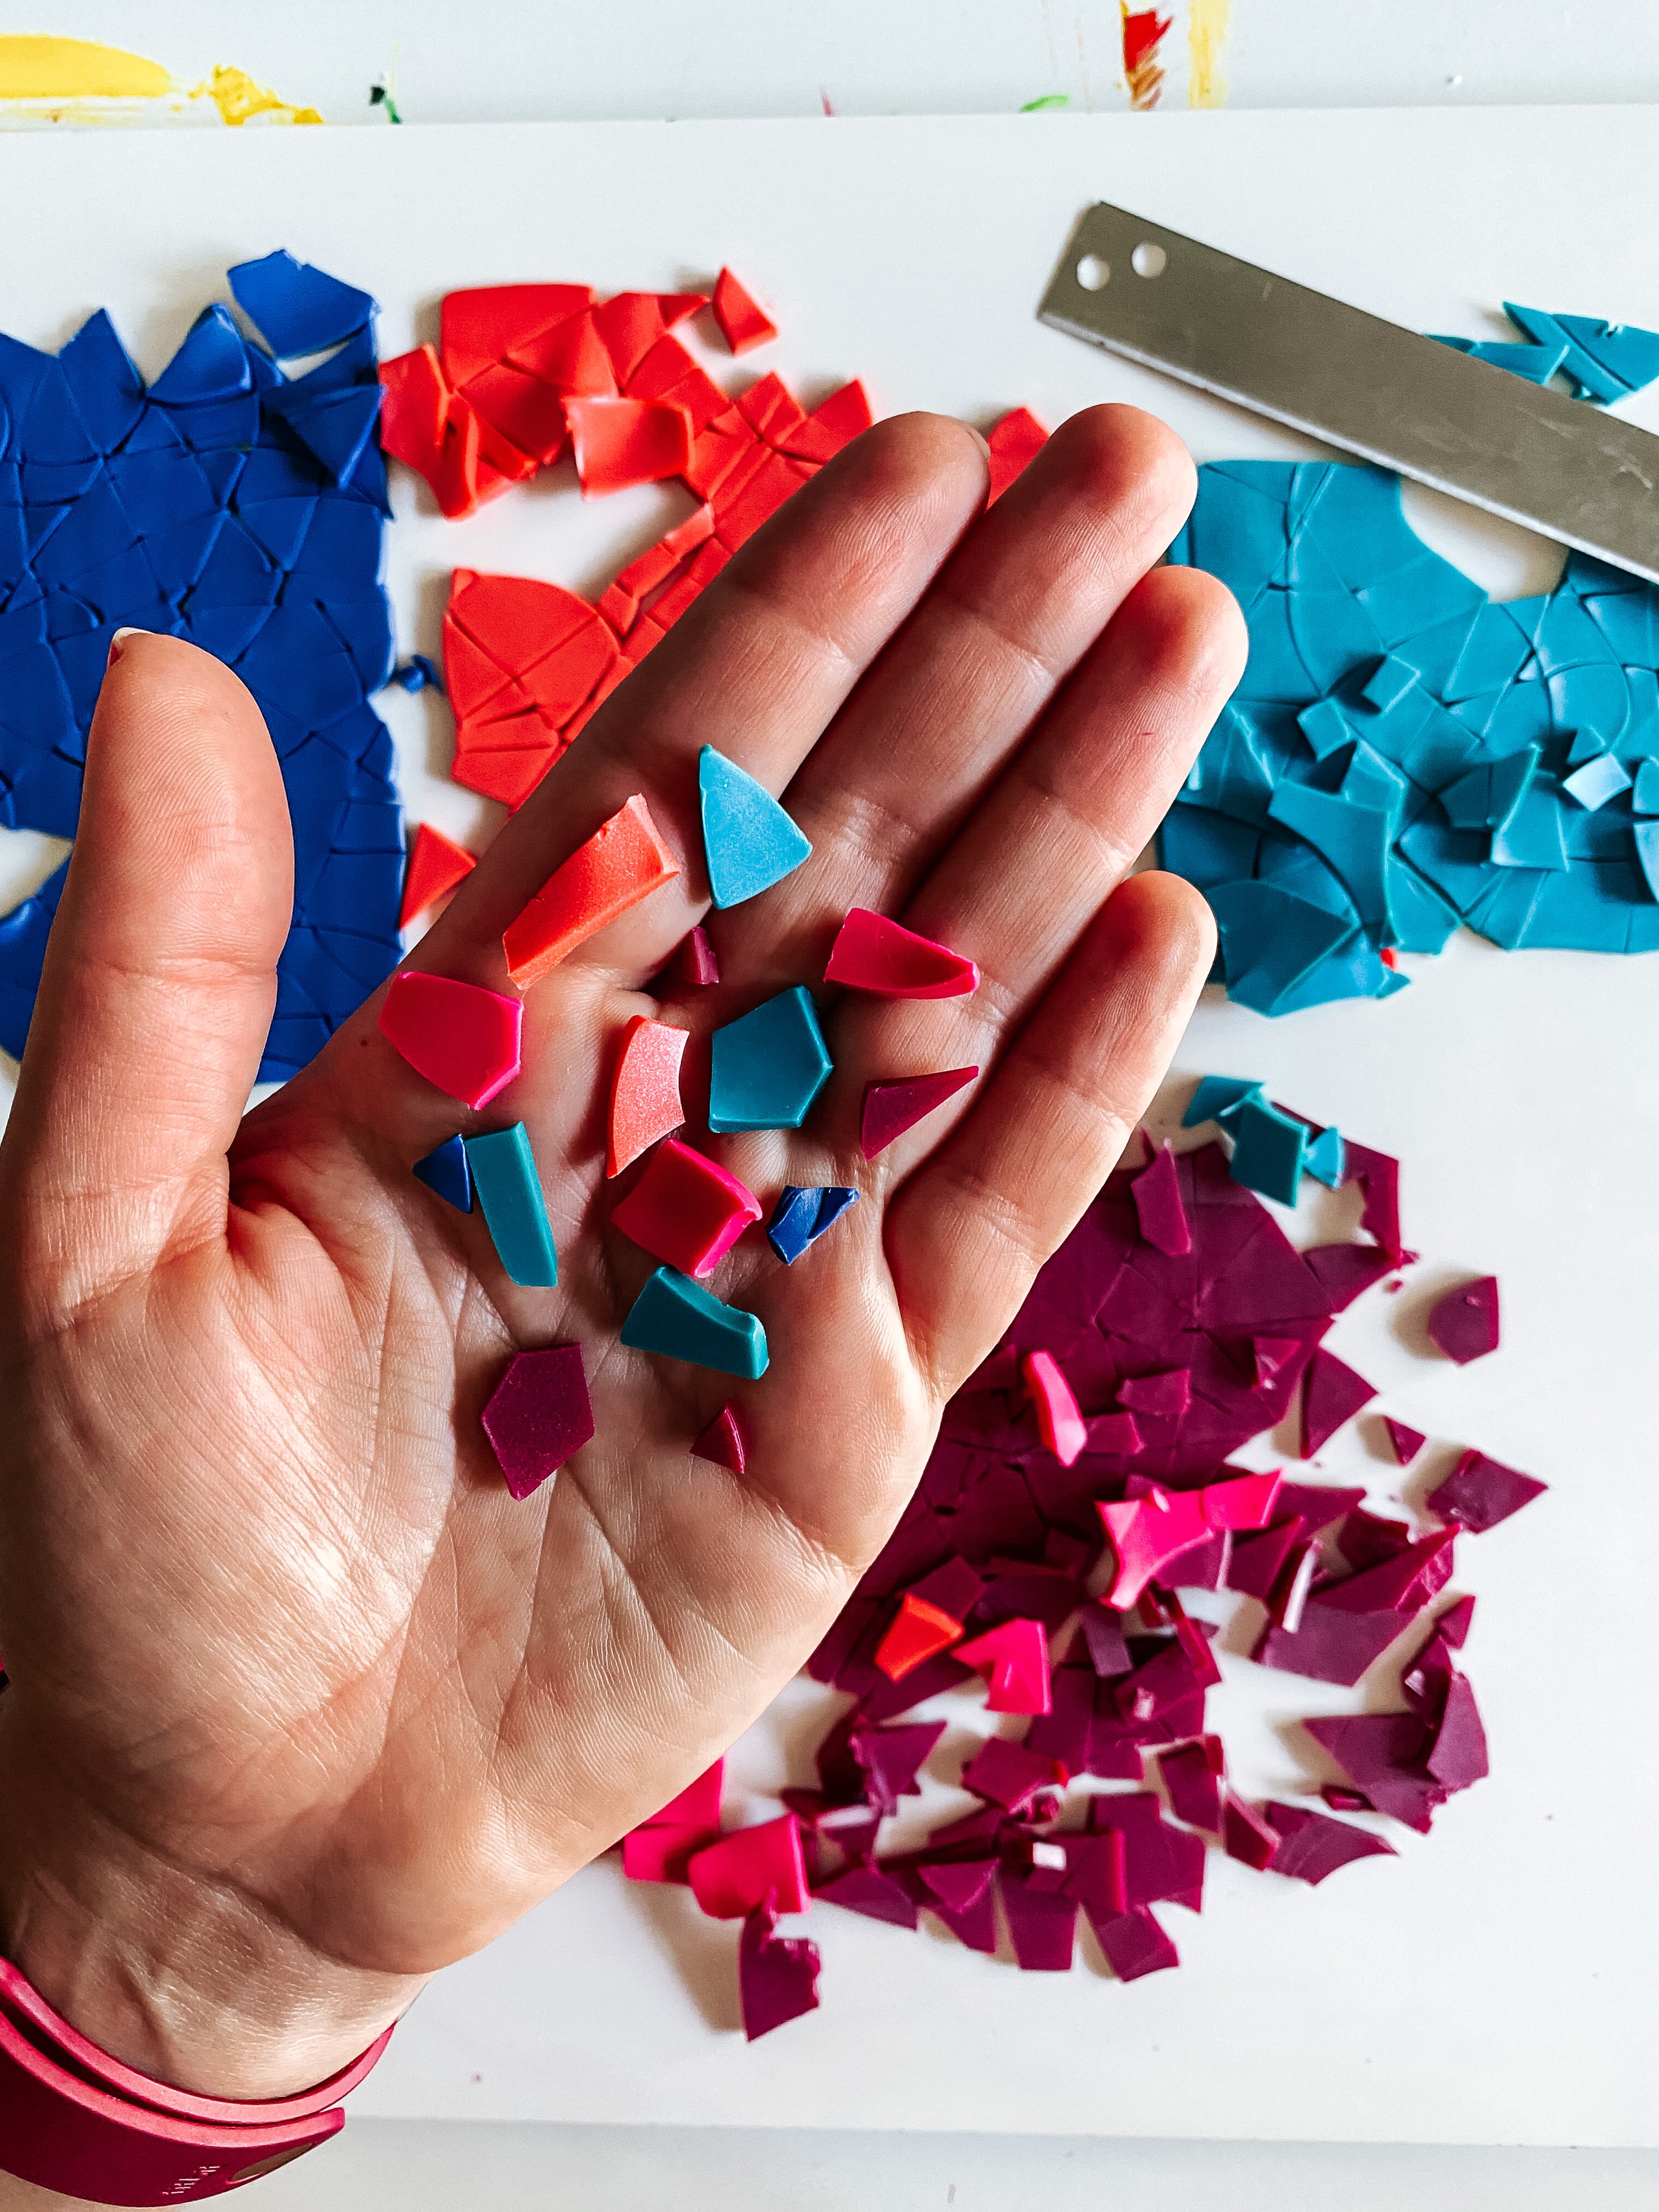
This was the EASIEST, NO WAY TO MAKE MISTAKES part! I simply took my Exacto and just started cutting lines in the clay! I cut pretty teeny tiny pieces and a mix of bigger ones. This will depend on your mirror size and how big and small of pieces you want. Have fun with this!
A quick note: You can also bake your clay in a solid sheet and then use your exacto or sharp kitchen knife to cut the shapes after they’ve been baked. I prefer when the clay is still soft so that If I do mess up, I can ball it up and start over again.
Clay is SO forgiving and you can rework it 1000 times if you need to, so don’t be afraid - go for it!
Once I had cut all my shapes, it was time to bake!
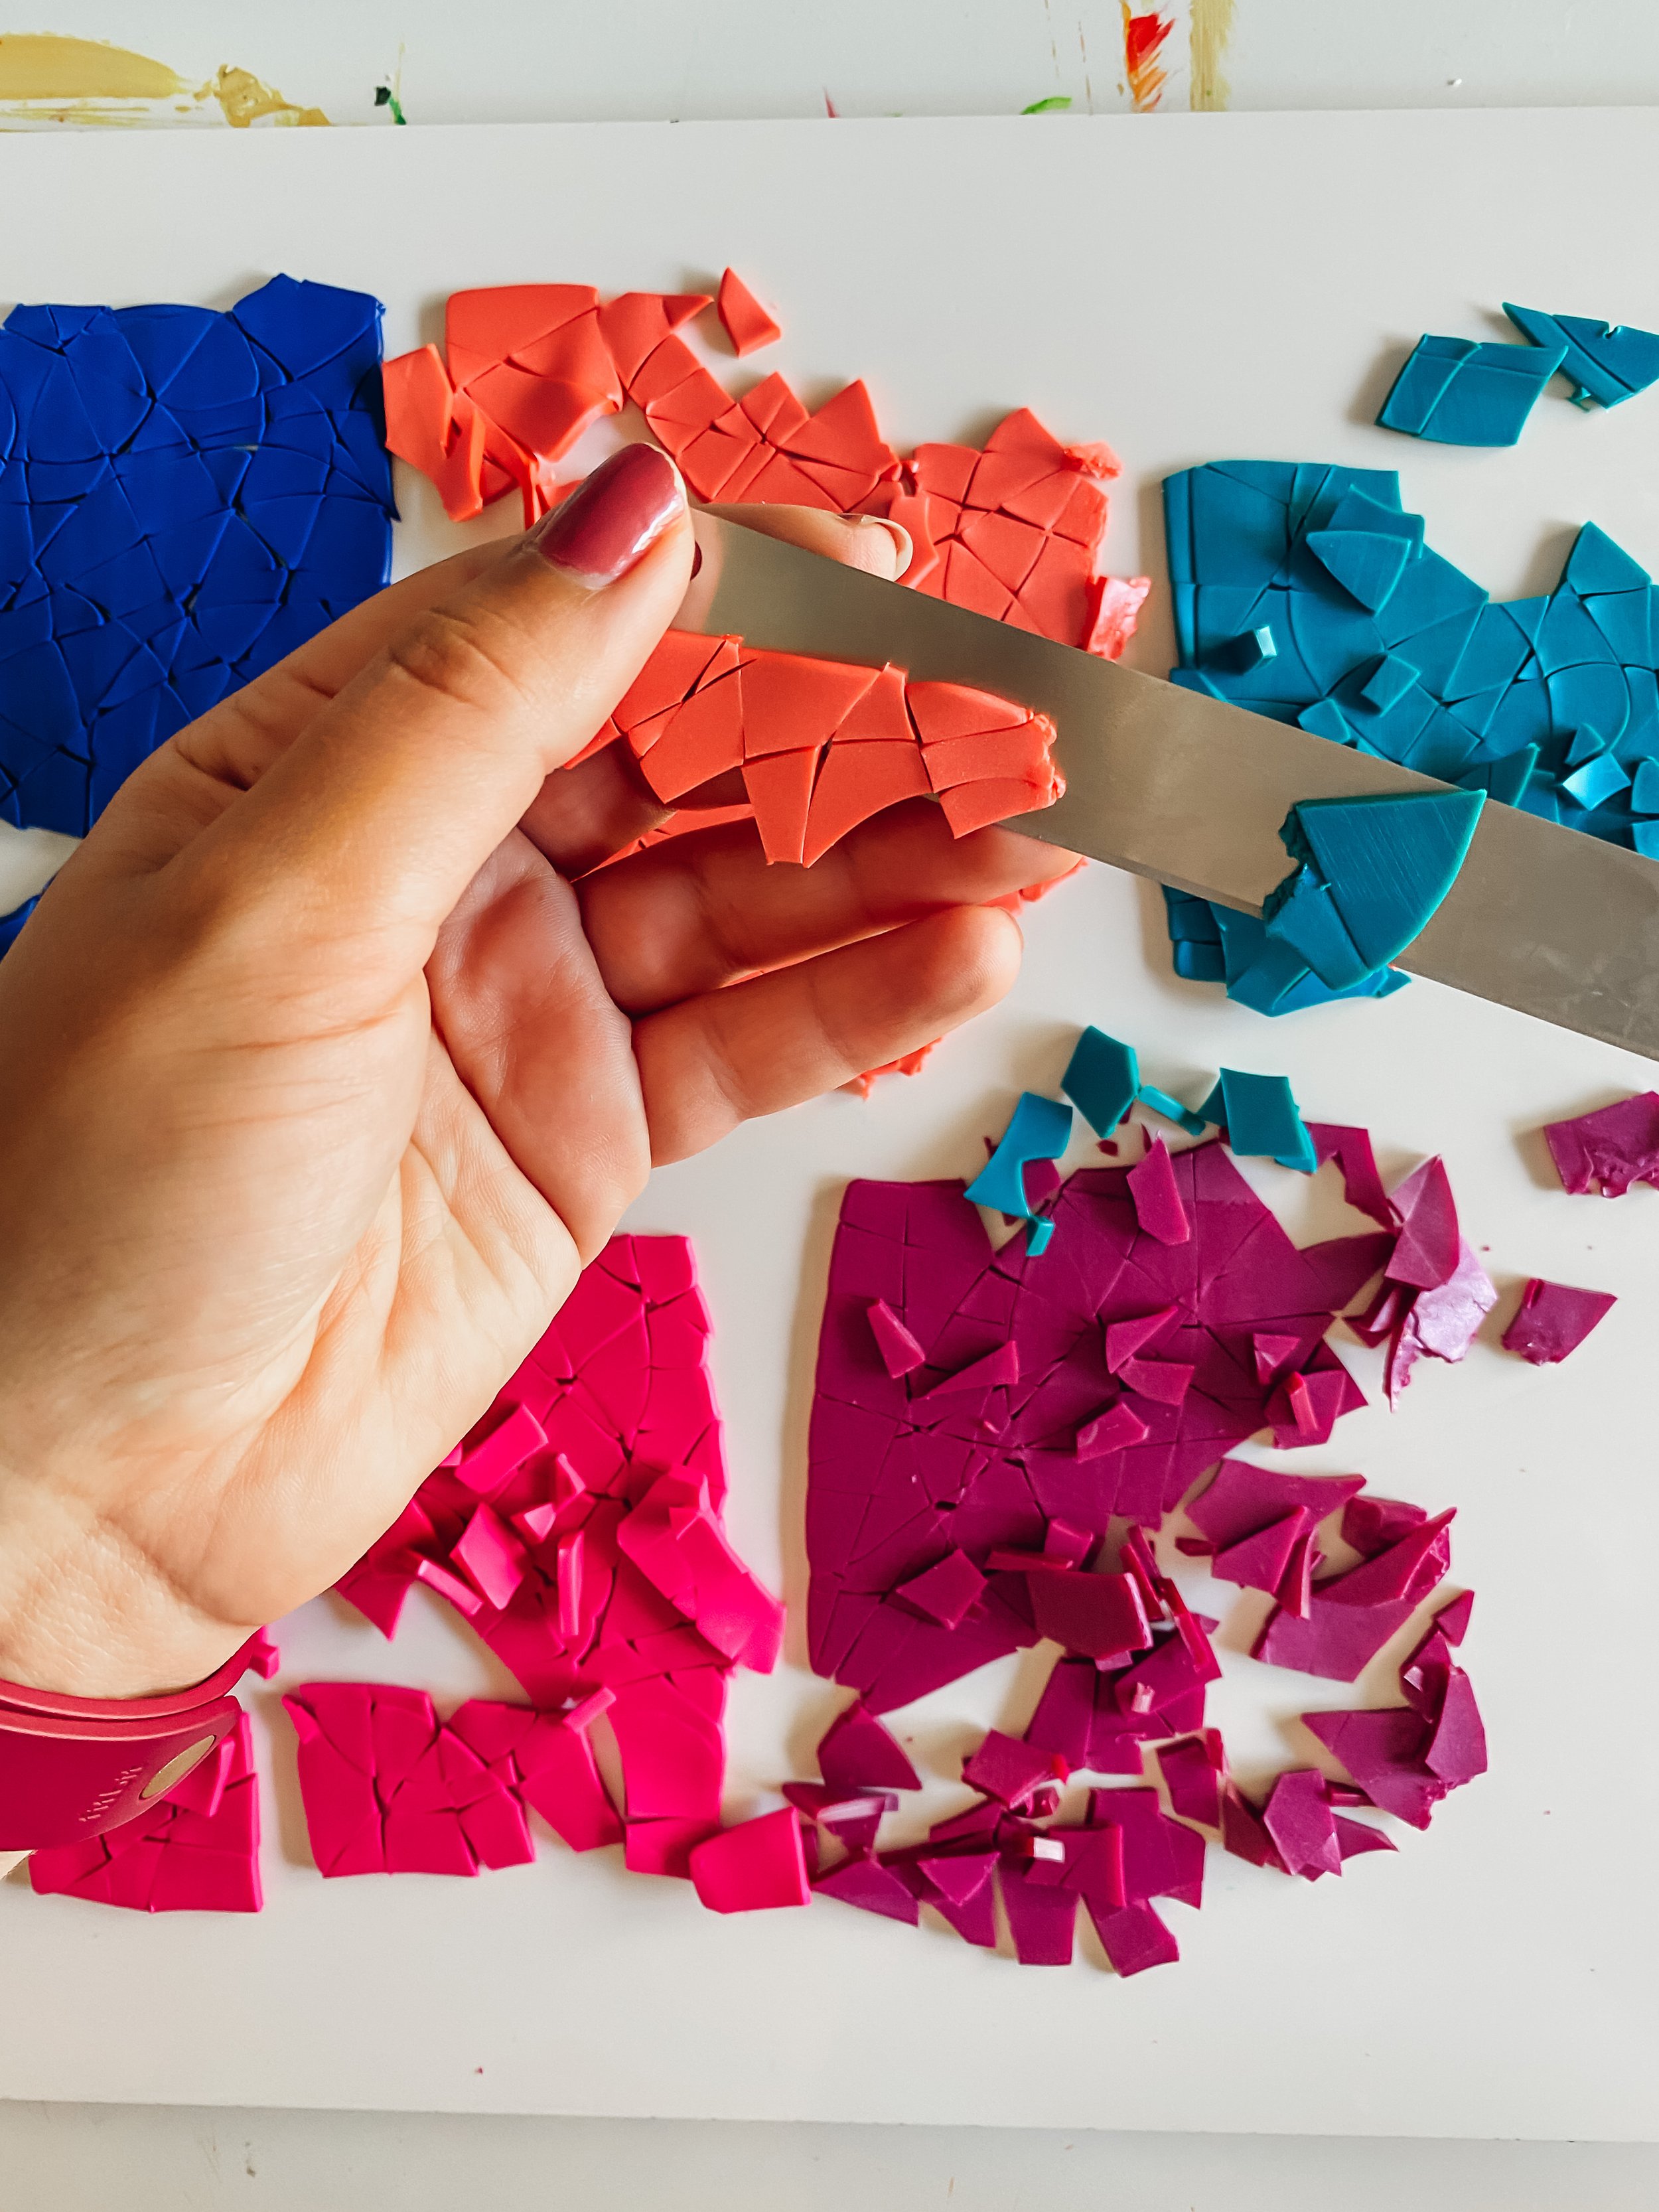
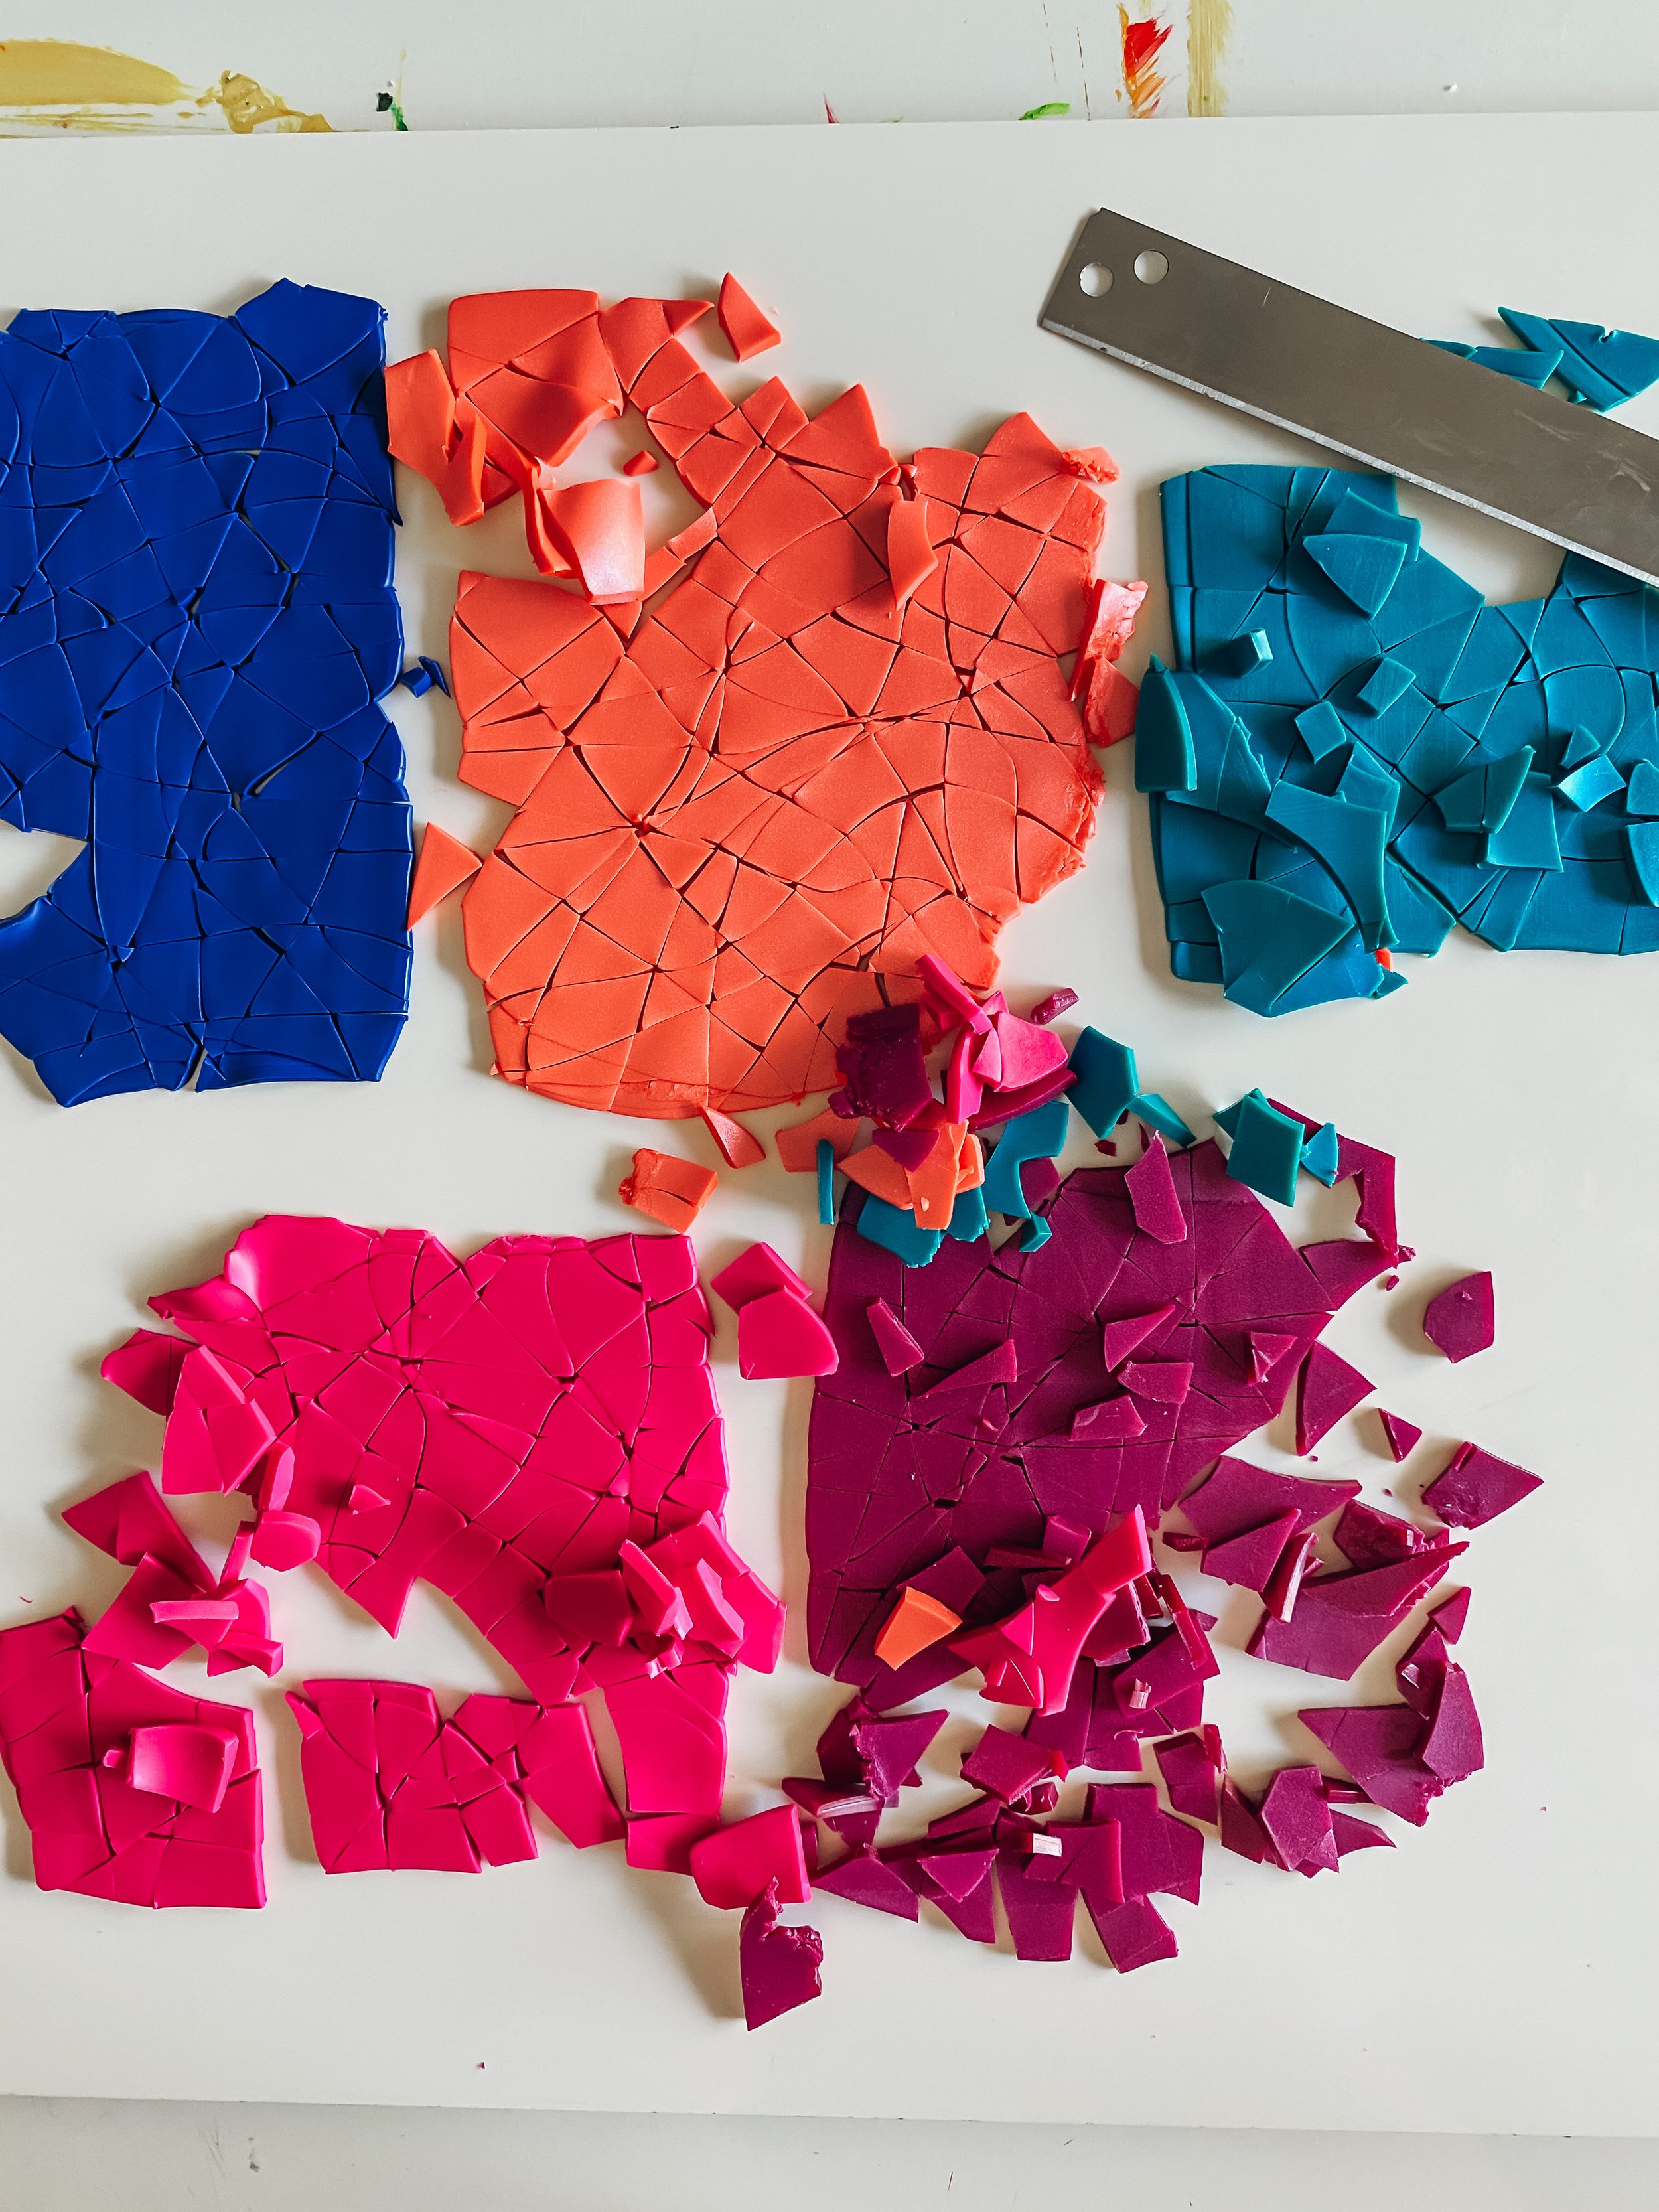
I use the clay blades to peel the clay off my work surface and transfer the individual pieces onto the baking sheet. You can pull them apart or leave them in a bigger sheet and just pop them apart once they’re baked.
Either way works! I did half and half depending on how soft my clay was. If it was too soft I left it in the bigger sheets so I didn't mess up the shapes by handling them too much.

BAKING
Now it’s time to bake! I recommend doing a test bake before you begin. Grab a small chunk of white clay and bake it in your oven at 275°F and check it every 10 minutes for 40 to 50 minutes. Make sure it does not change colors. I bake my clay at 275°F for 50 minutes.
Let the clay cool for about 30 minutes.


CREATE YOUR TERRAZO DESIGN
Decide on how much of a border you want to give your mirror. You can use a dry-erase marker to draw a line or just eyeball it and wipe off any smudges that get too far in.
I used molding paste and a palette knife to spread it around the edges of my mirror. You'll want to do a medium thick layer so it's enough to press the shapes into and hold them there once it's dry. If your layer is too thin, the clay won't stick.
Then I pressed my clay pieces into the freshly wet paste and arranged the color and design the way I liked.
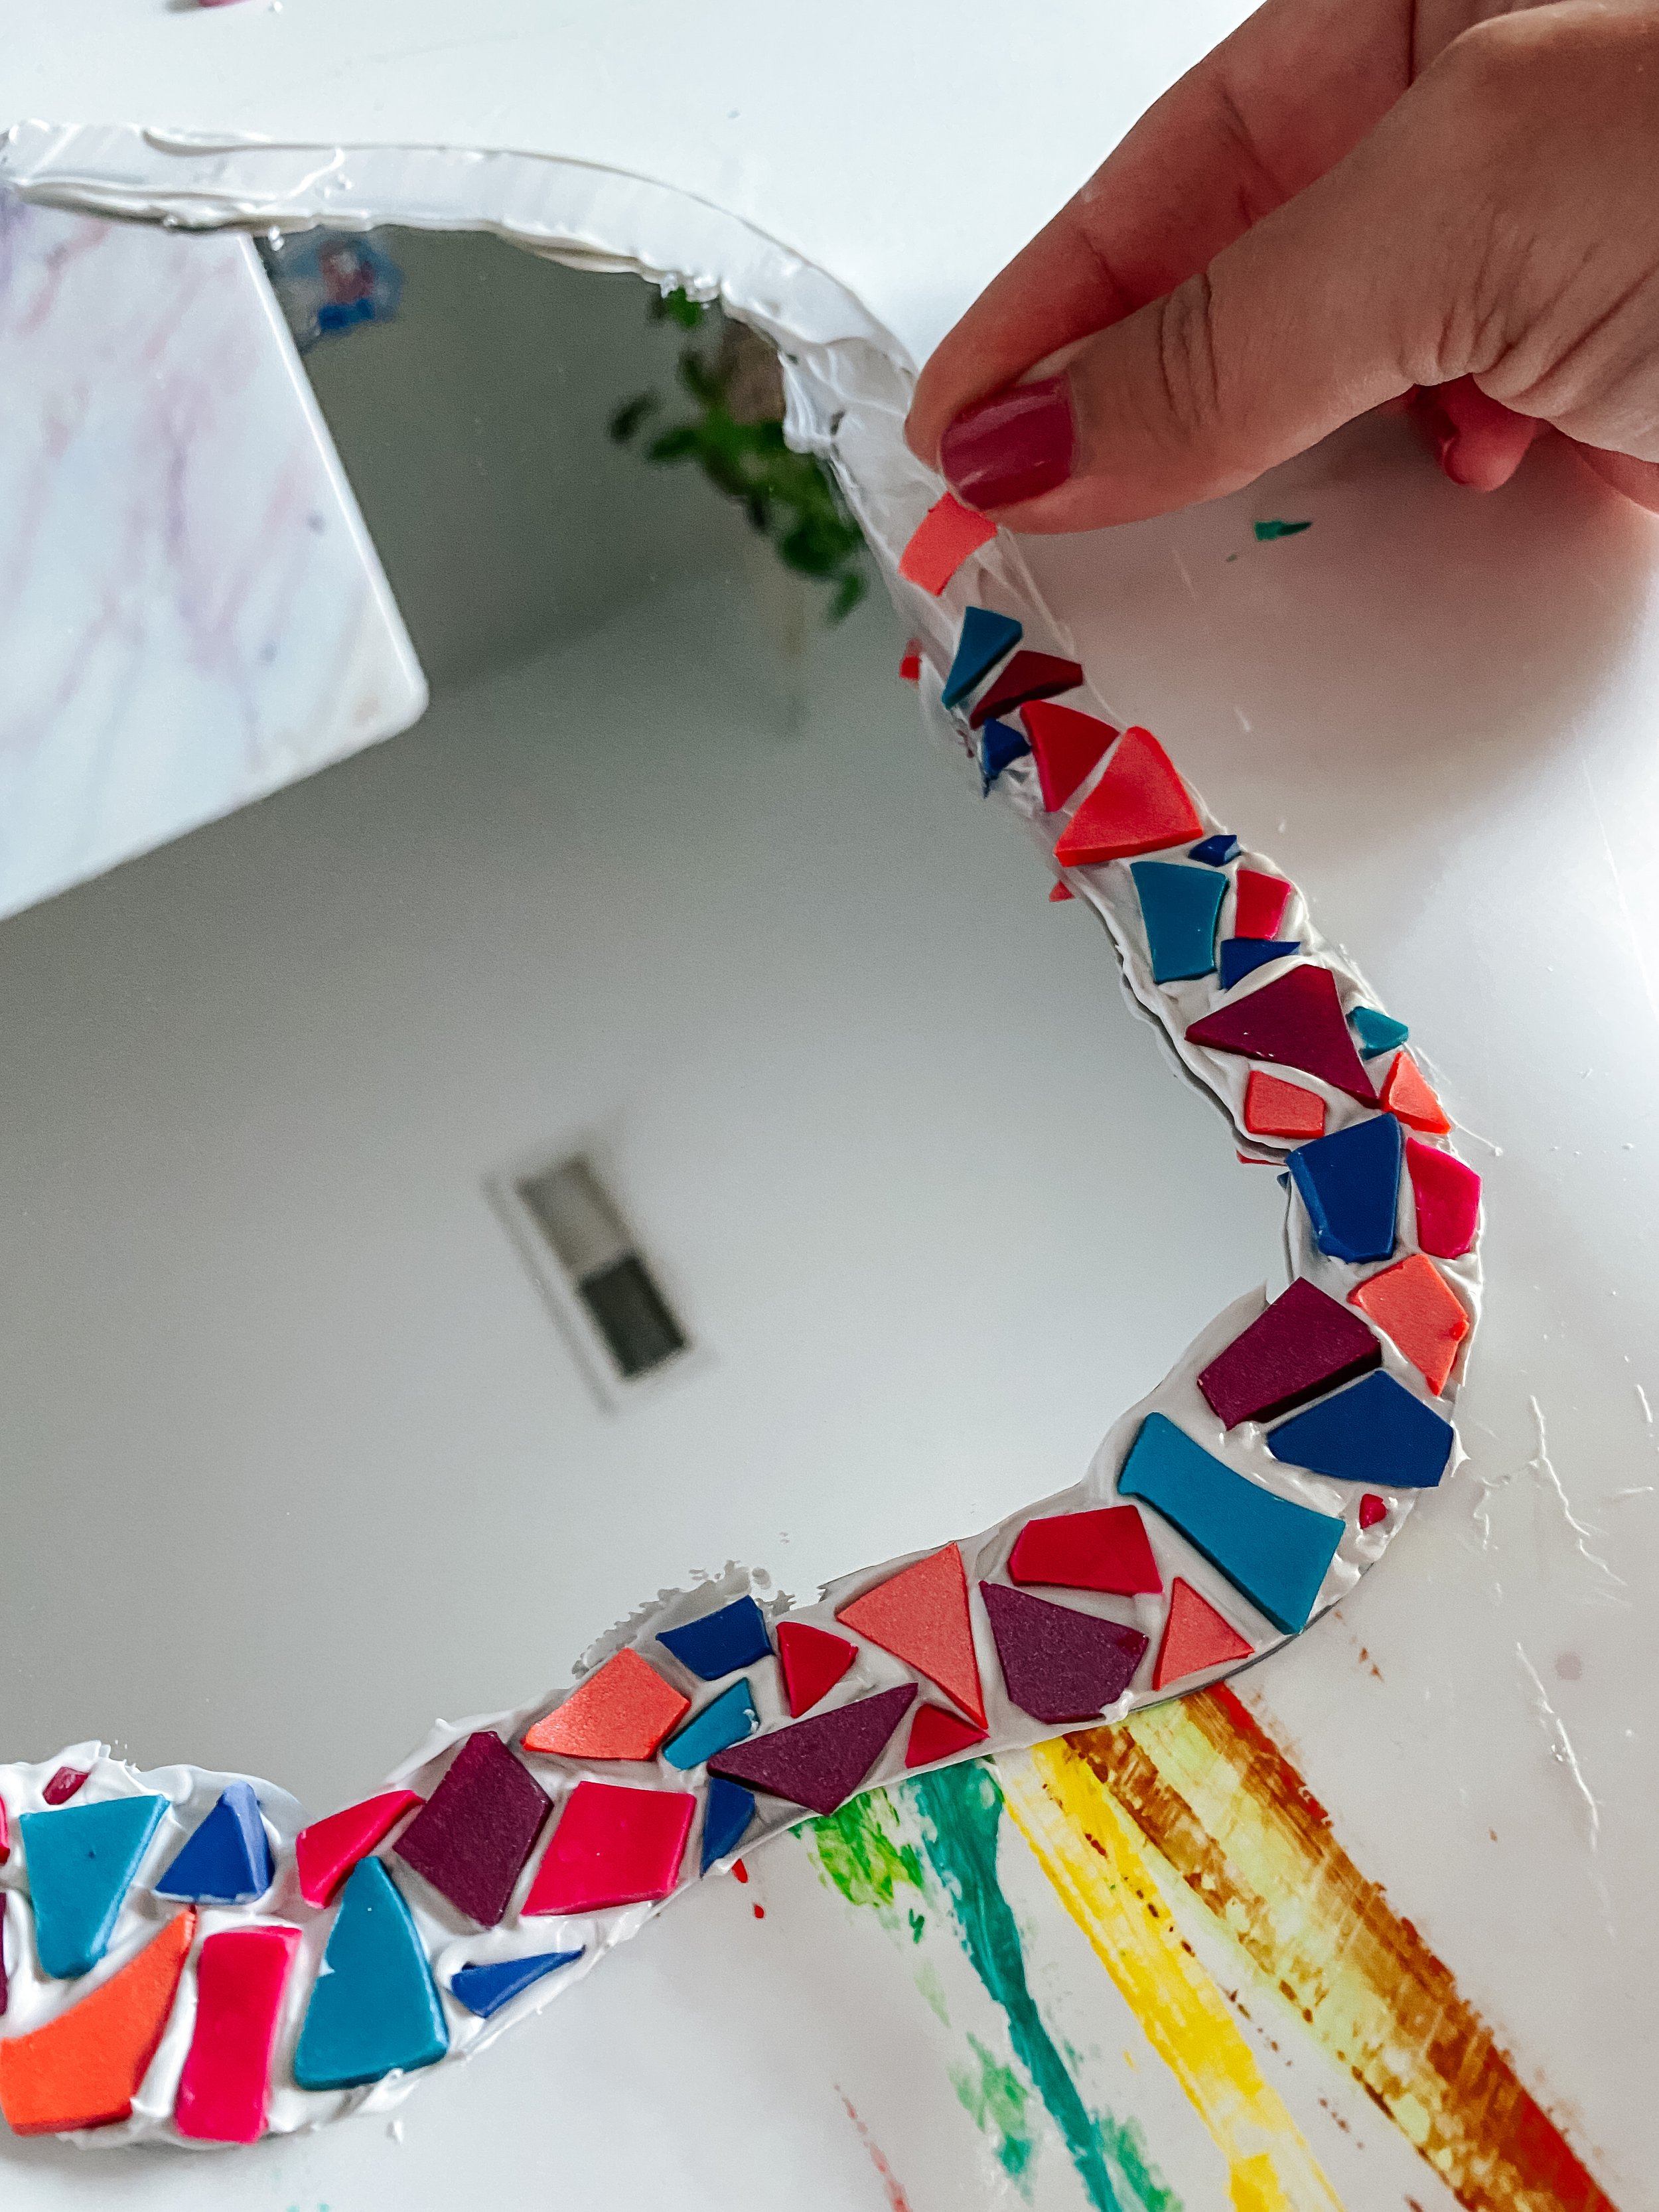
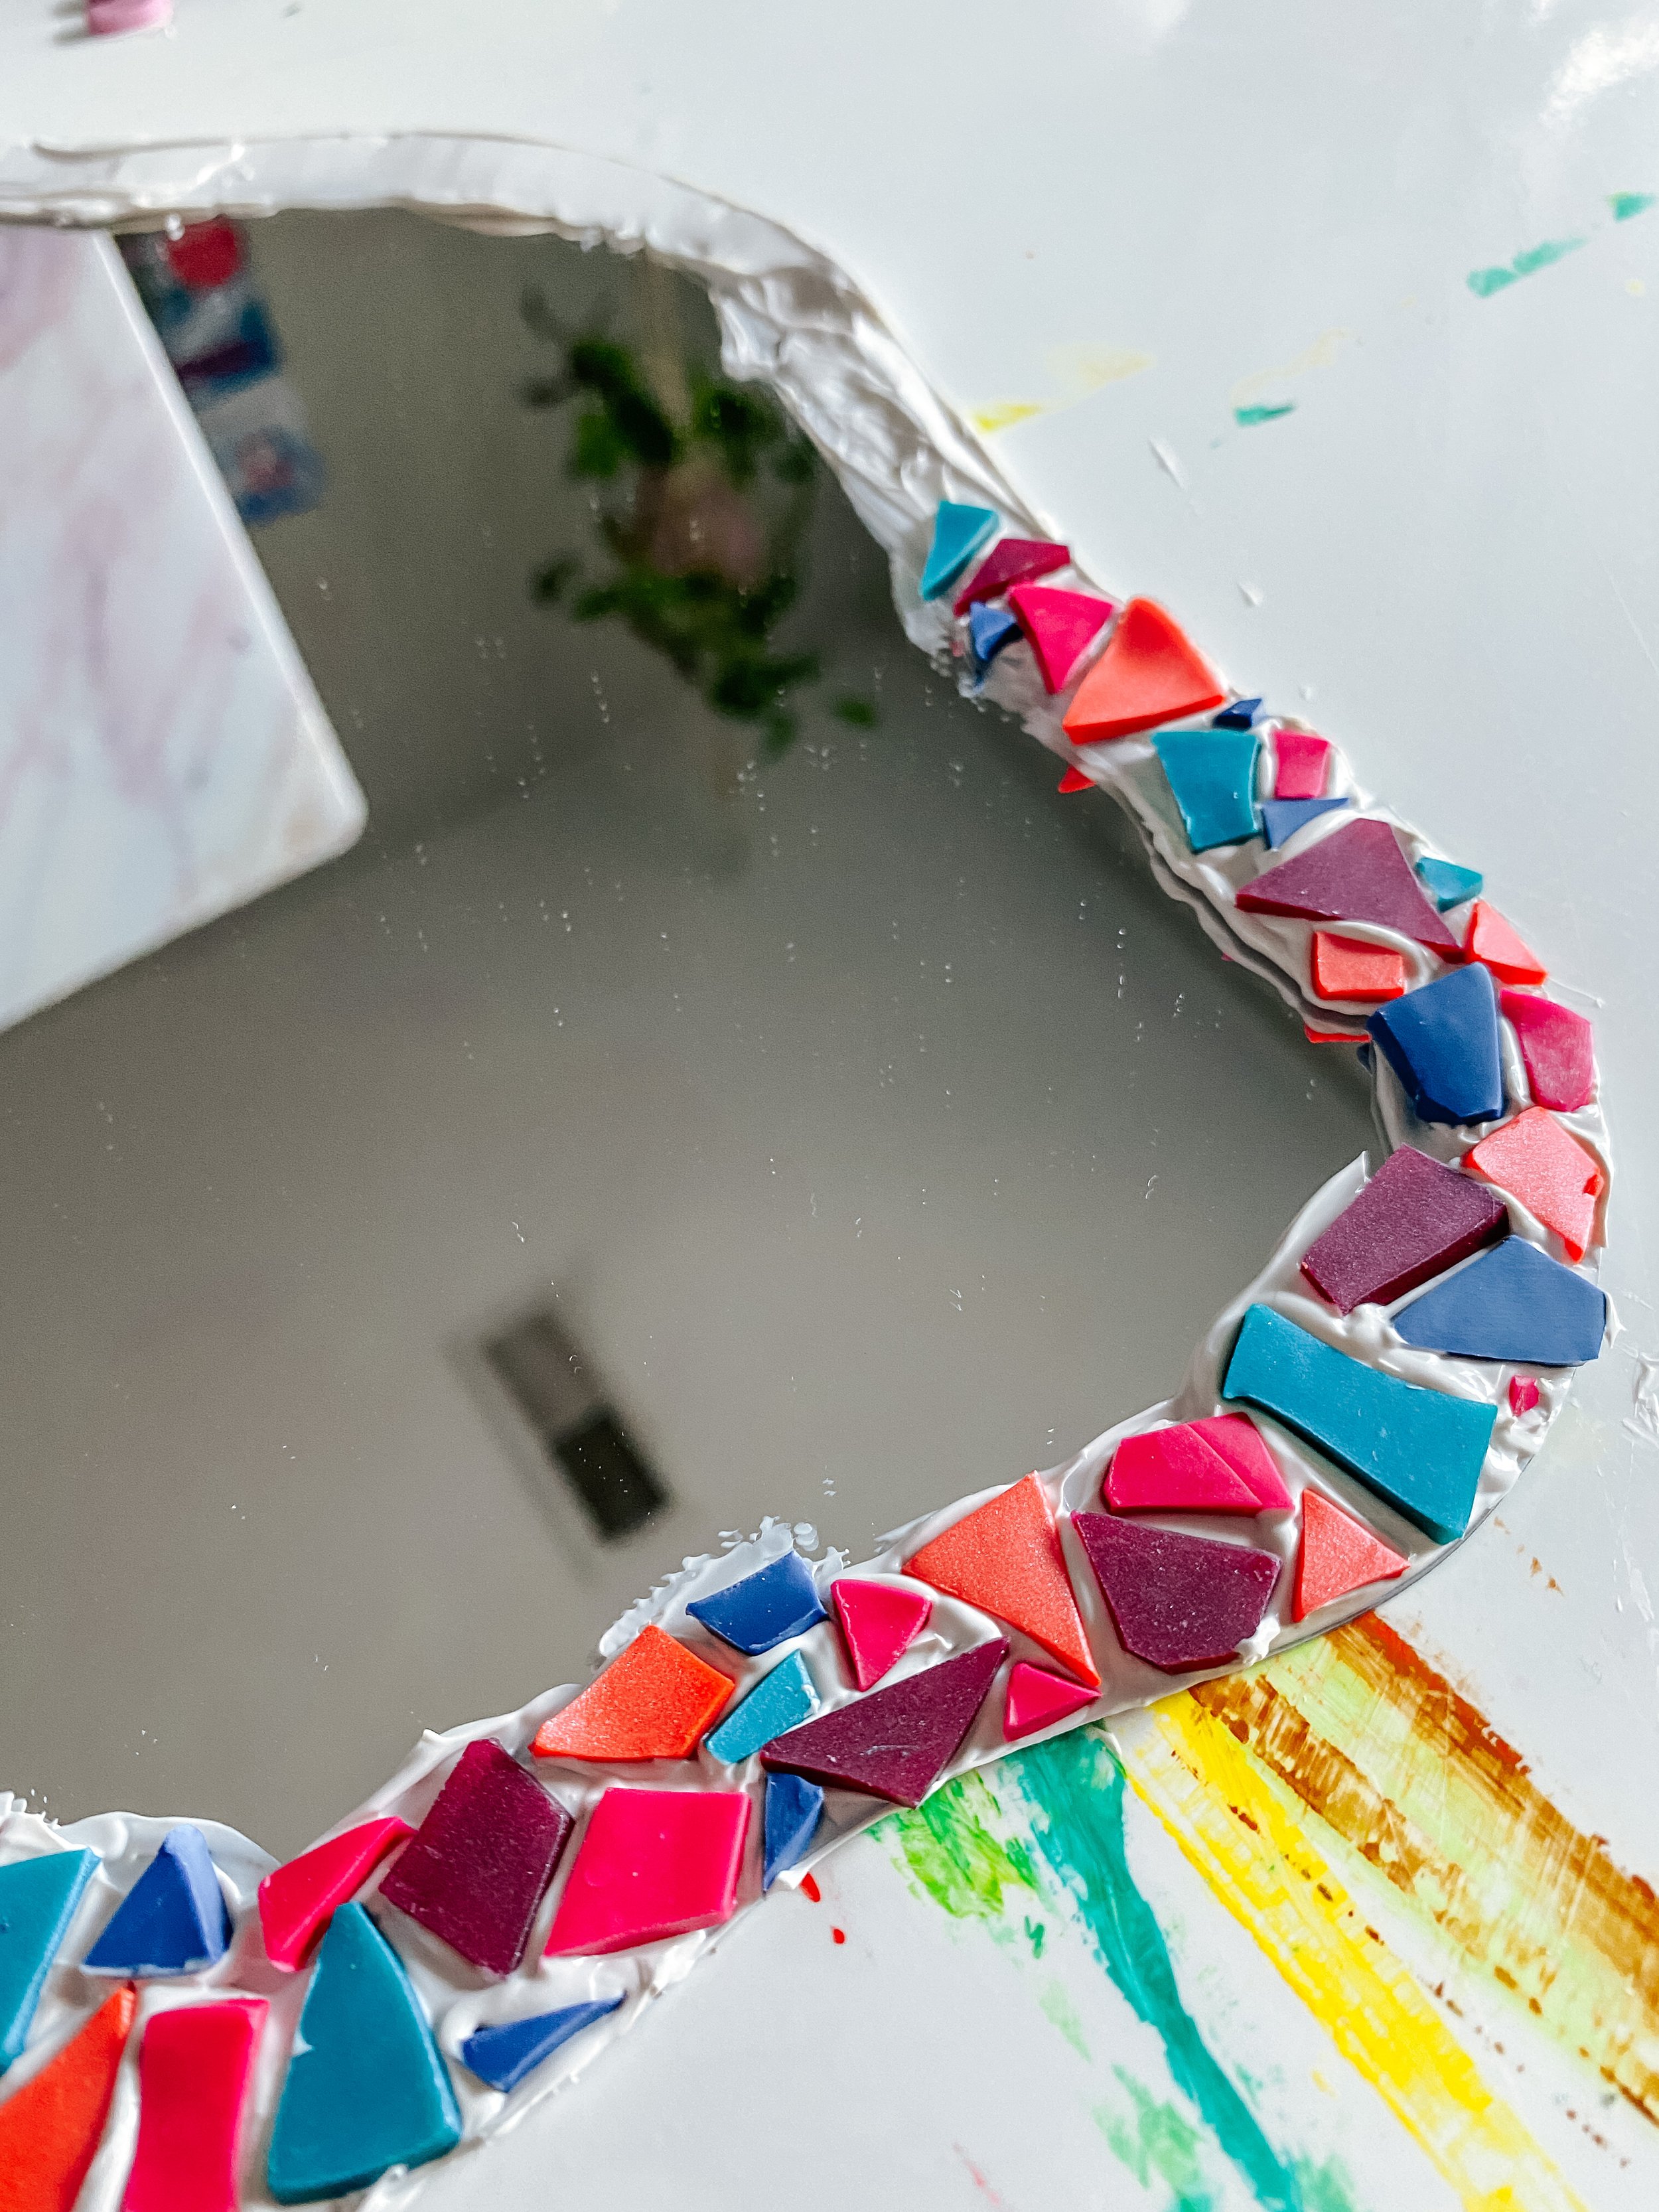
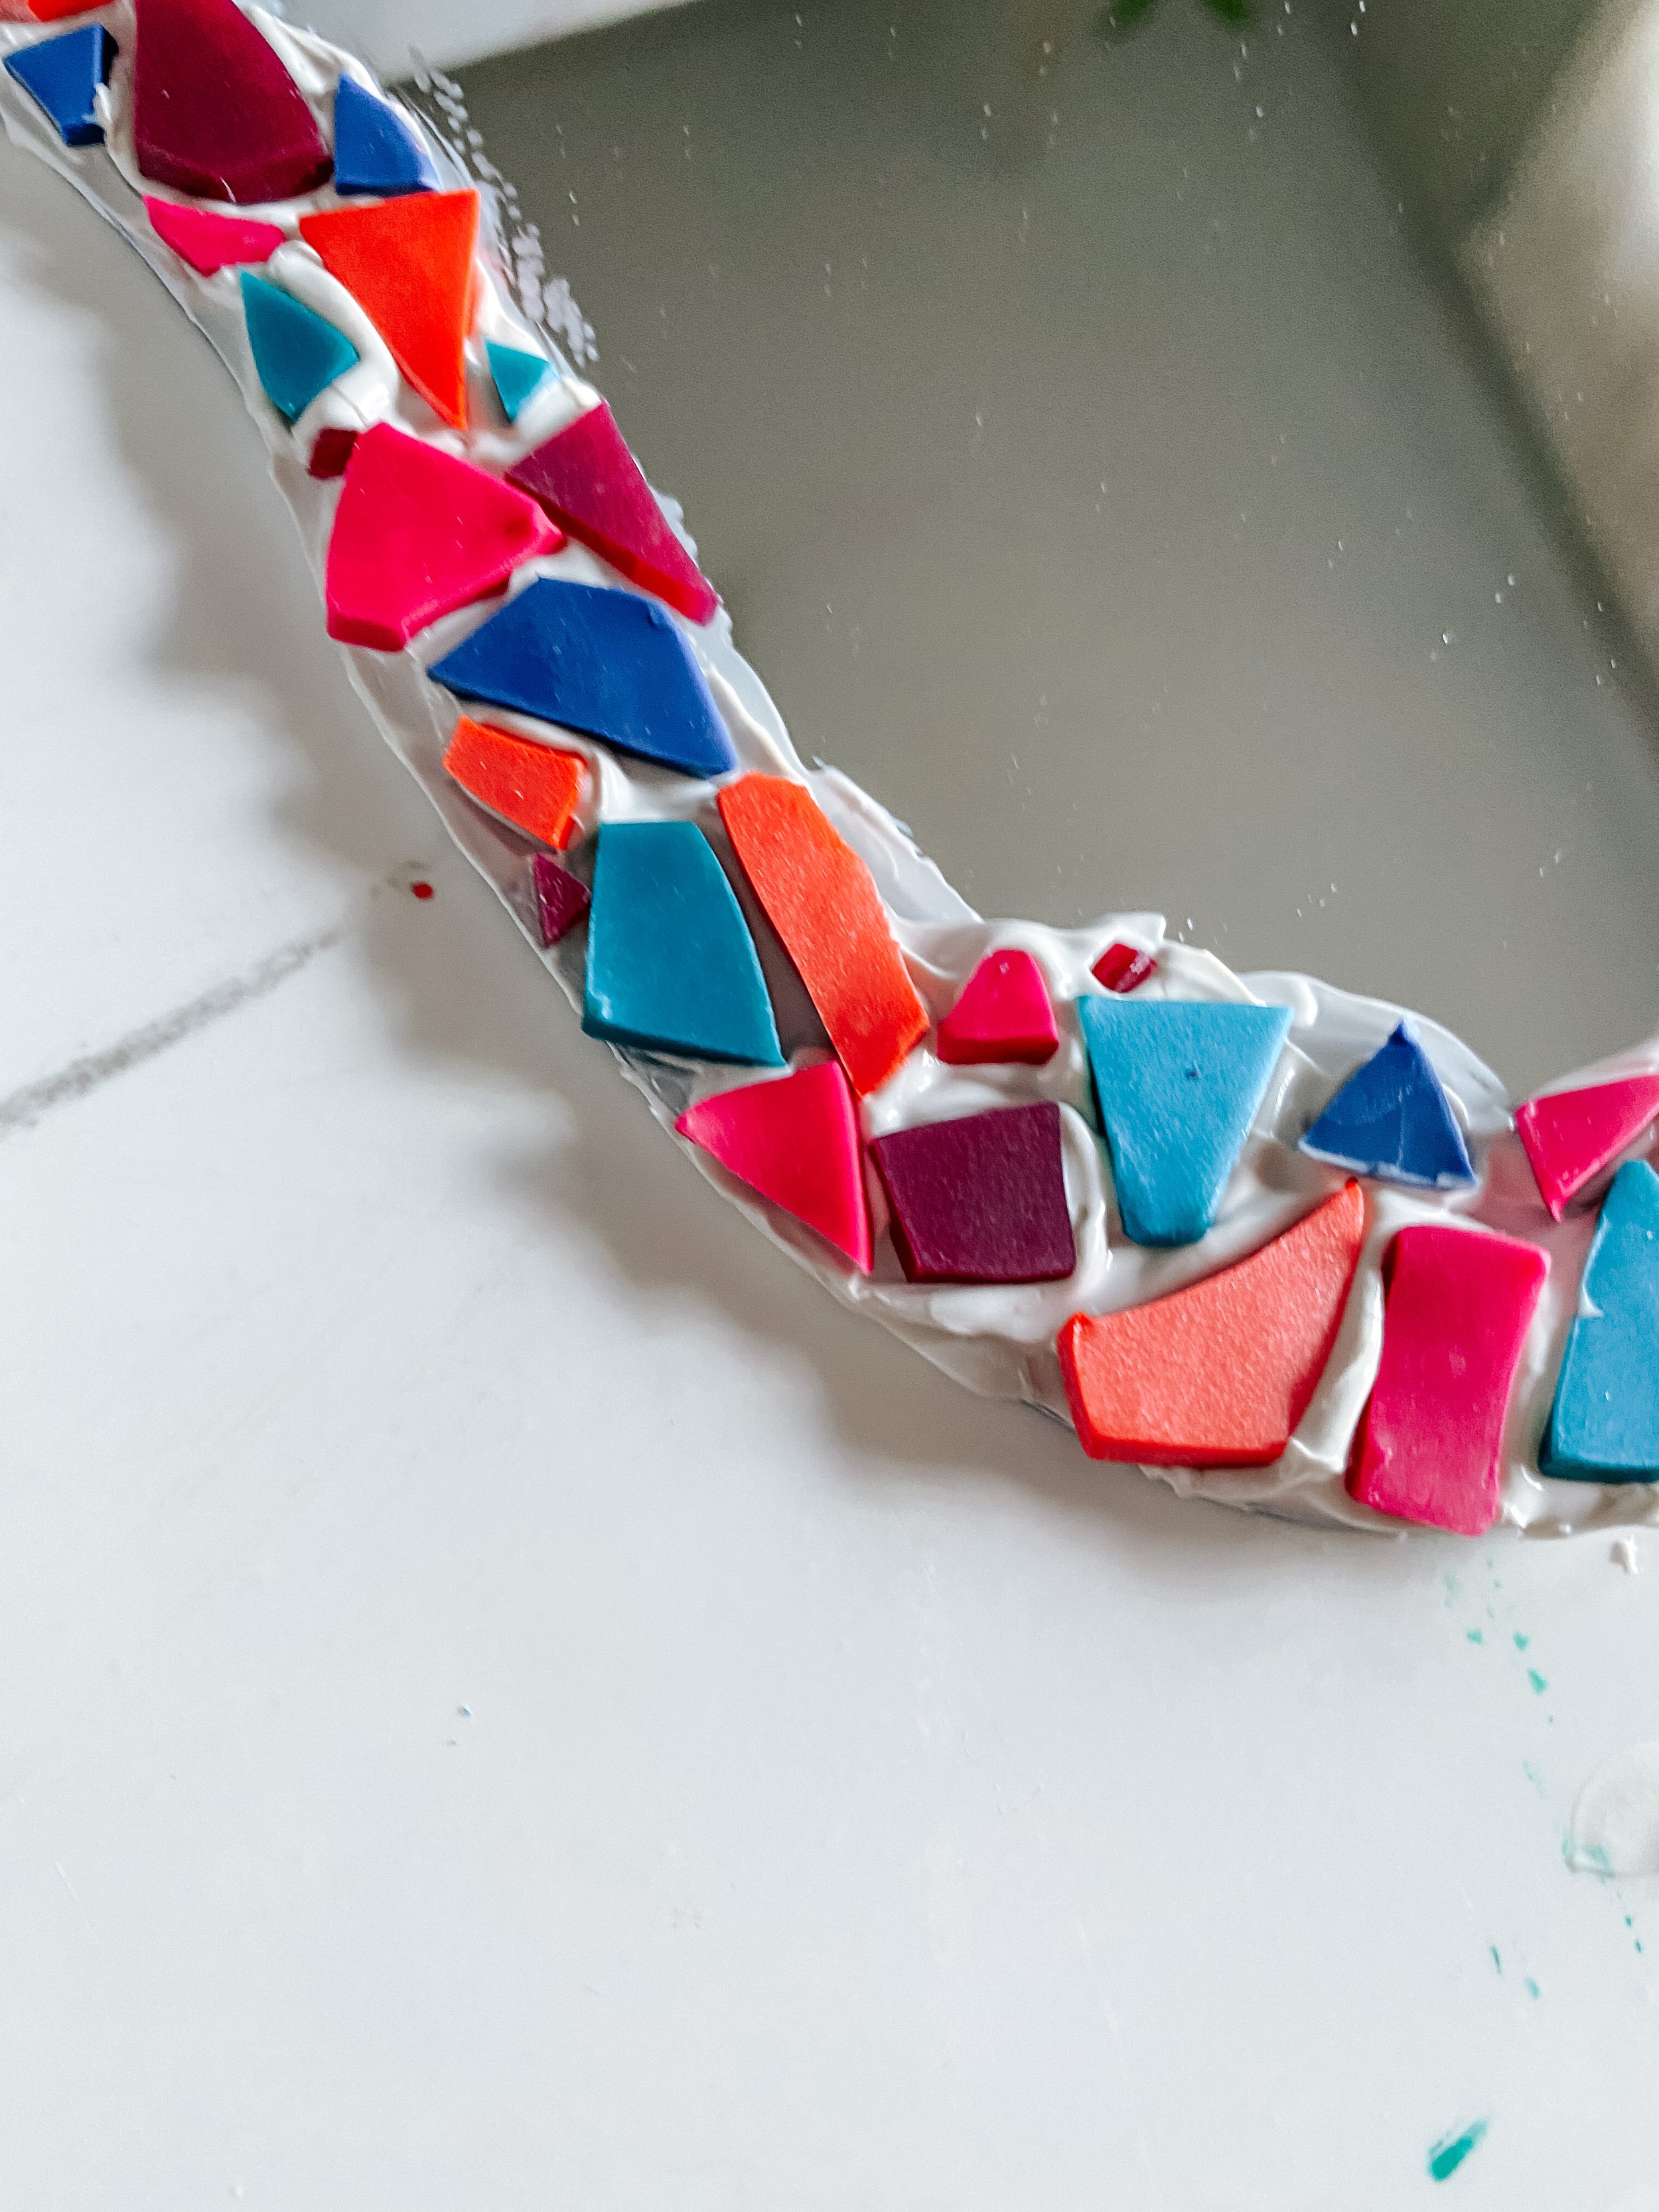
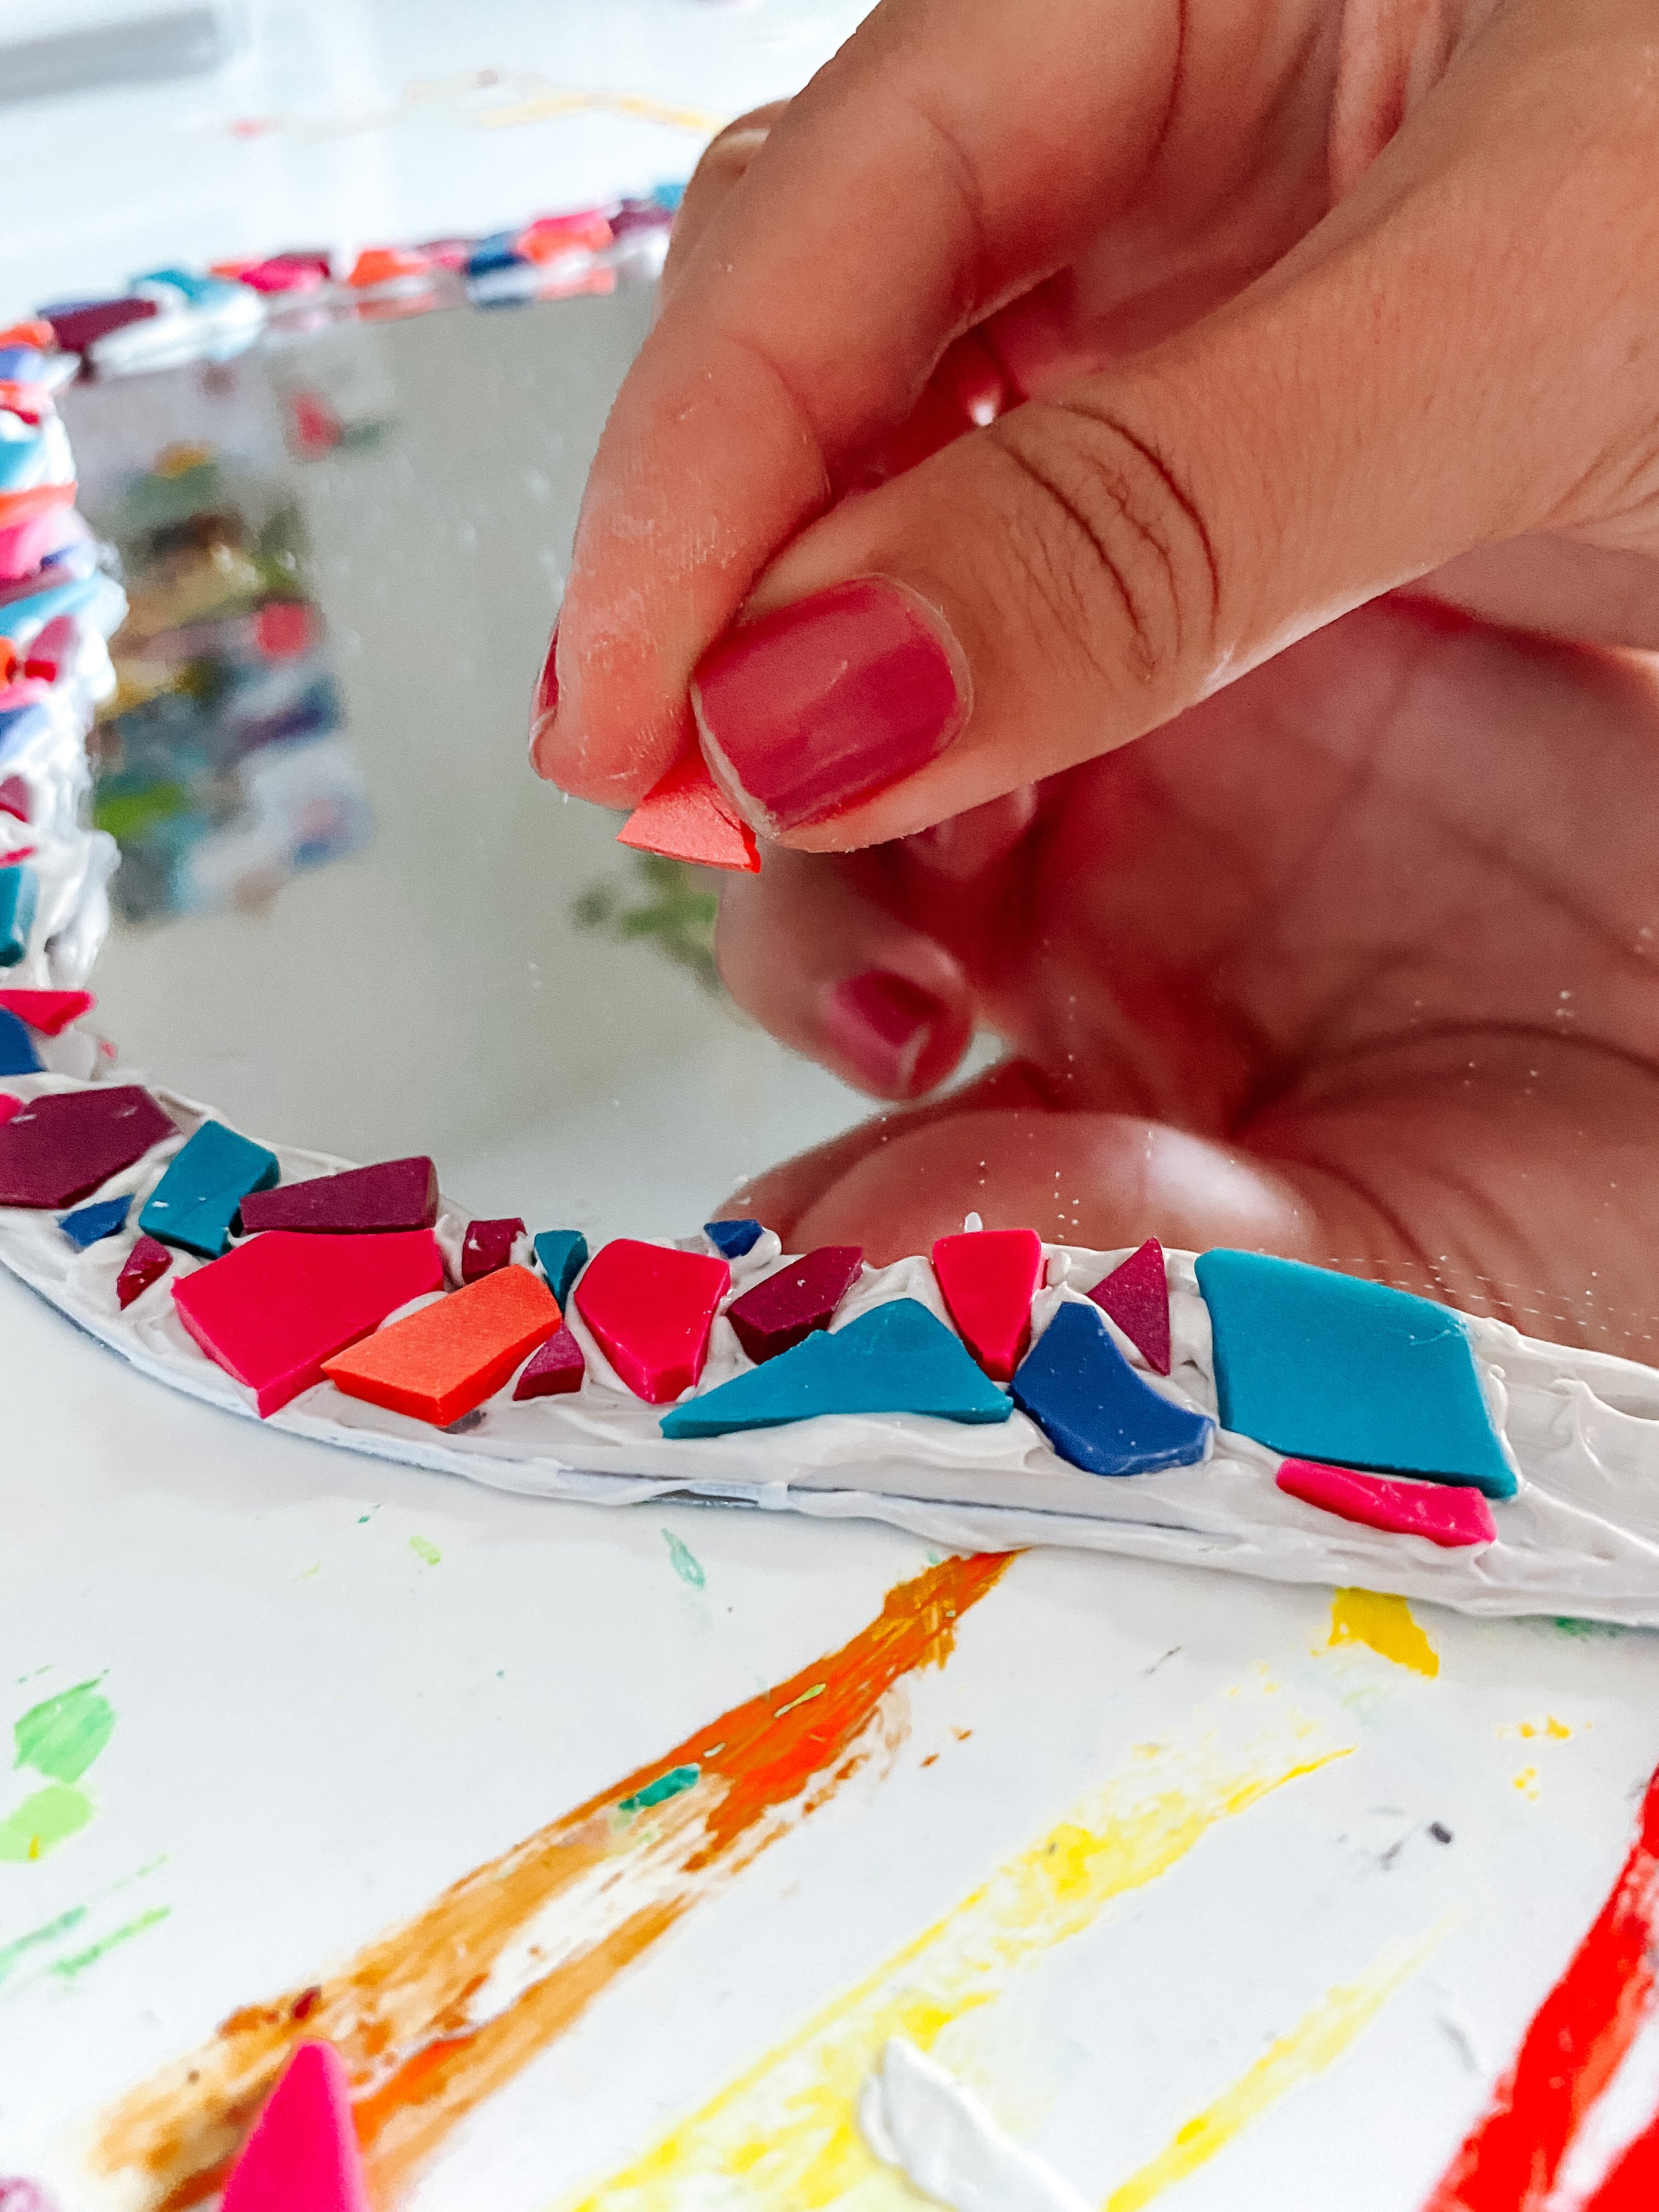
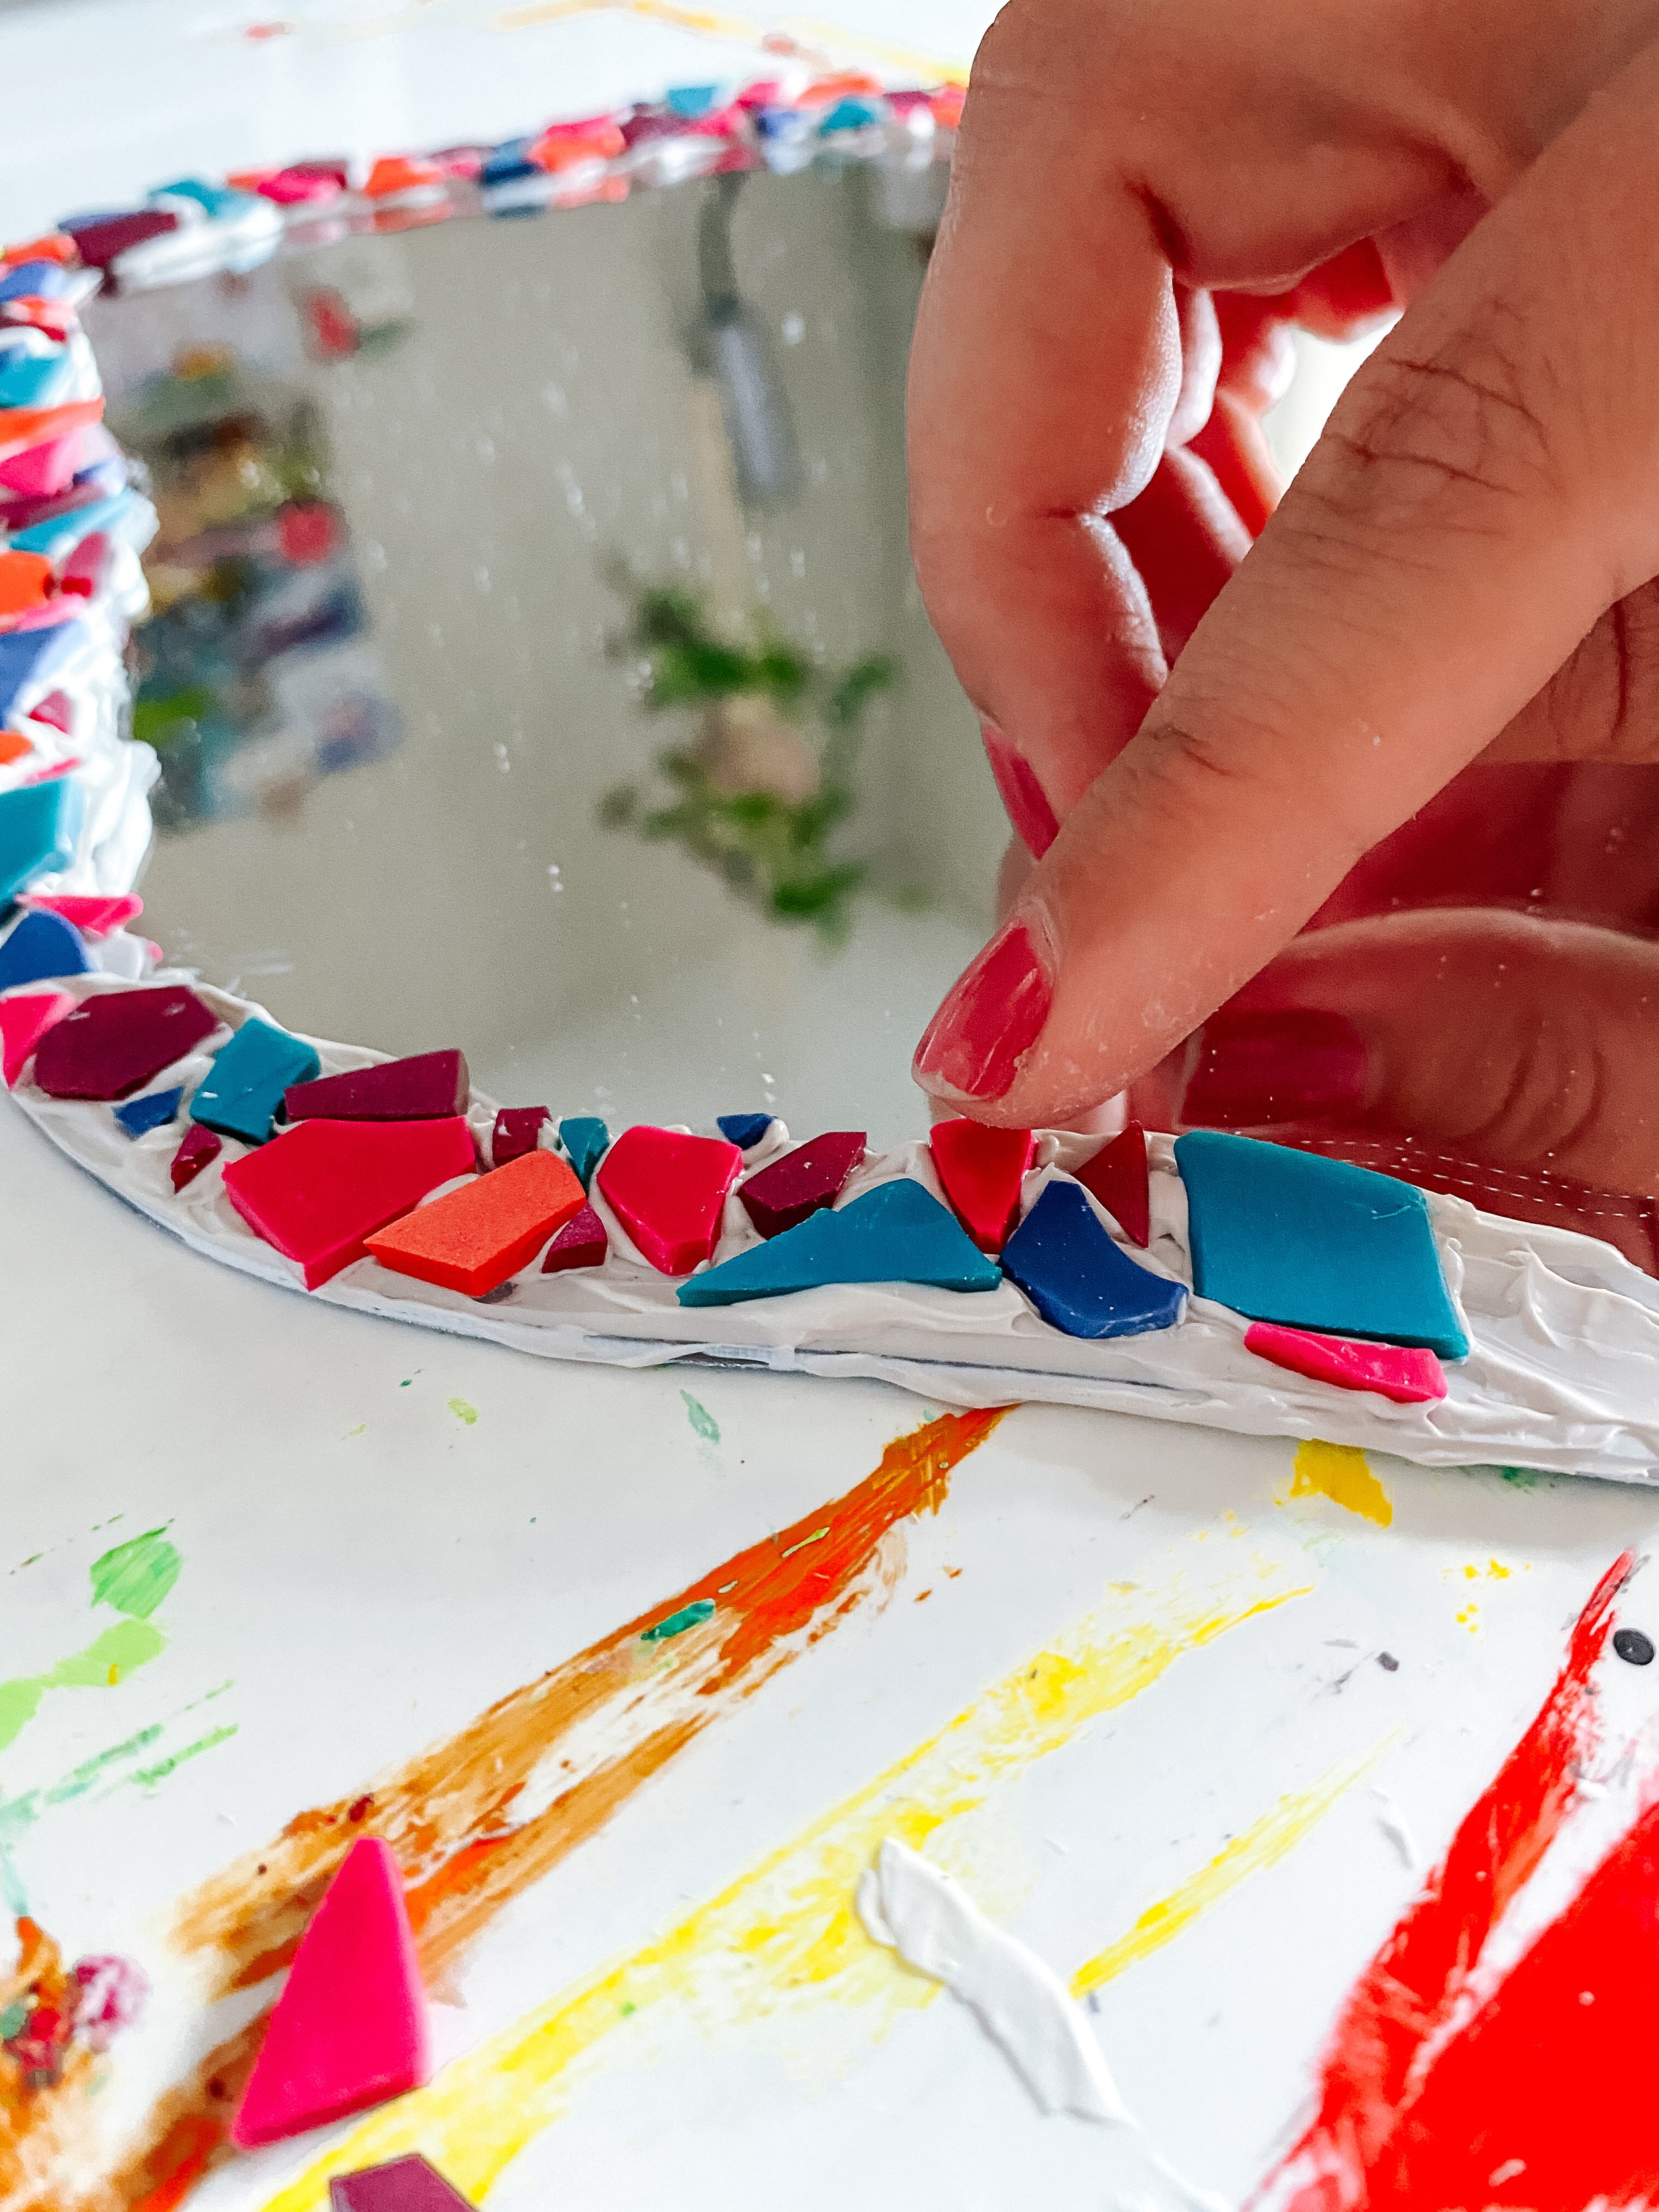
Note, if your mirror has a base like mine did, be sure to measure and not run the clay design all the way to the bottom or it won't sit in the base correctly.
Once you're finished, let the paste sit at least overnight to dry, depending on how thick it is, it may need longer.
While it dried I spray-painted the bases of my mirrors white to match.

Once it's all dried and you’ve cleaned your mirror, display it and enjoy the splash of color and tropical seaside vibes every time you use it!
I hope you create a lovely piece for your home and maybe even give one as a gift this holiday season! I hope this project brings you lot of joy as you create it and a lot of beauty each day as you use it to get ready.


If you create your own, please show me! Tag me on instagram @laurenlikesblog so I can see.
Thank you so much to Sculpey for partnering with me to create this post. All opinions and ideas are my own and please know that I only work with companies whose products I already own, use, and love.