
DIY Clay Earring Stand

Functional + aesthetically pleasing crafts are my specialty! When im designing a new craft, I want something functional and lovely to match my space that gives me a unique feel. If you, like me, have a few (100) too many pairs of (clay!) earrings and need a fun way to display them, today’s clay earring stand is perfect for you!
Im teaming up with Sculpey to teach you how to make these funky, lightweight, clay earring stands that will add a pop of 90’s Saved By The Bell vibes to your home - or any design you prefer.
Let’s get started!
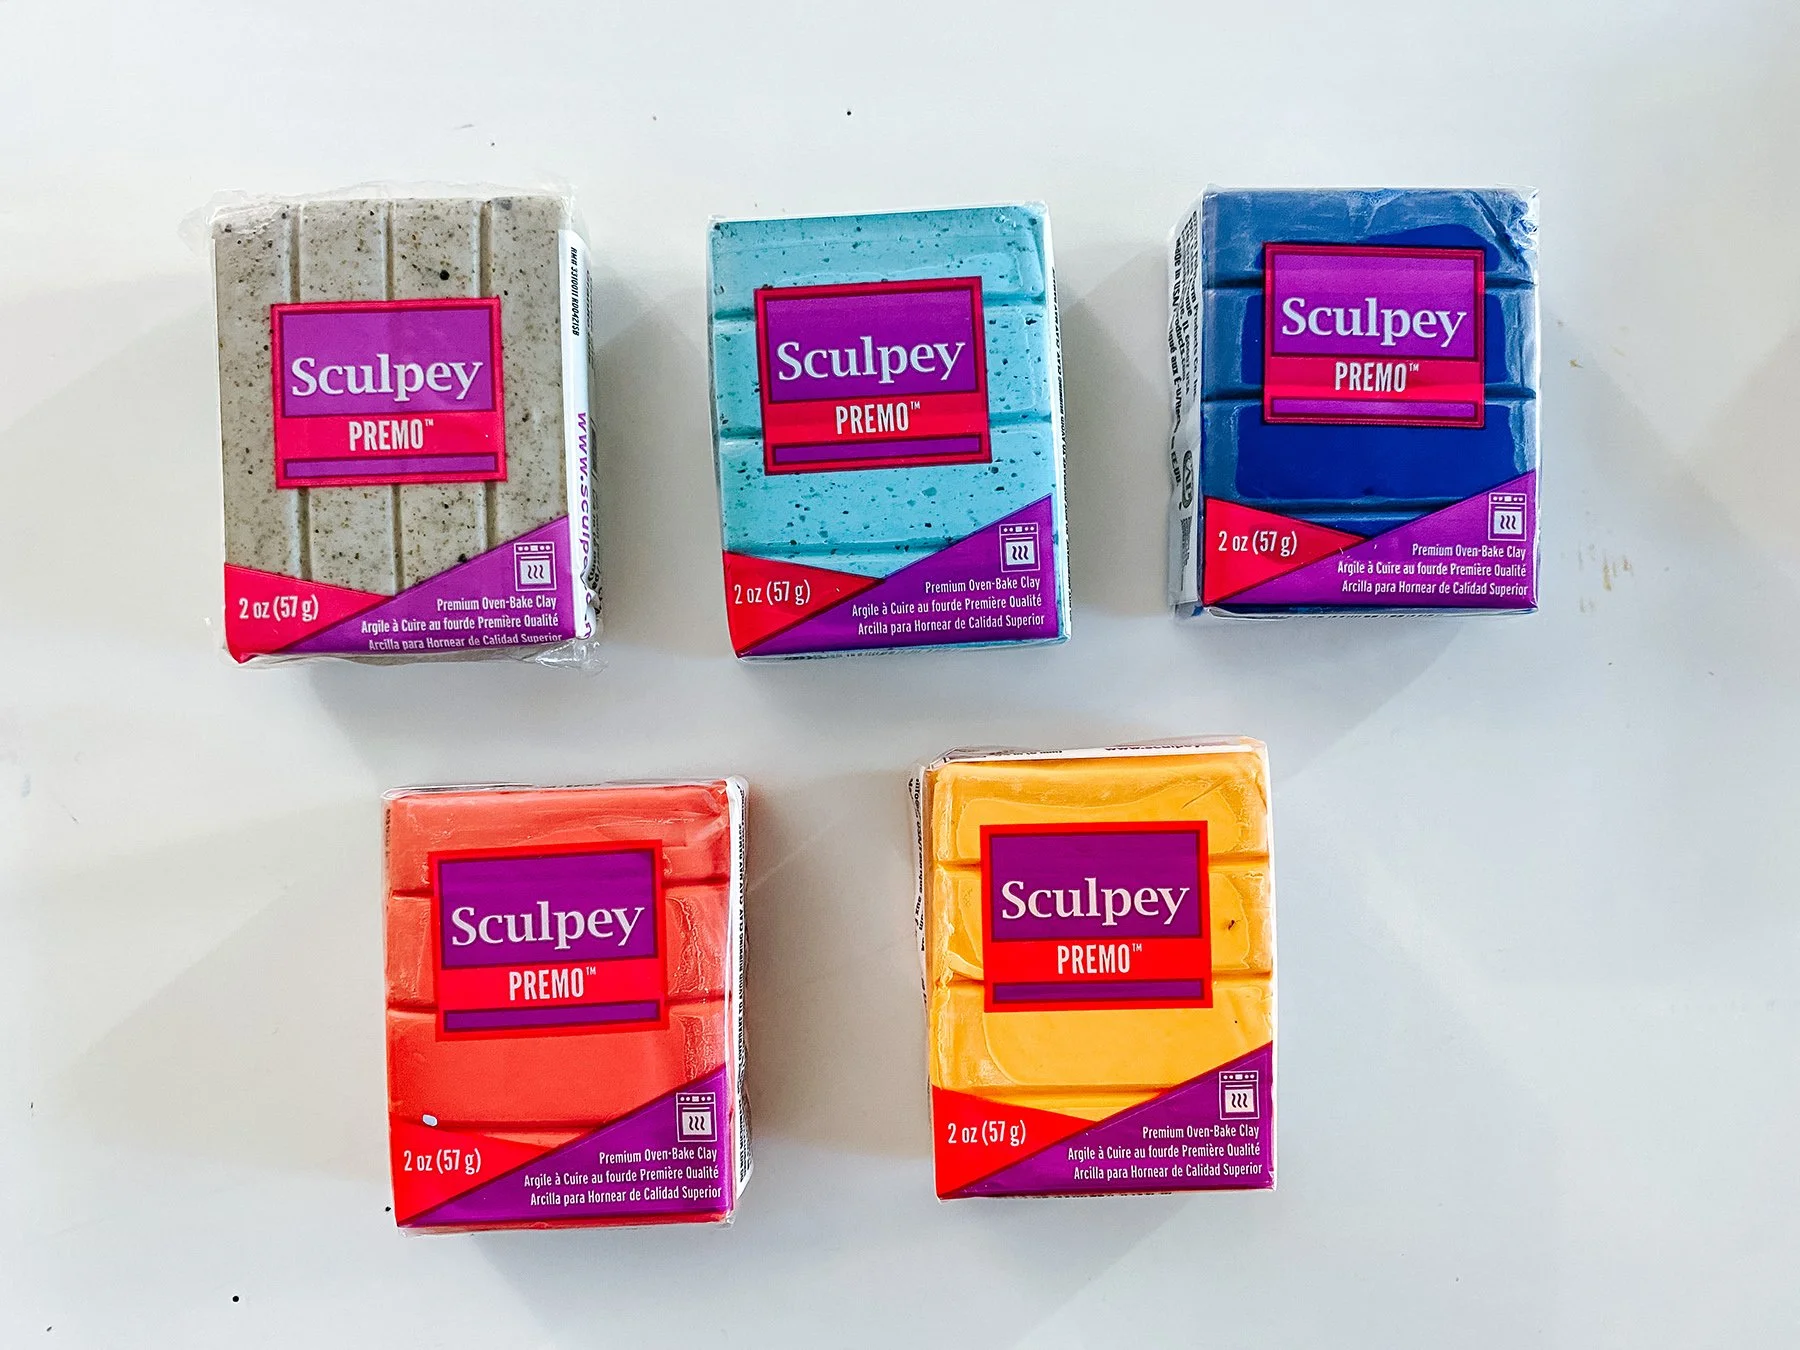
CLAY
Sculpey has some amazing colors that are exclusively available on their website and this pallet gave me that perfect FUN but muted color vibes, but you can use any colors that fit your home.
Premo is one of my favorite types of clay as its colors are not only gorgeous but also because of its flexibility - literally! This is an oven-baked clay that is super strong but flexible after baking so you can continue crafting with it - you can even stitch into it!! Clay is lightweight and holds up to everyday use really well. Plus! What you dont use won't dry out - it stays usable for multiple projects if you don’t use a whole bar, I keep mine sealed in an airtight container.
Grab your favorite colors from sculpey.com and let’s gather our supplies and get started!

SUPPLIES
Workspace
Clean surface such as a tile, wax paper or smooth desk
Tools
Roller (included in mix pack)
Clay blades are really handy (included in mix pack)
Exacto Knife
Cookie cutters in shapes you want to use
Clay
Baking
Baking Sheet
Oven
Piece of Paper
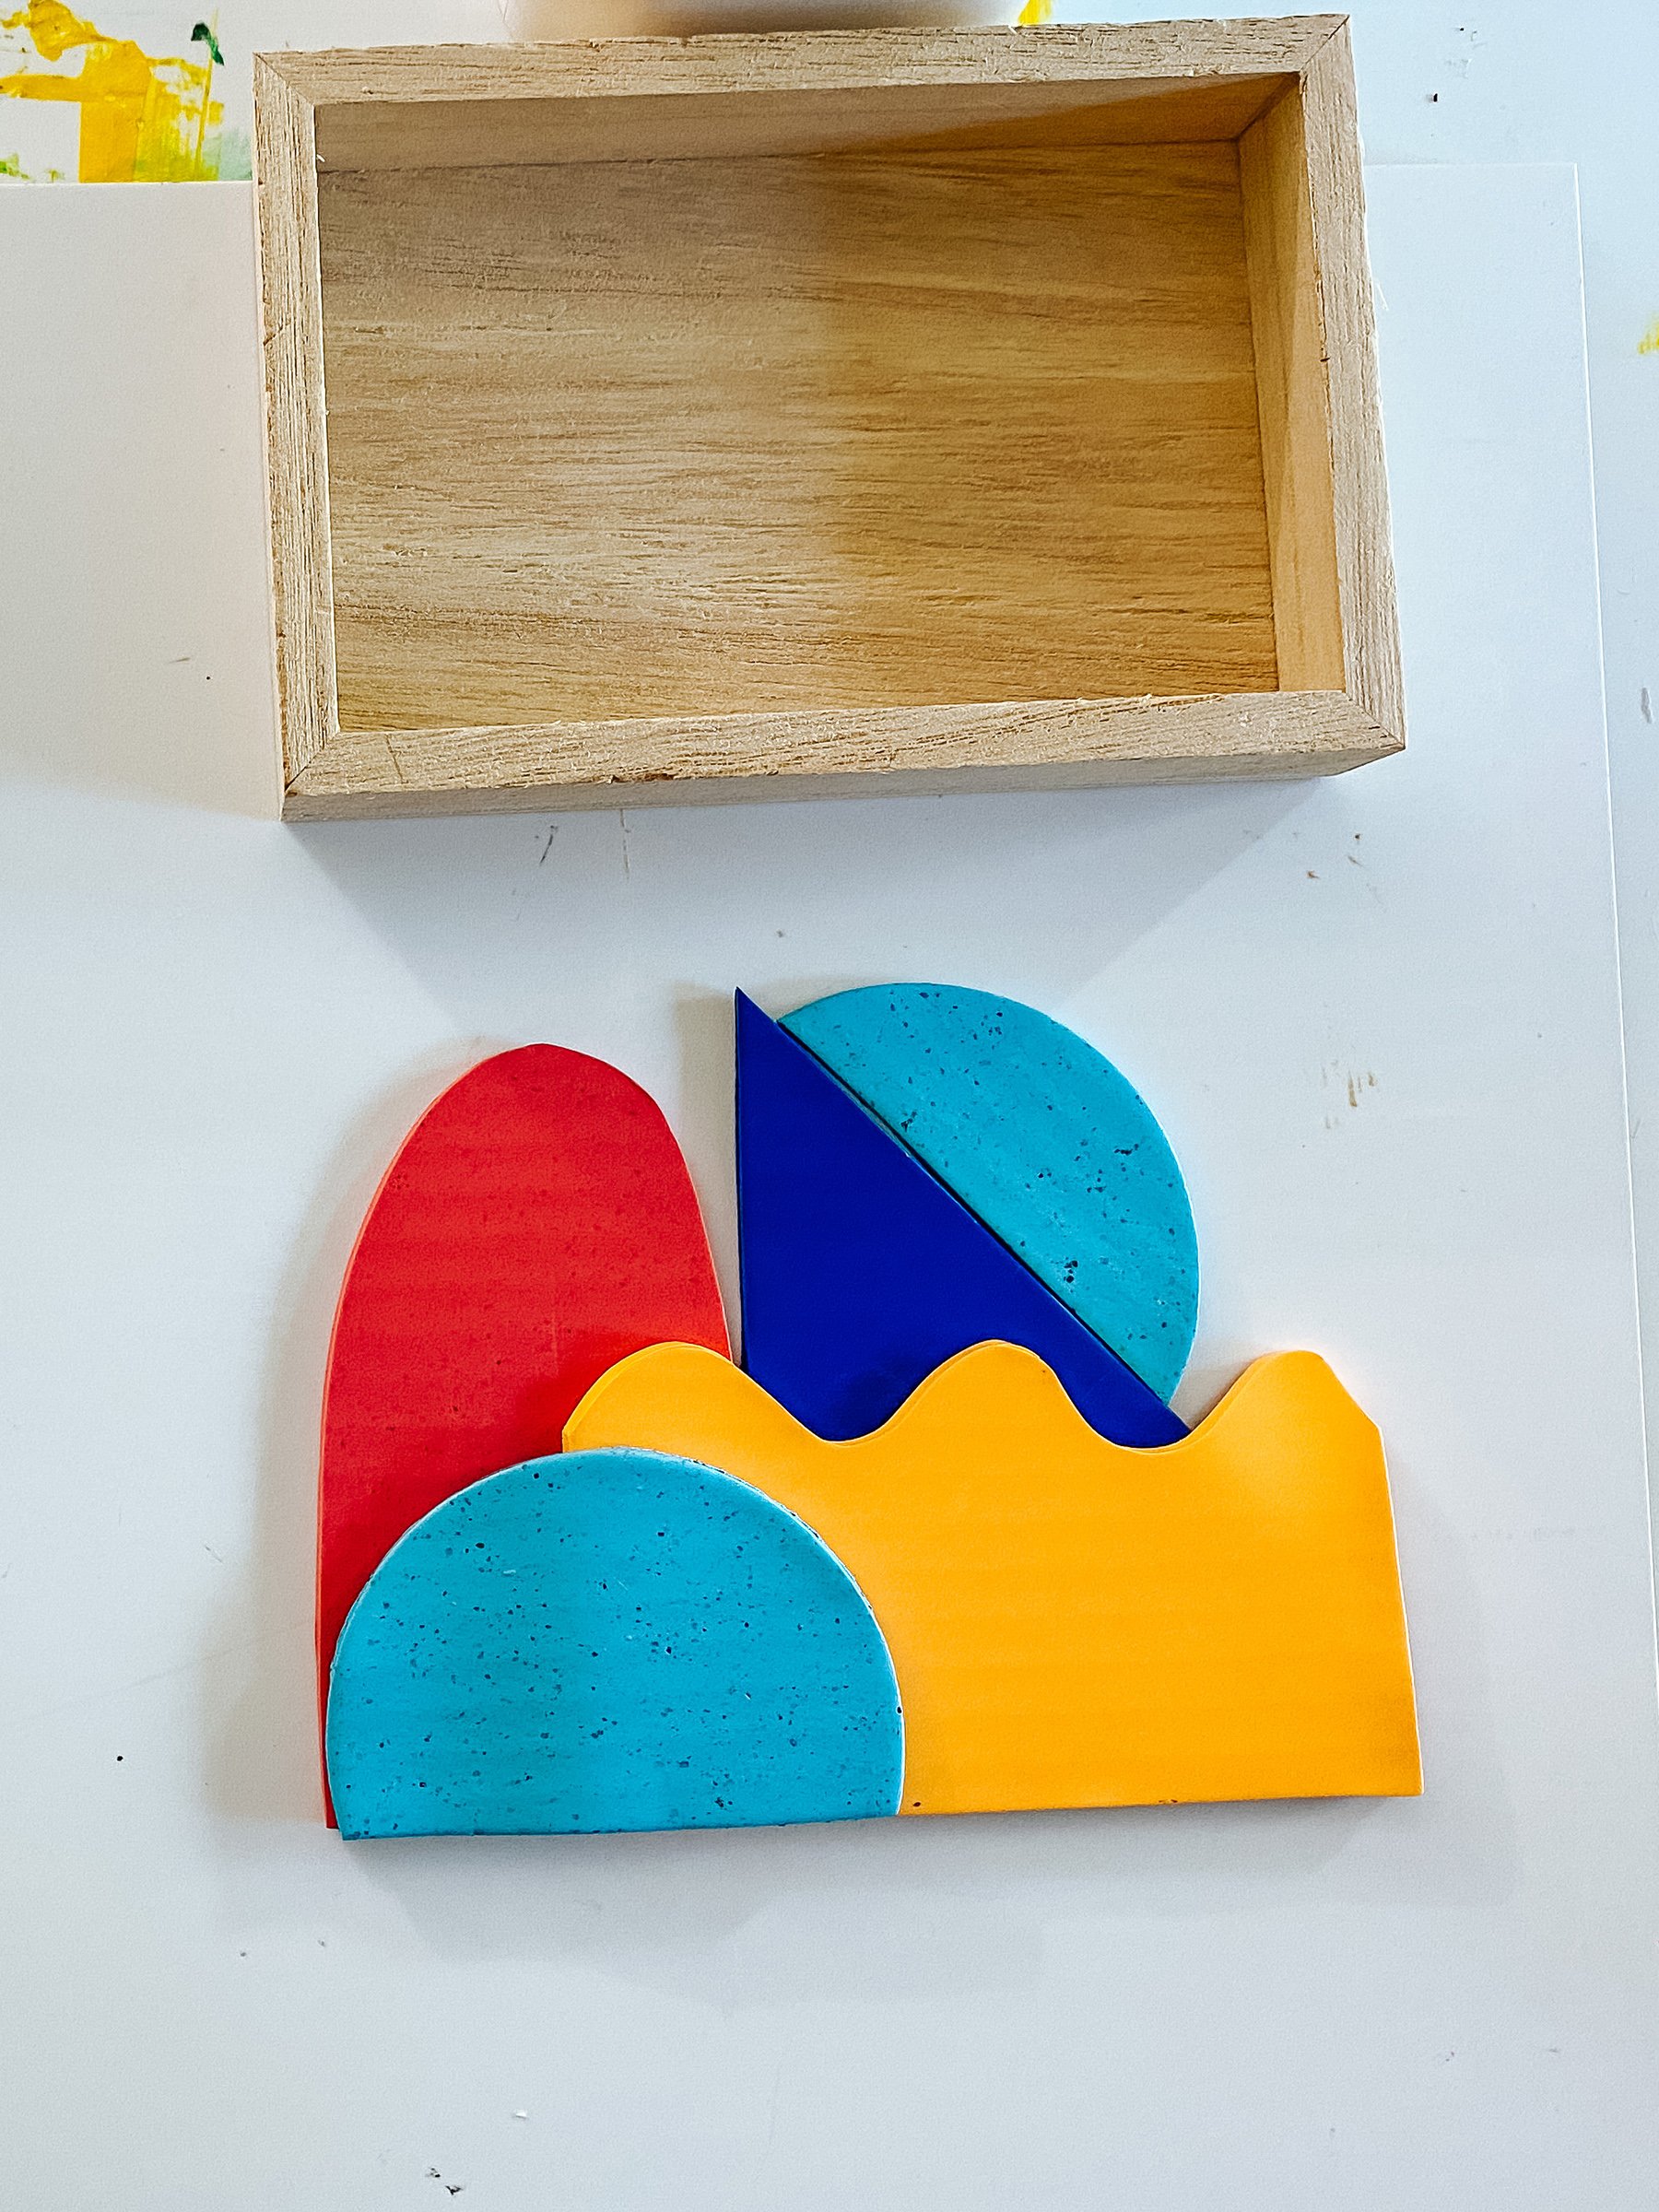
Trays:
I found these ‘trays’ at Michaels for 99cent but they were actually shadowboxes that I removed the hanging system from! You can use any tray that you like + matches and is the right size for your space
Glue:
Sculpey recommends using e6000 or Loctite Super Glue for a long-lasting hold
Sculpey oven bake clay adhesive: I used this to attach my pieces to one another
A note about your workspace:
You can use wax paper or a tile or just your table to work on. Just be sure it's really clean so your clay doesn’t pick up any fuzz or other colors, so be sure to wipe it down and wash your hands between colors.
LET'S CREATE!
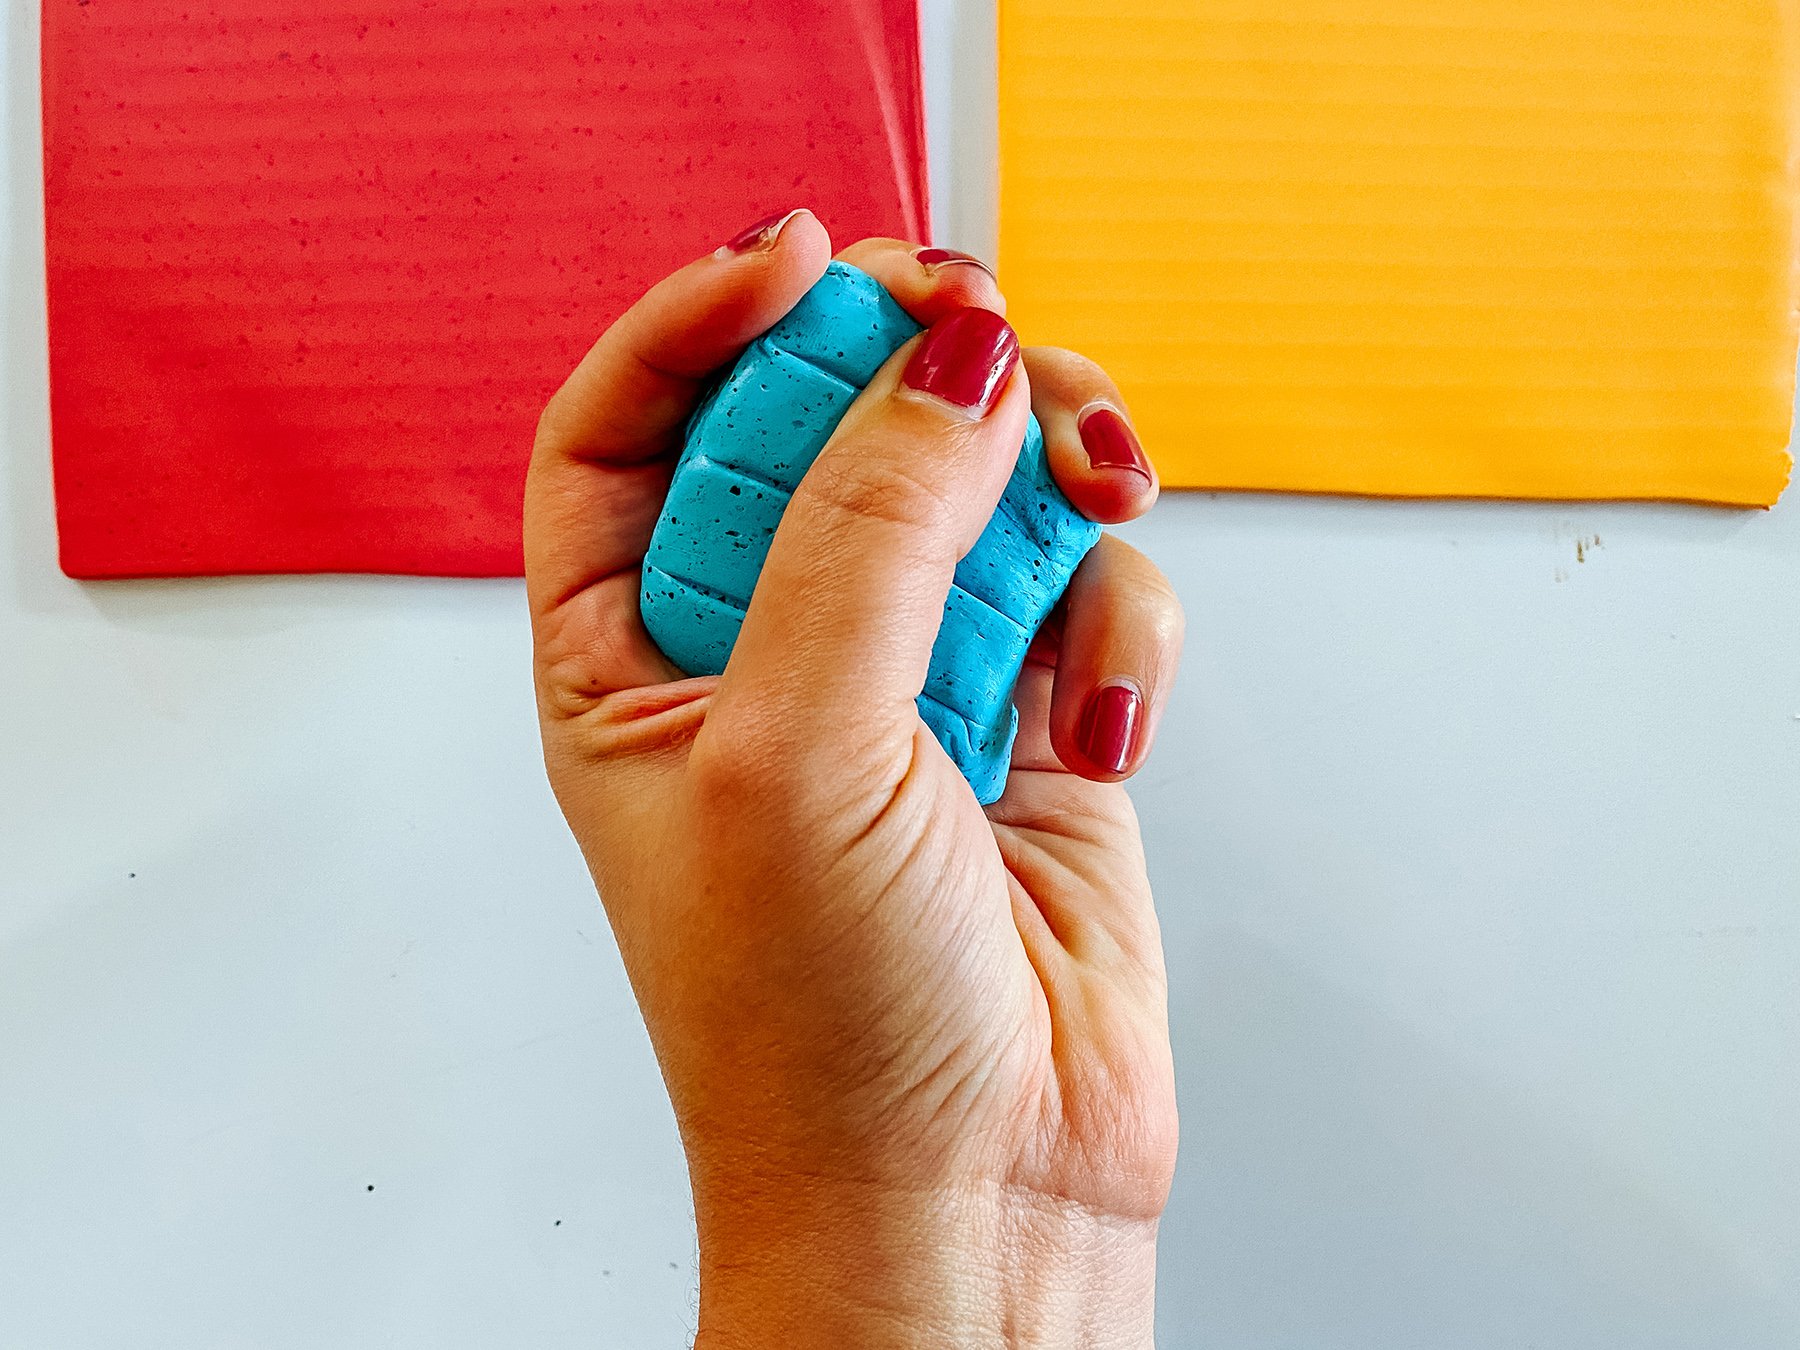
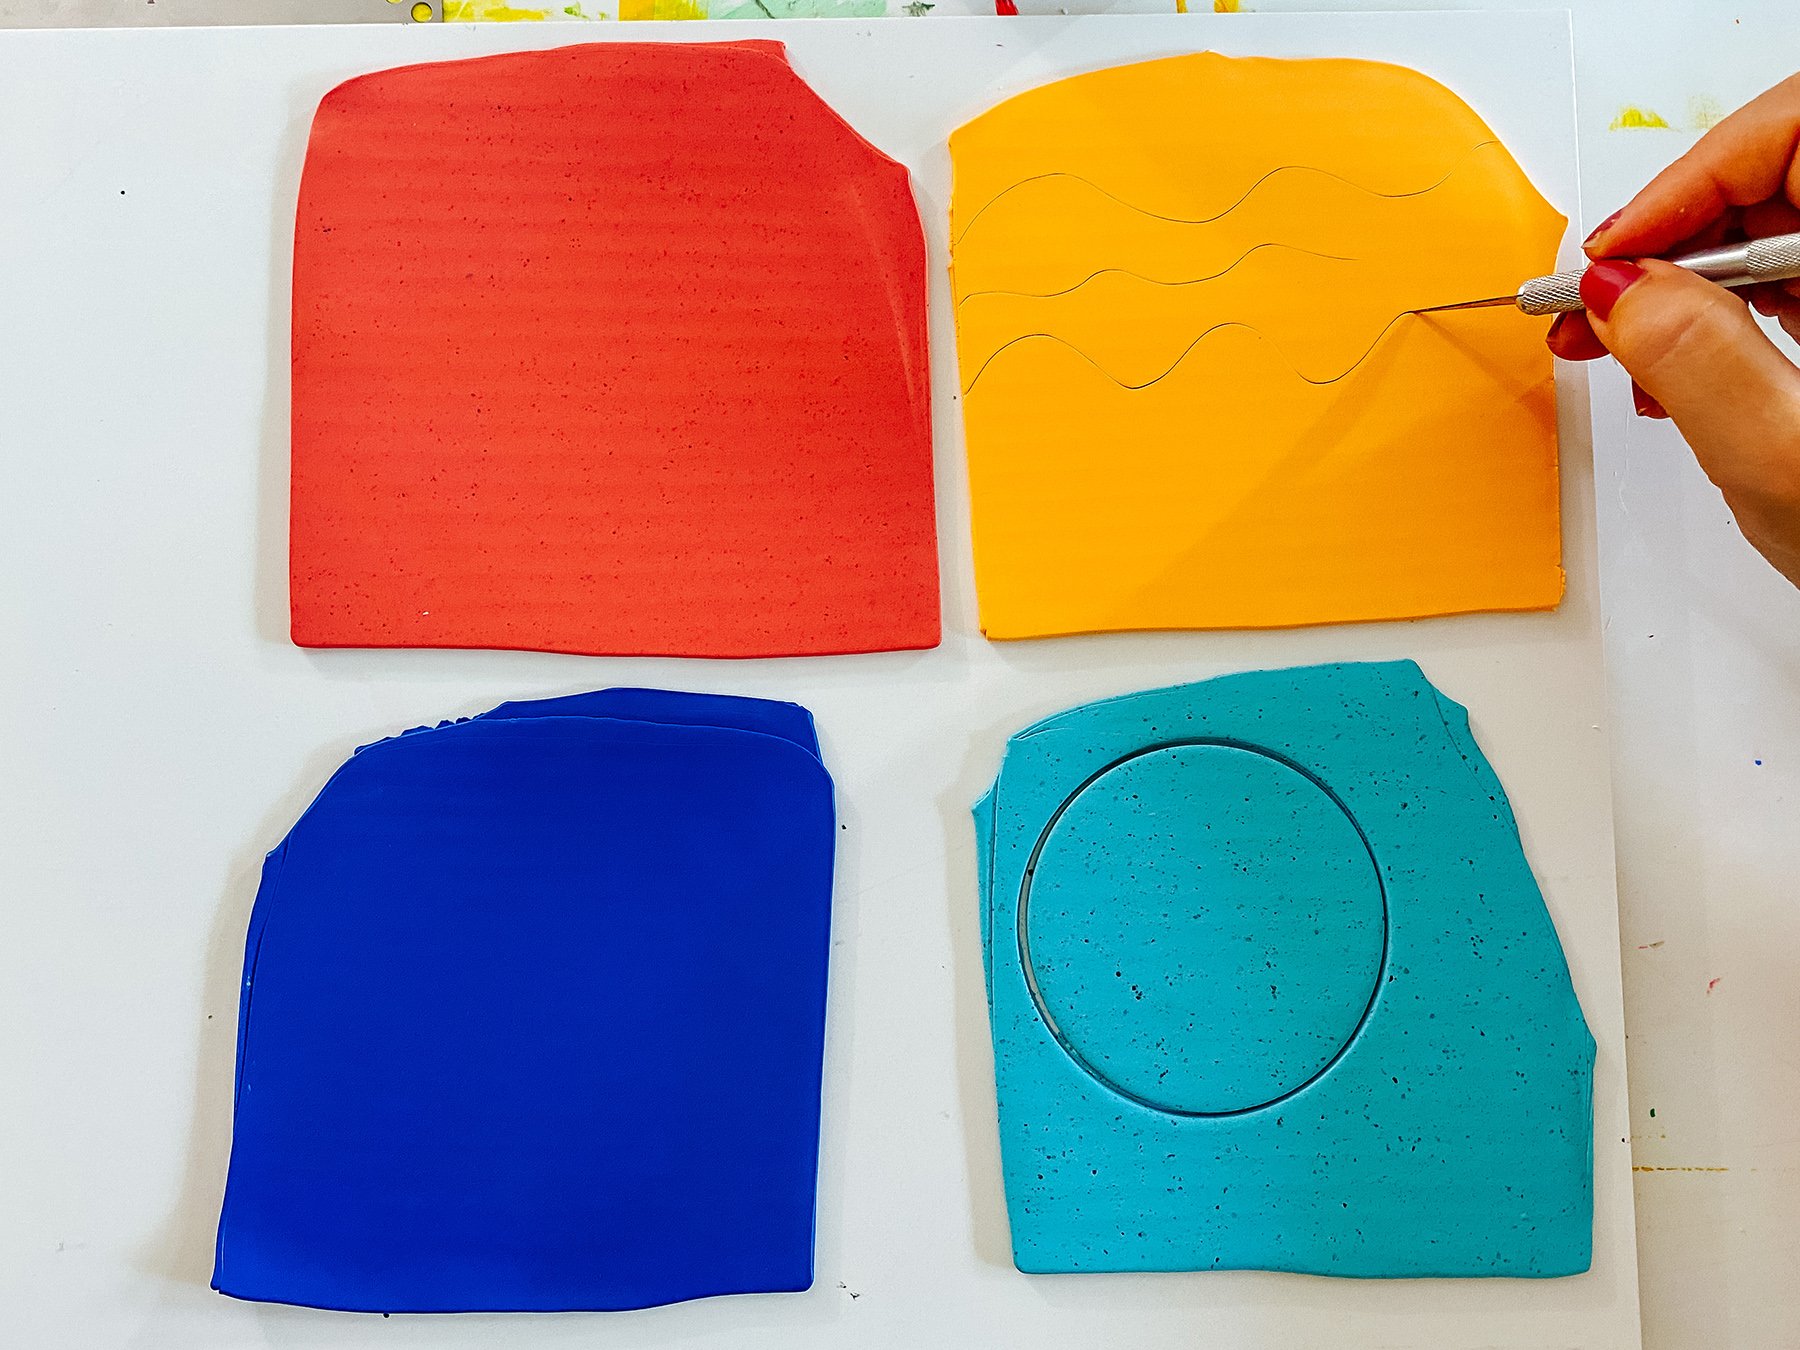
To get started you will need to condition your clay. You want it to be warm and smooth to the touch so it’s really malleable so you don’t get any air bubbles when you bake. Start by rolling it in your hands to warm it up and smash smash smash it until it’s really easy to work with. If it gets too hot and it’s sticking to your hands just let it sit out for a few minutes or pop it in the fridge and then come back to it. But this is a really important step because you need it to be as conditioned as possible to keep it from bubbling when you bake it.
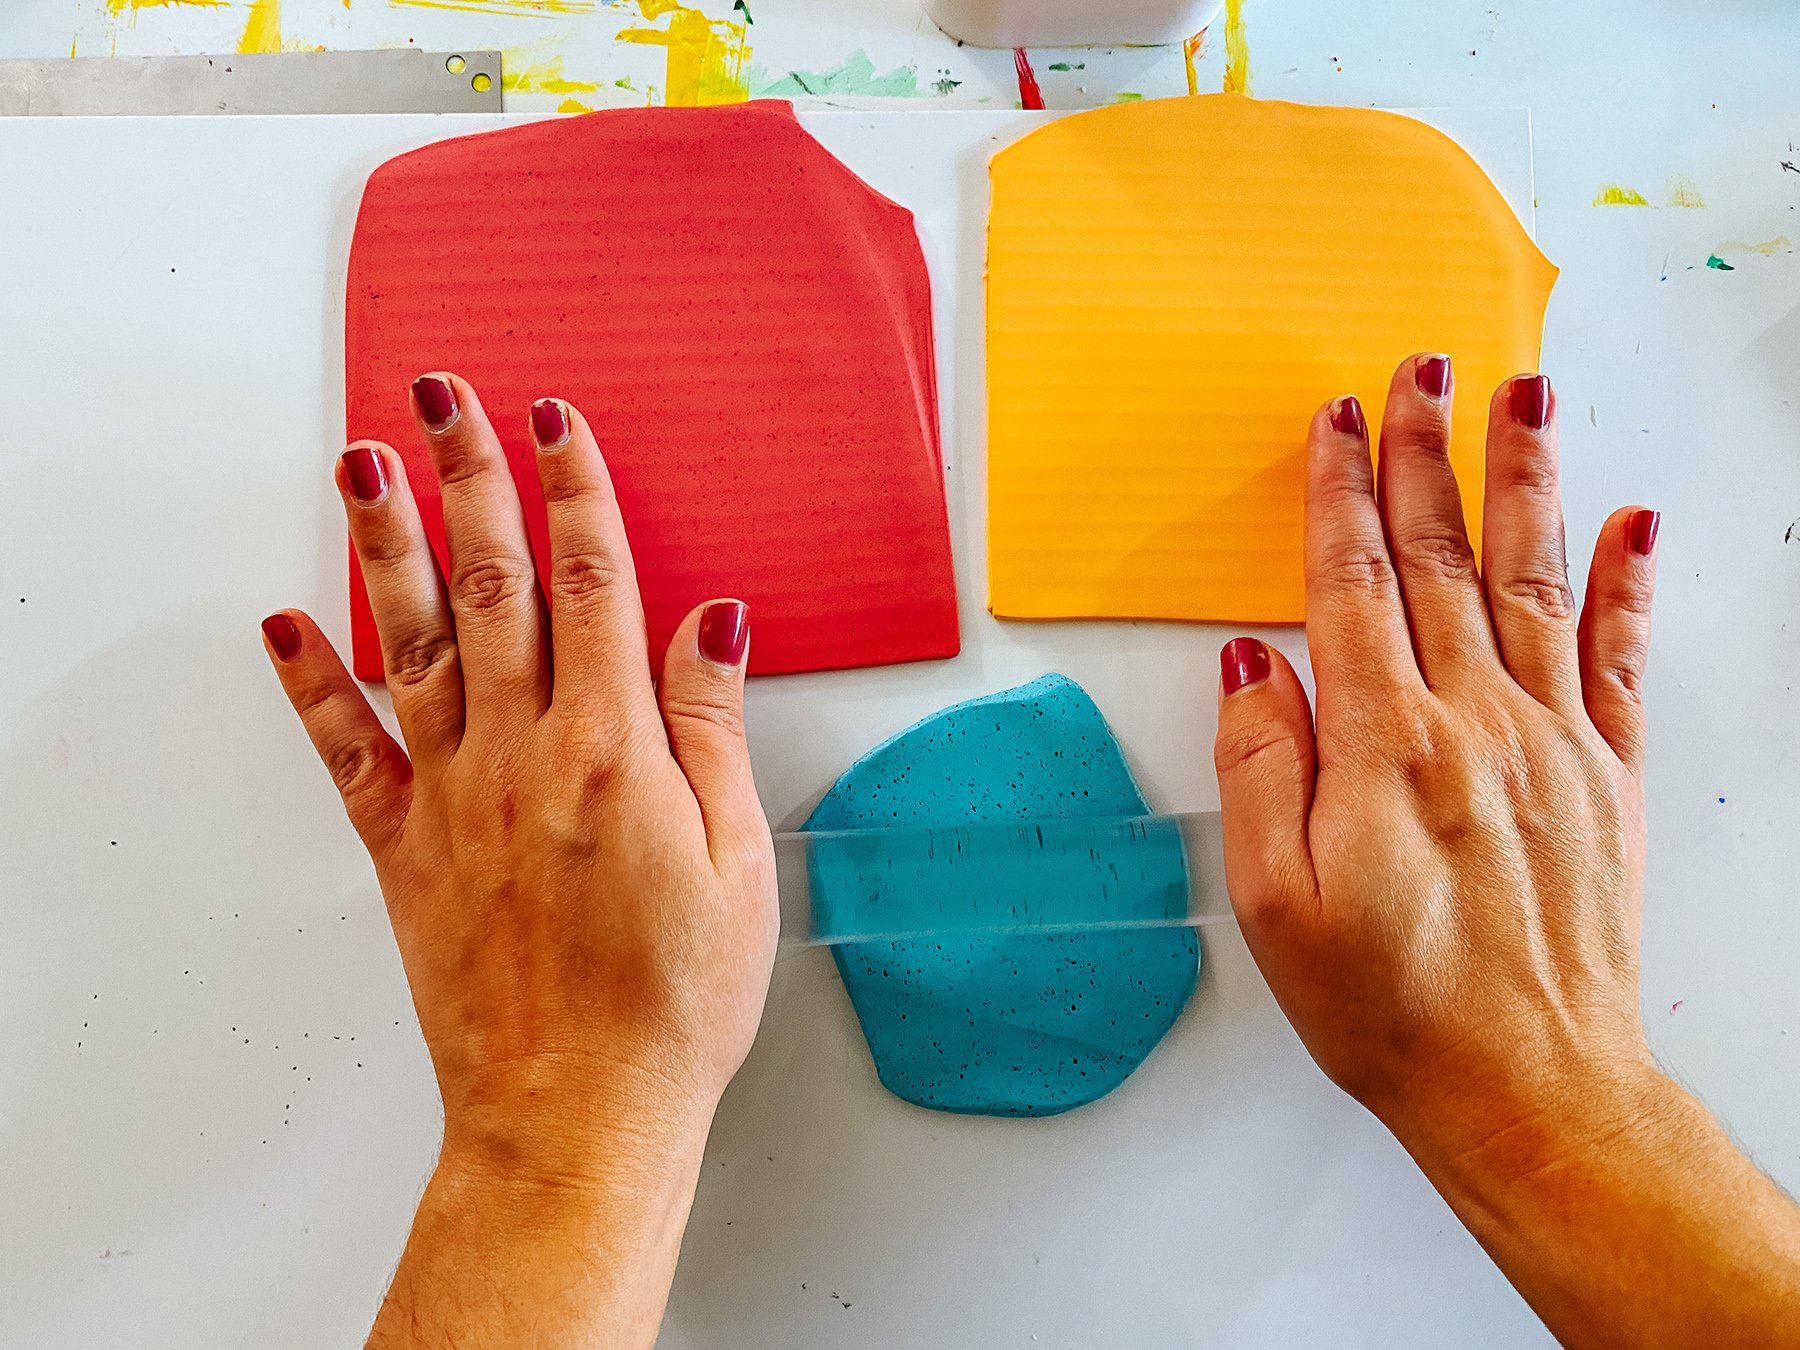
Next, you’re going to want to roll out a flat slab. You can do this by lying two of the same thickness rulers side-by-side and using them as your guide to make sure your surface is even. Shoot for about a quarter of an inch thick. You don’t want to go too thin or it’ll be impossible to work with, so ere on the side of thicker than thinner.
Now is when the fun starts!
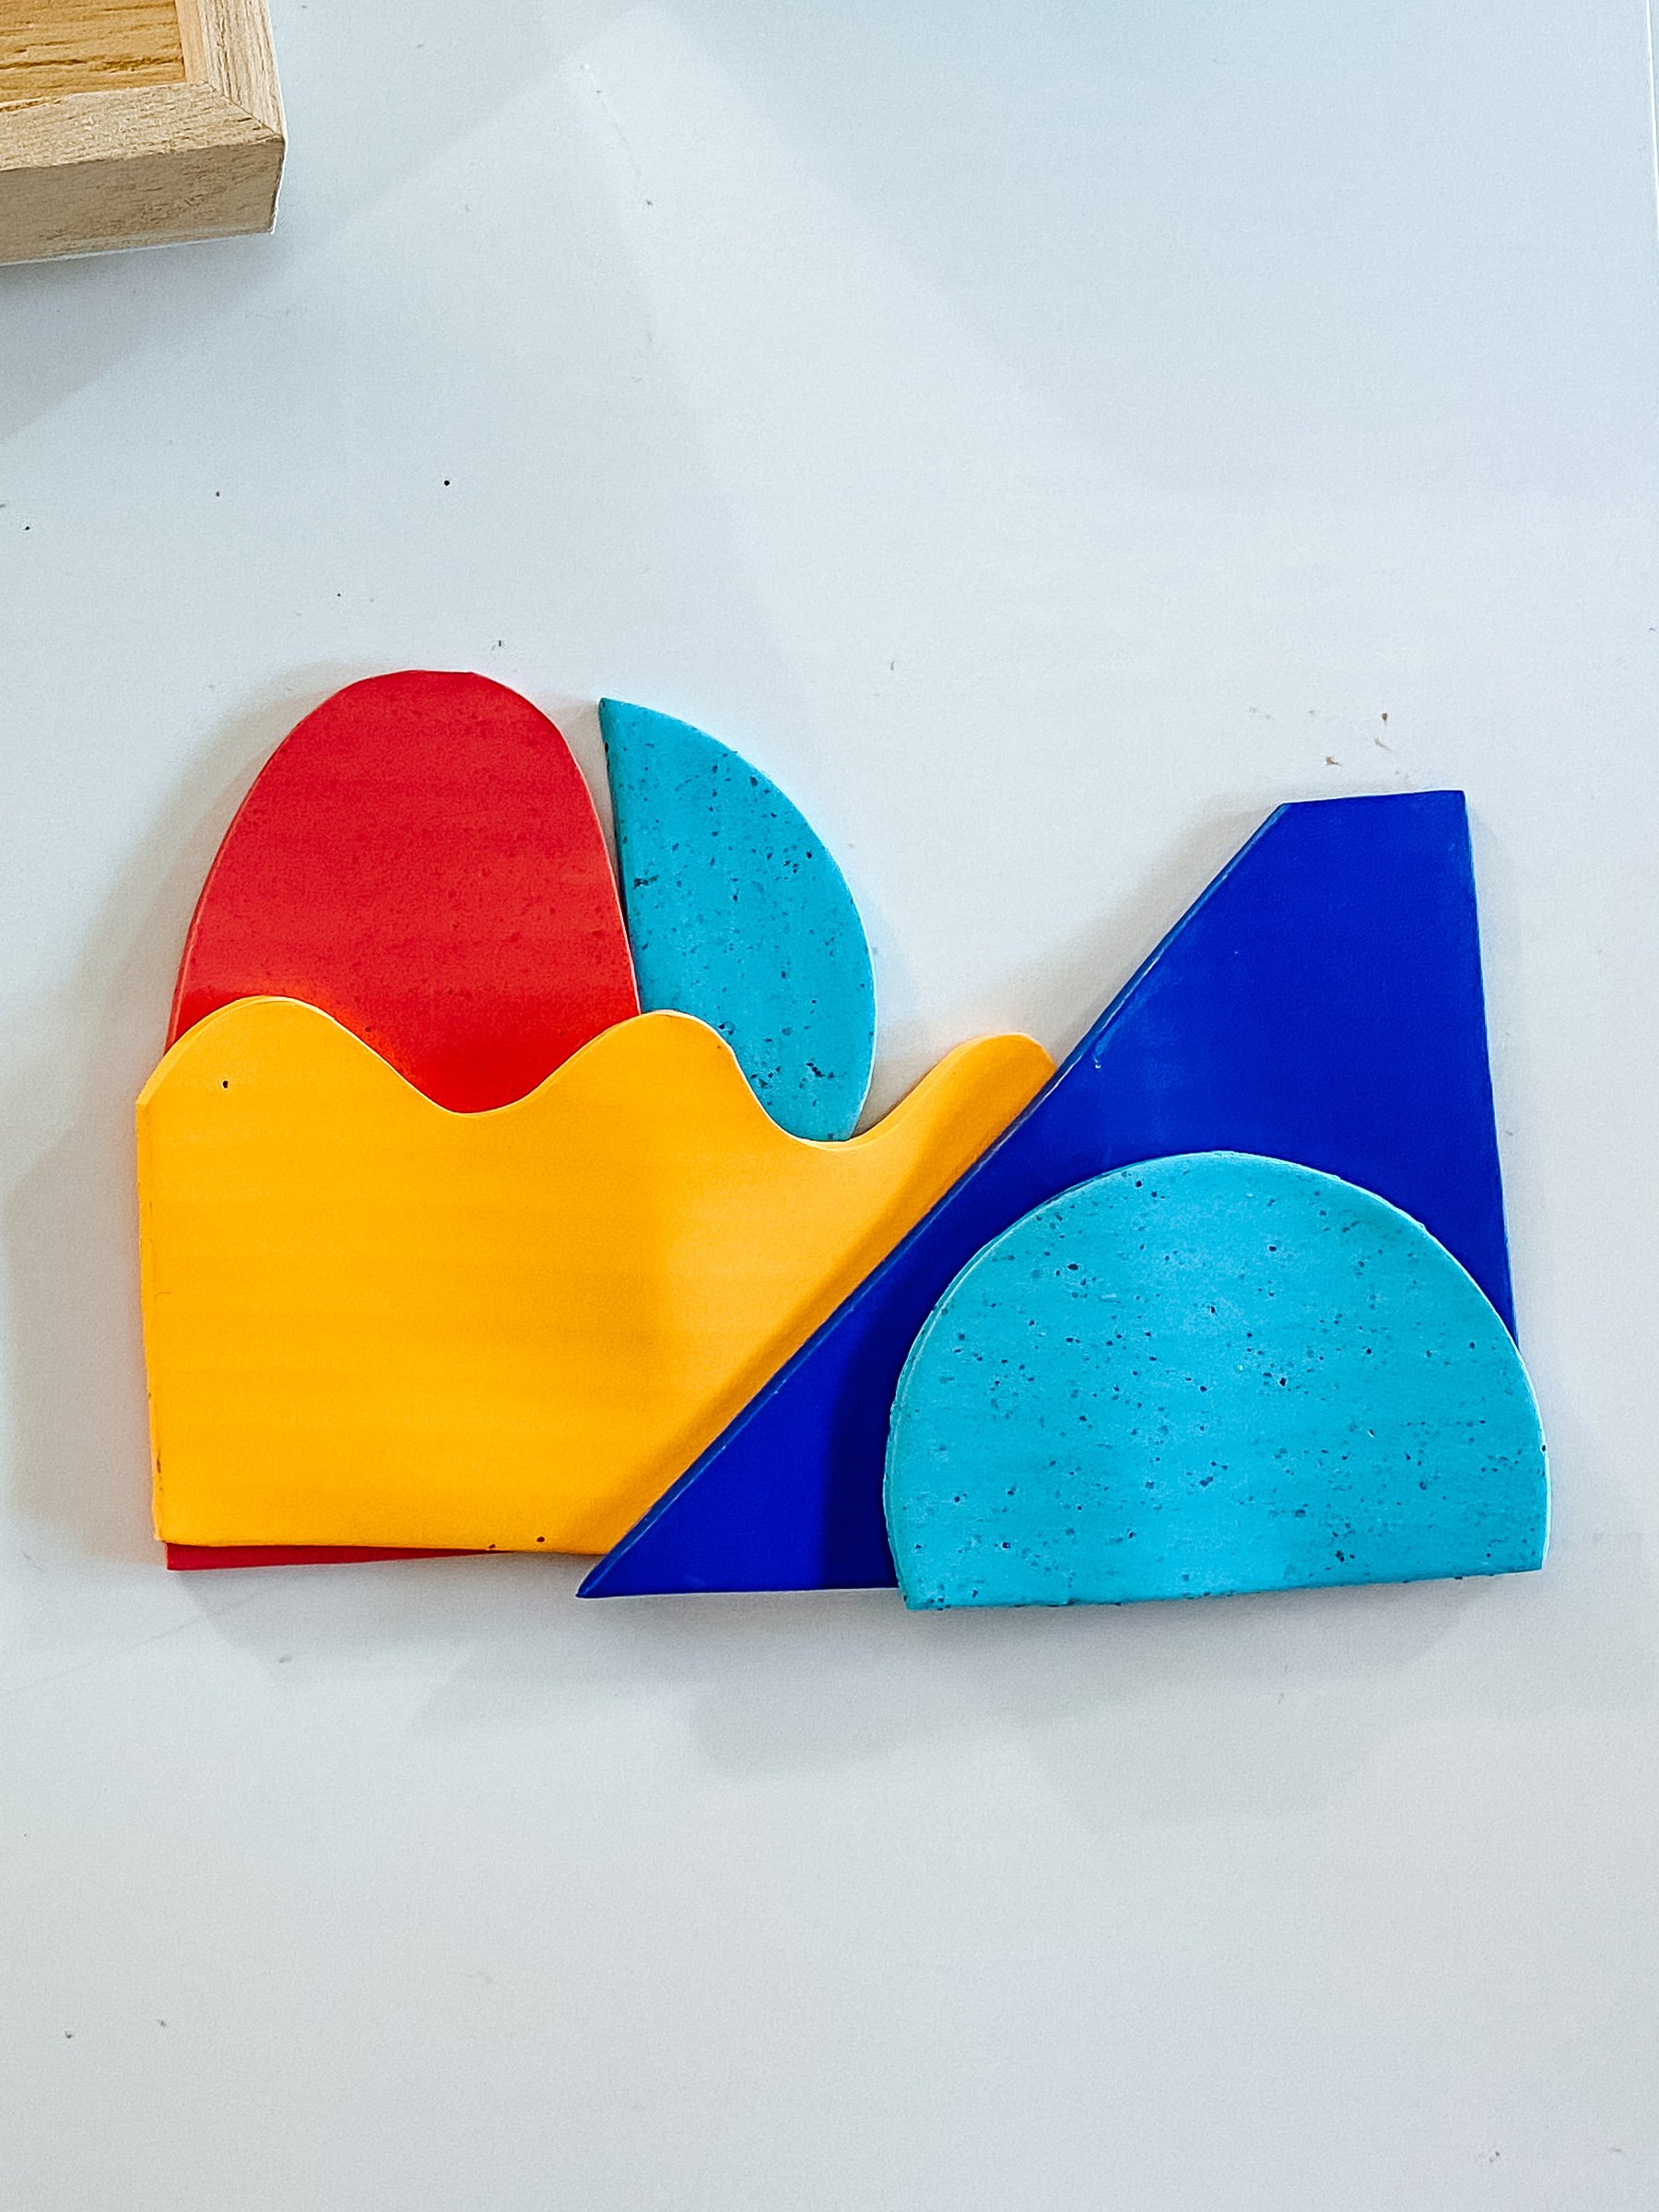
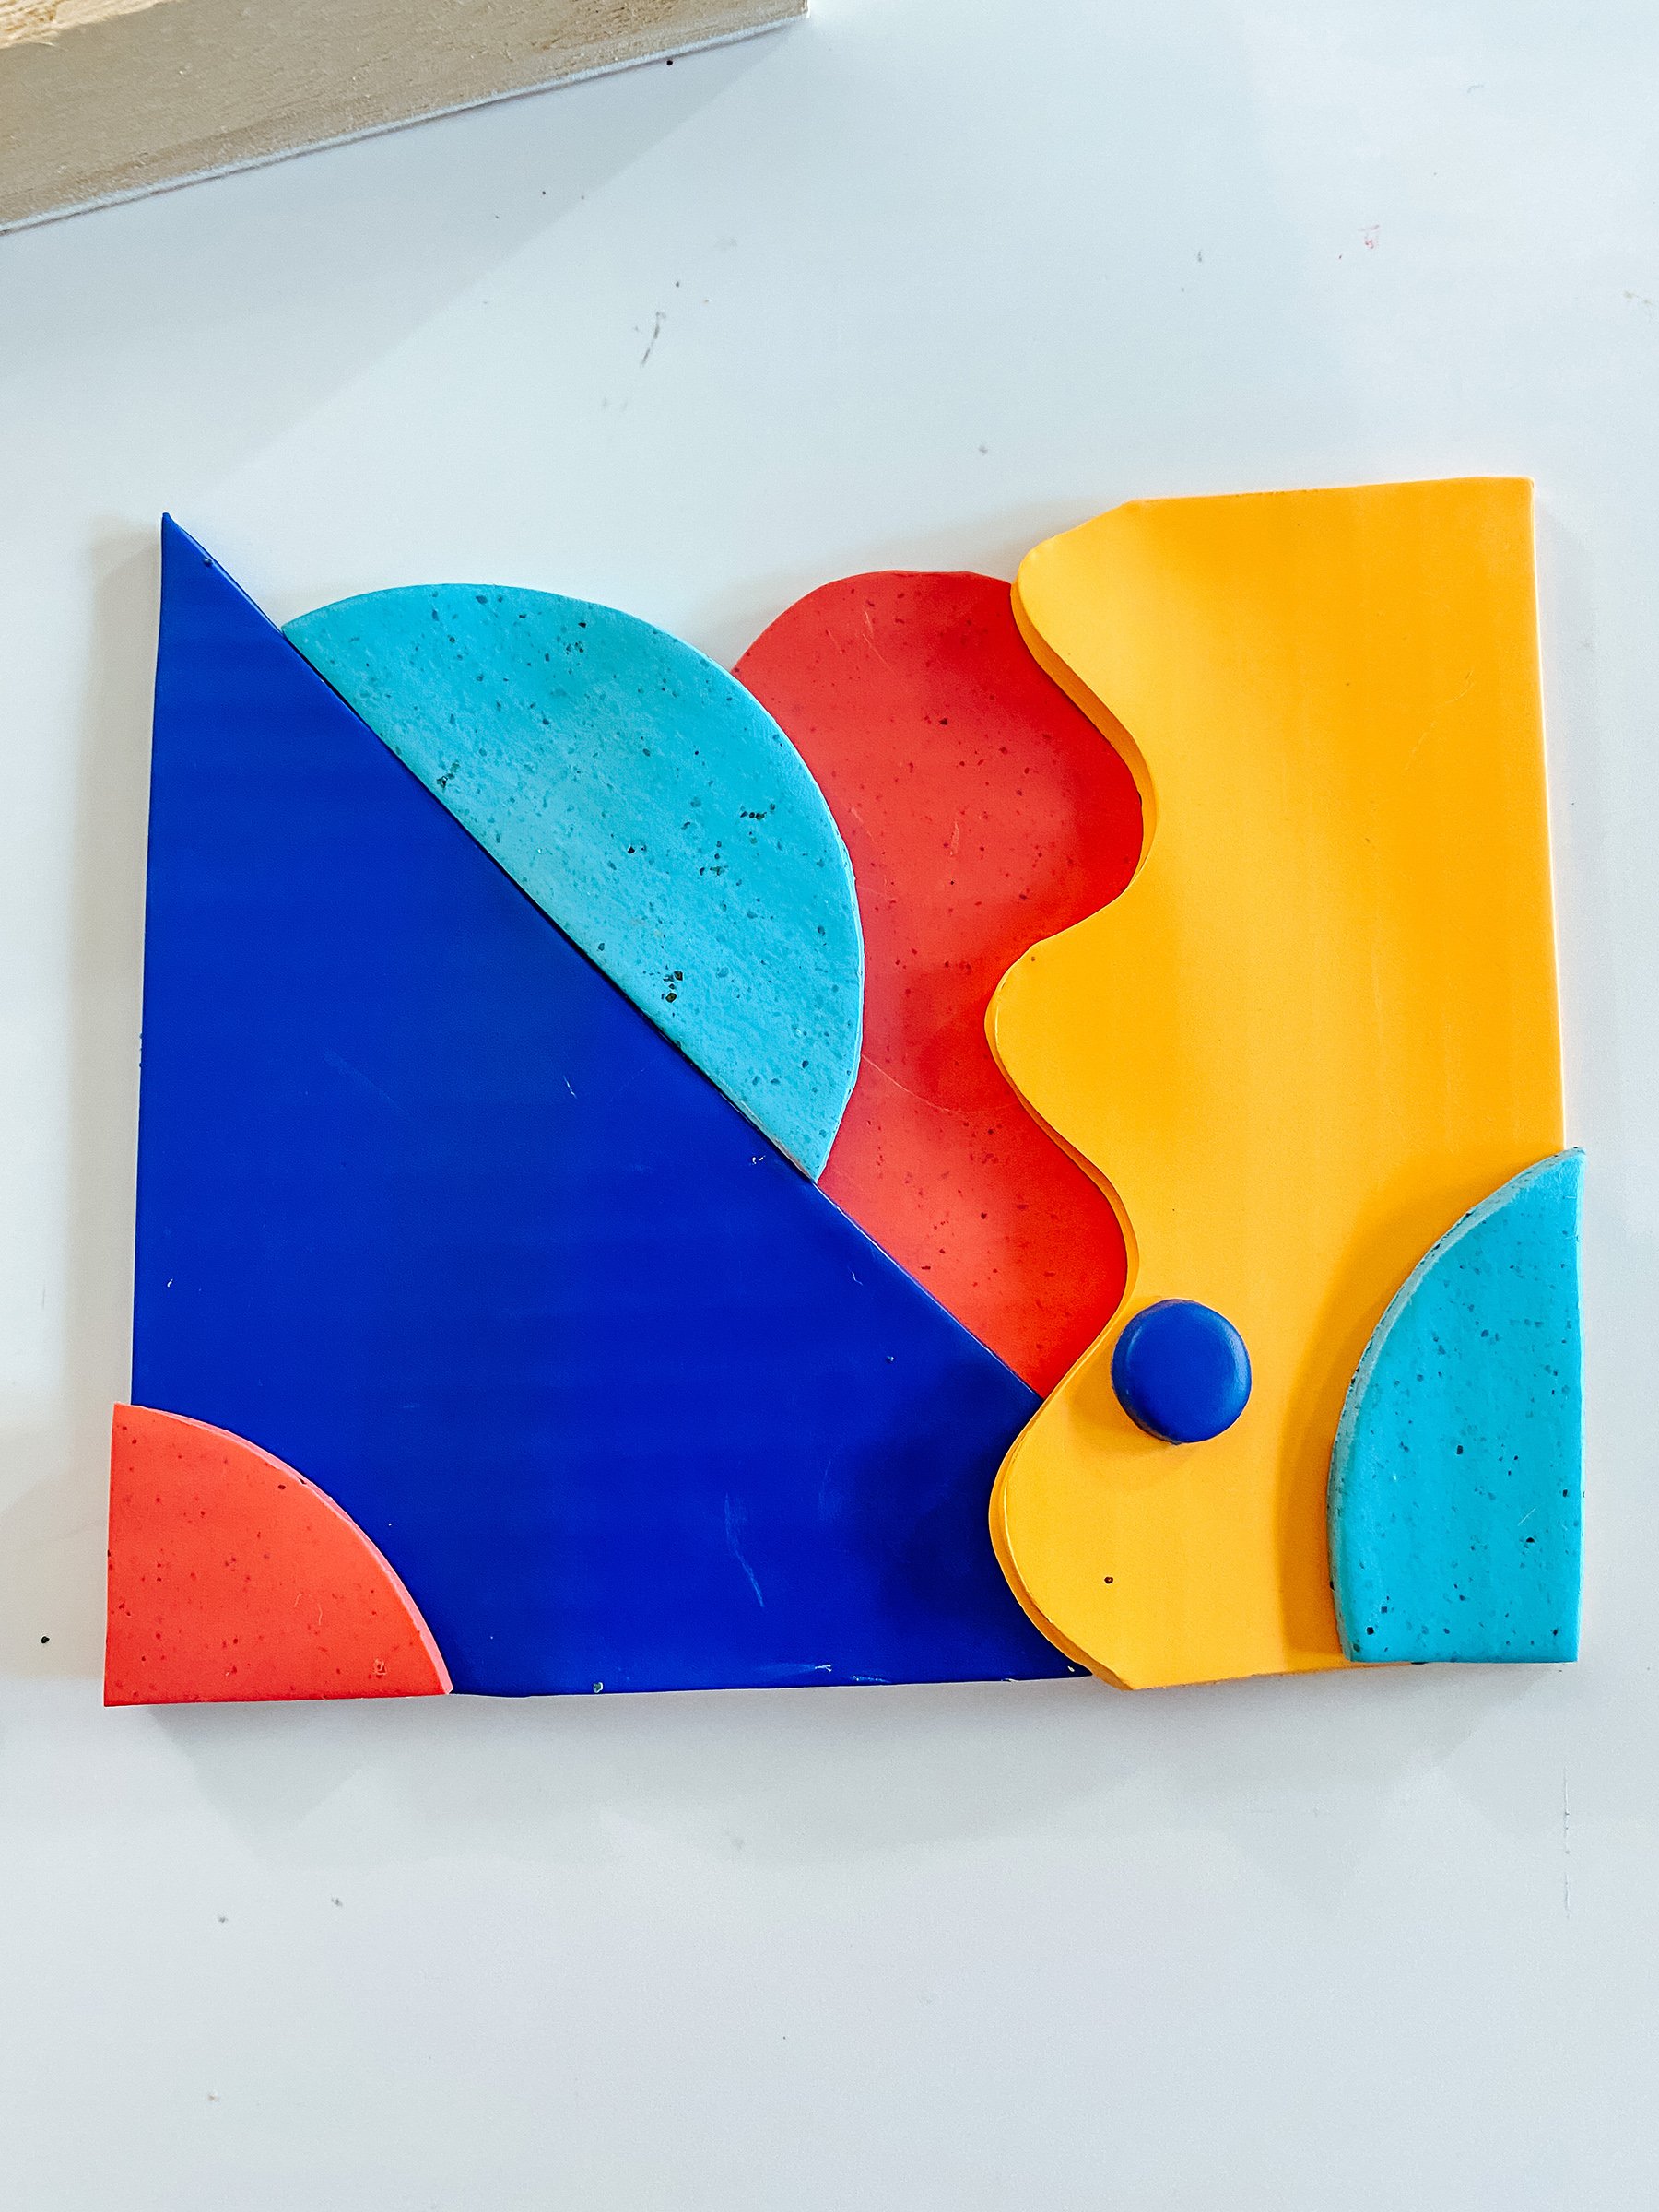
For the design part there are SO MANY POSSIBILITIES!! I chose to cut out organic, wonky shapes and create a design with them. You can do this or create your own! You could do a rainbow! A solid piece as a background with a design on top of it (polka dots!!, etc) or you could even do themed ones to display your halloween or christmas jewelry, etc.
Here is how I created mine:
Once I conditioned my colors, I added some of the granite to the coral to give it that fun speckled look. It barely shifts the color of the base clay you are using, it mainly just adds the speckles. You can see here that i’ve used ¾ of one of the 4 bars in a clay package mixed in with an entire package of coral.
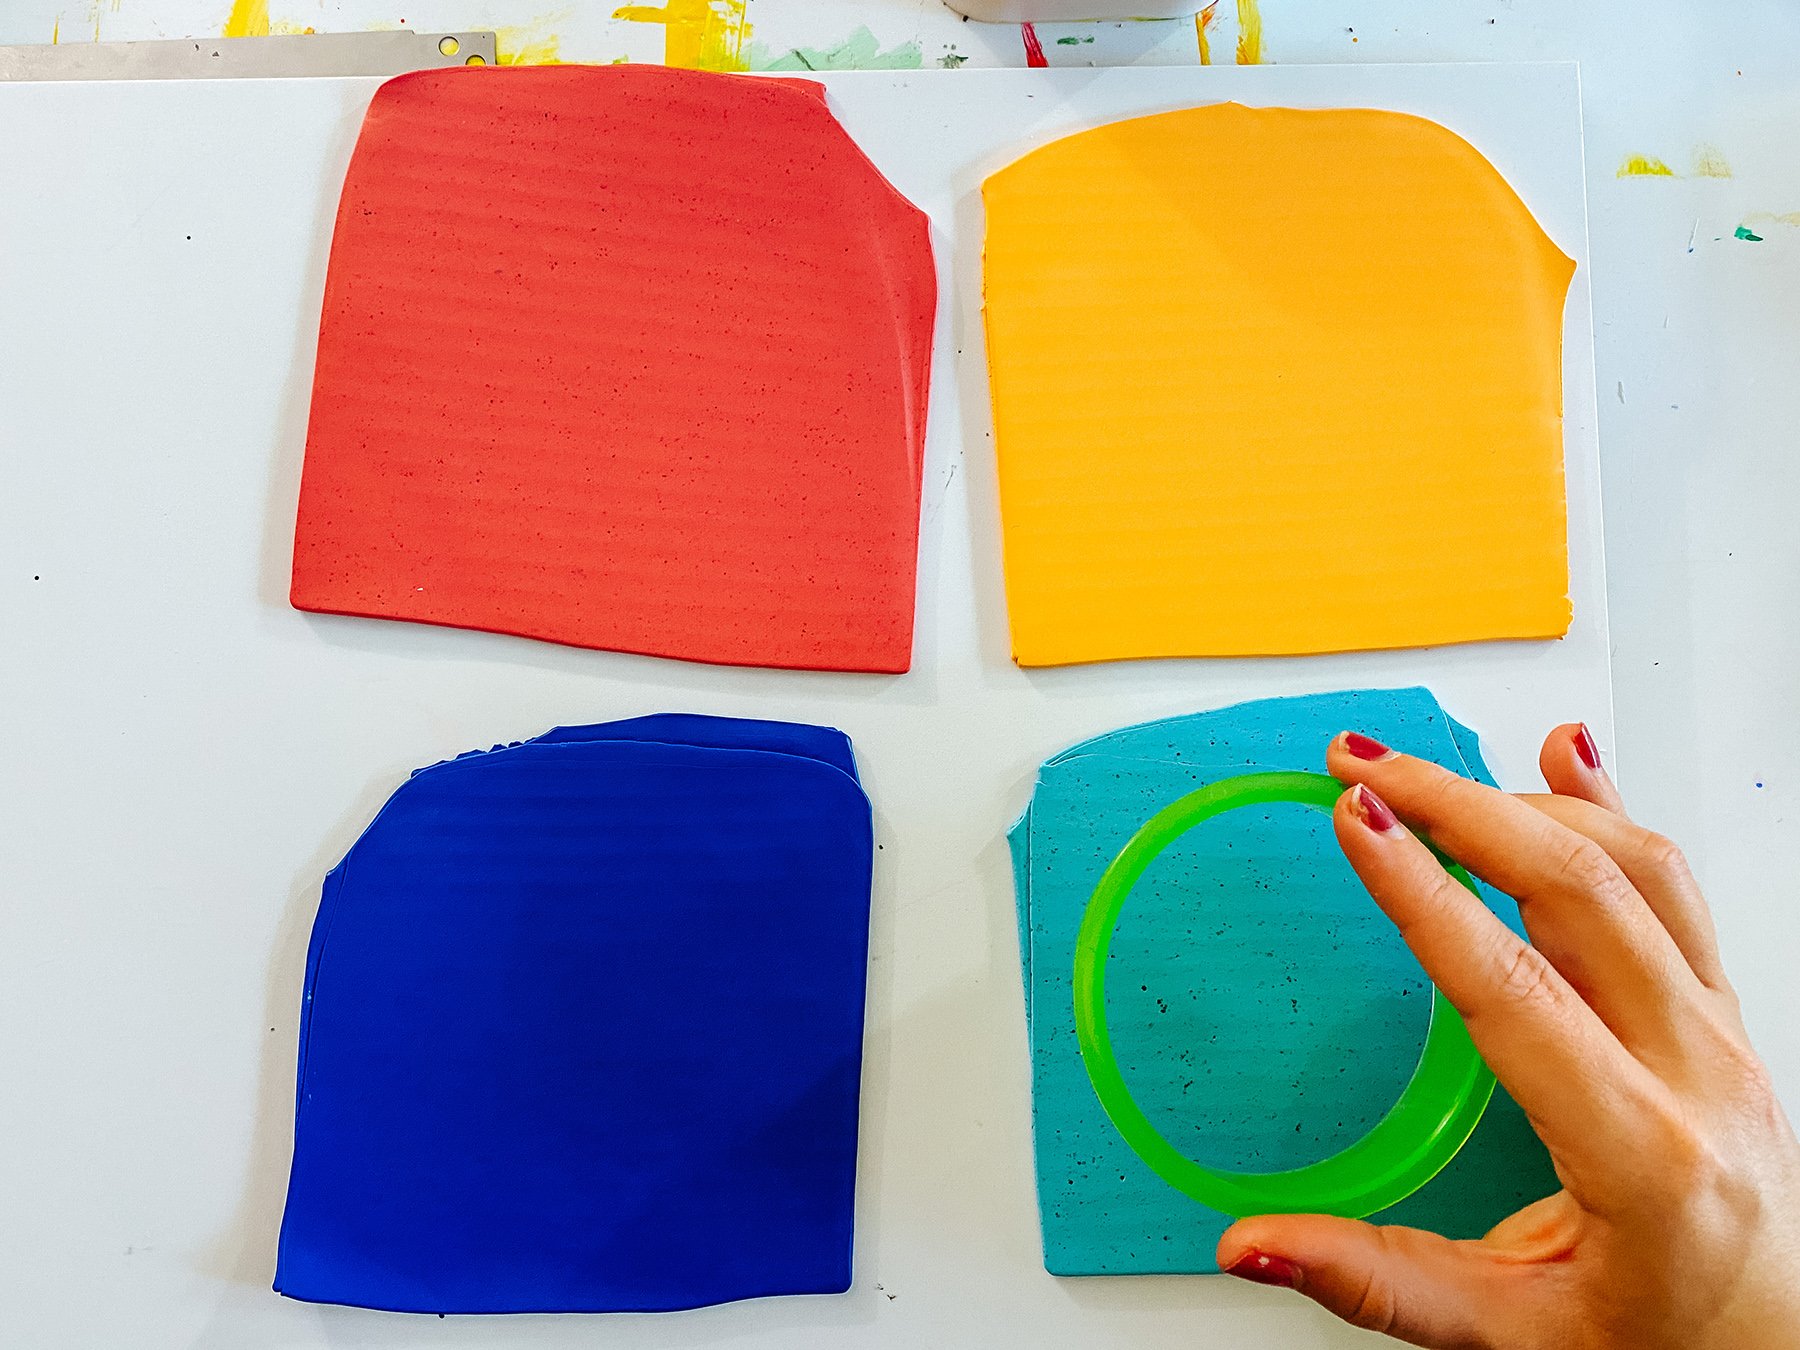
Next, I rolled out flat slabs and got to cutting. For the circle, I used a large cookie cutter, for the triangle - my blade, and the rest I used my Exacto knife to freehand them. Be sure to use your clay blade to cut a really straight/flat surface along the bottom so it sits nicely on your tray.
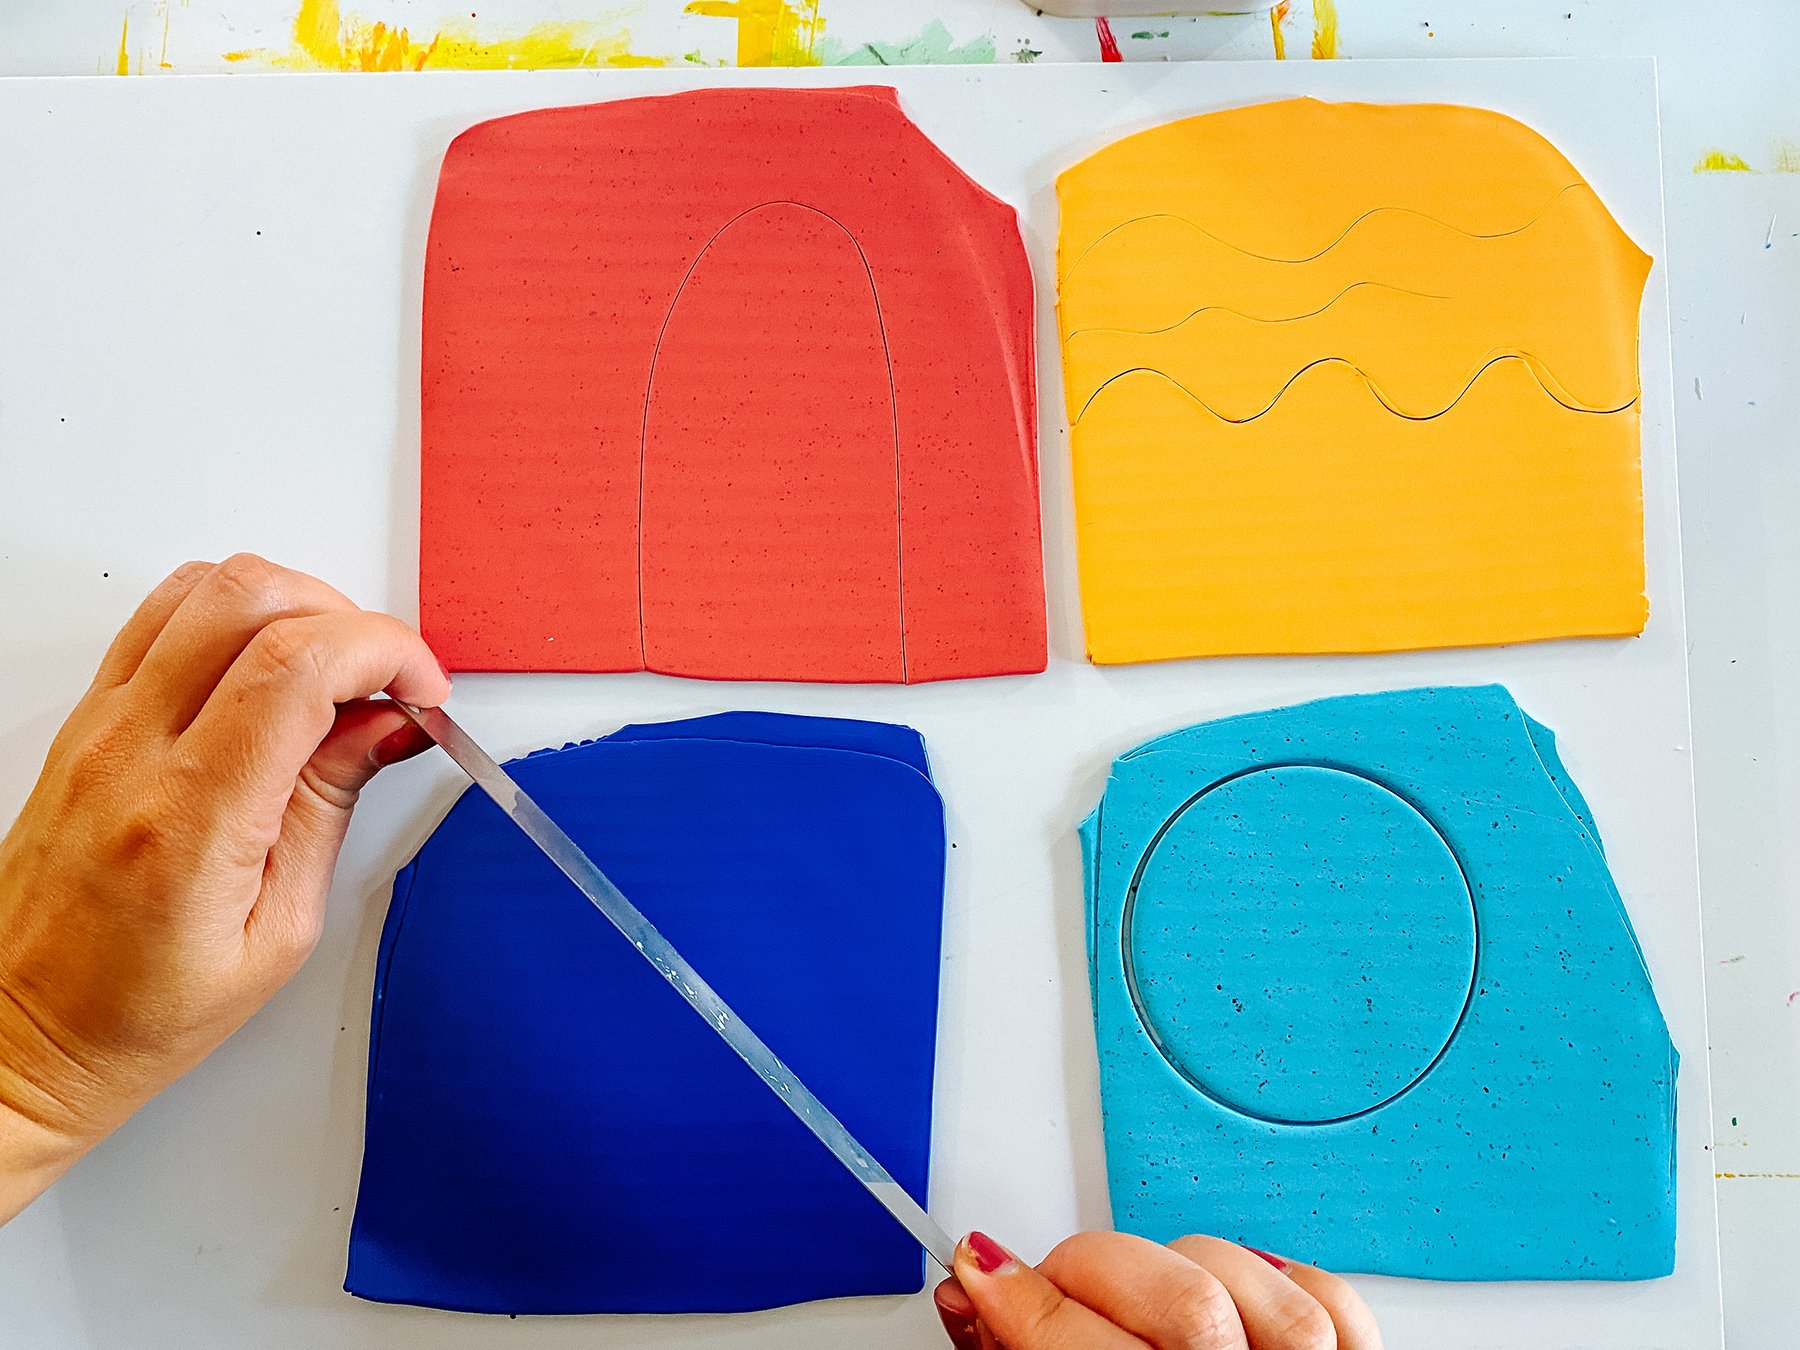
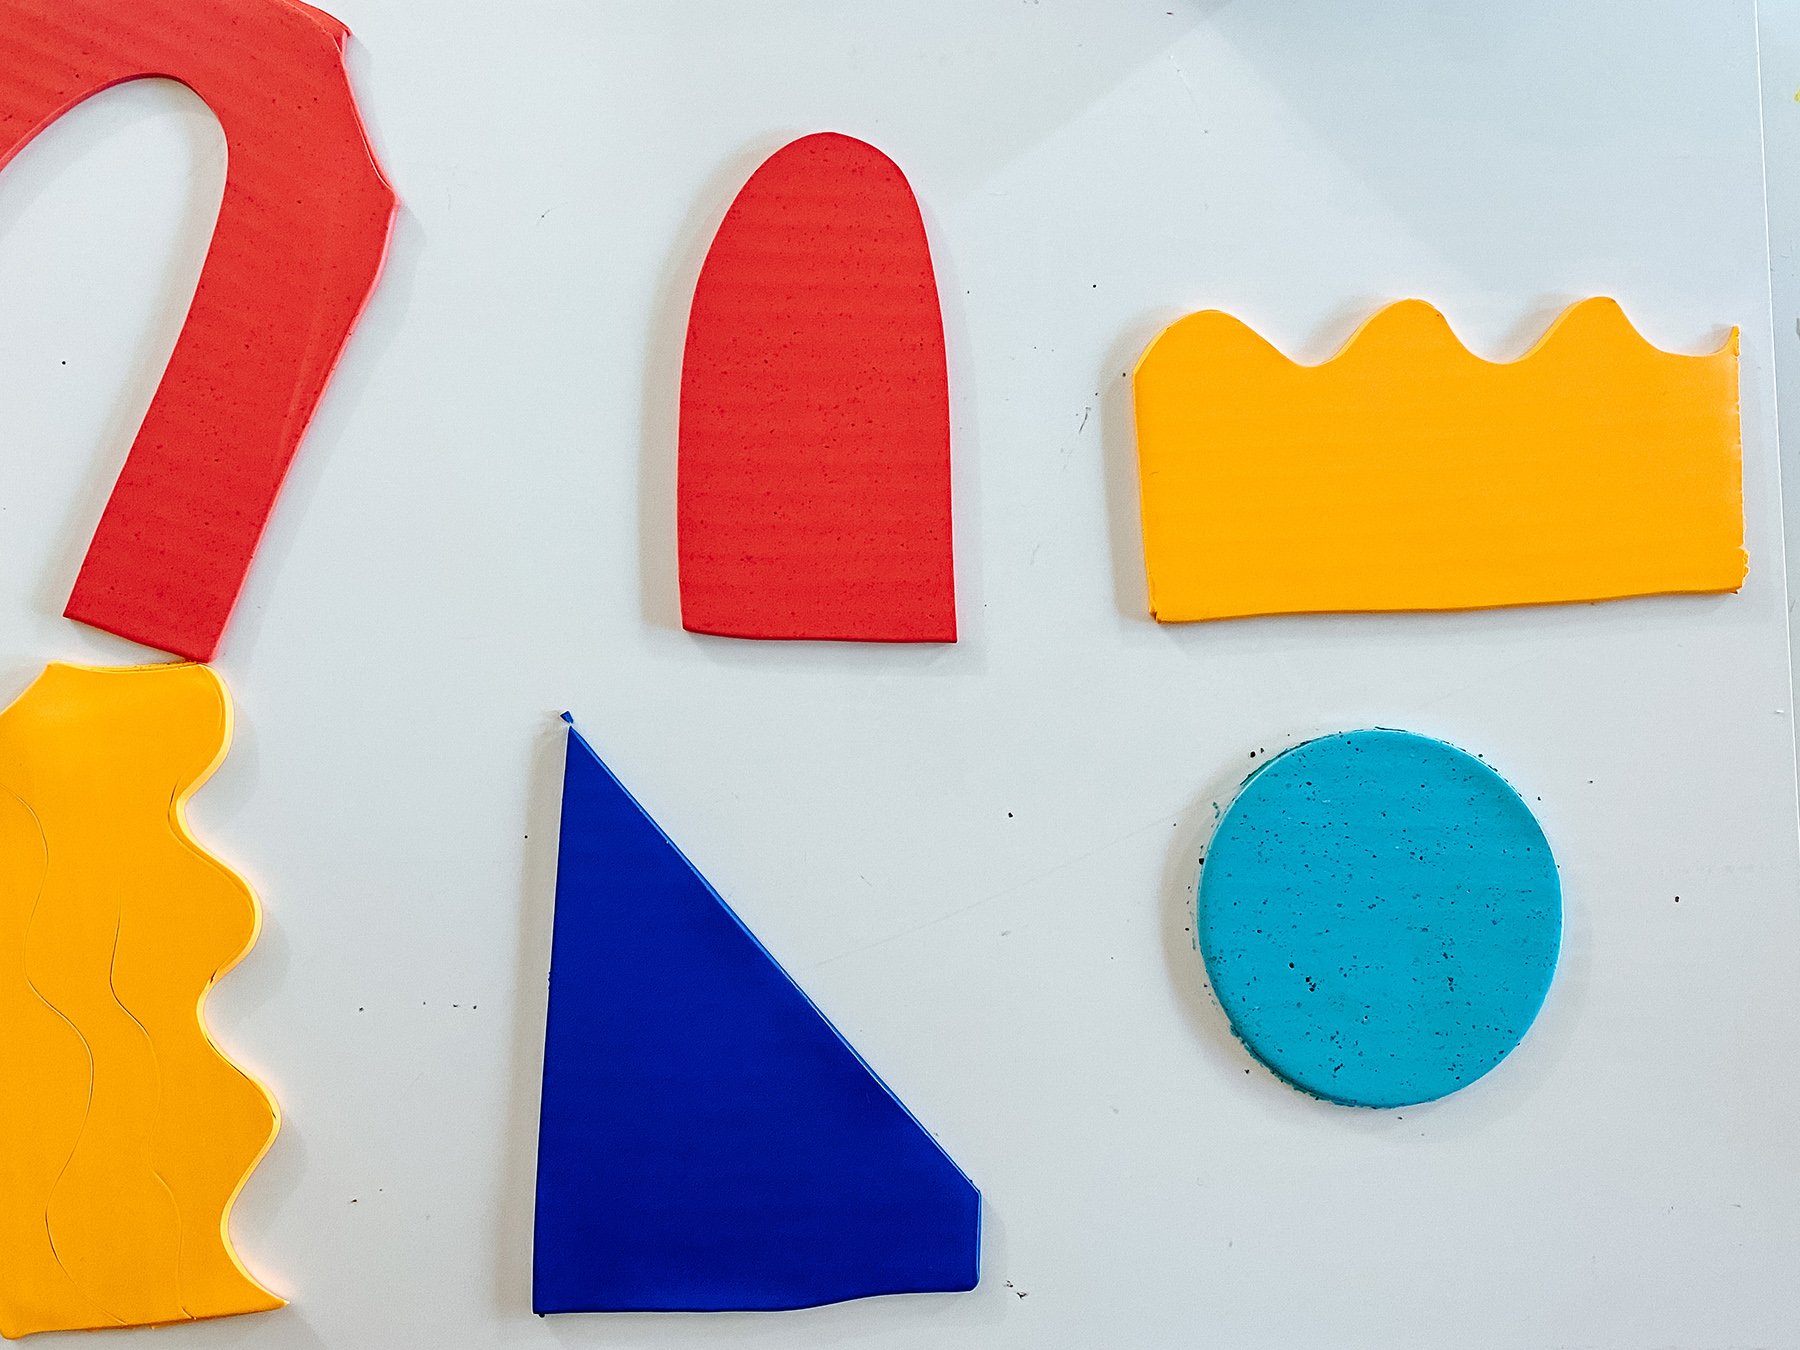
I didn't really have a plan, just cut out shapes I felt were interesting and arranged them, like a puzzle, until I found a design I liked. You can have a plan going in and know exactly what shapes you want or play as I did. You can see just a few of the iterations I went through until I landed on a final design.
Clay is SO forgiving and you can rework it 1000 times if you need to, so don’t be afraid - go for it!


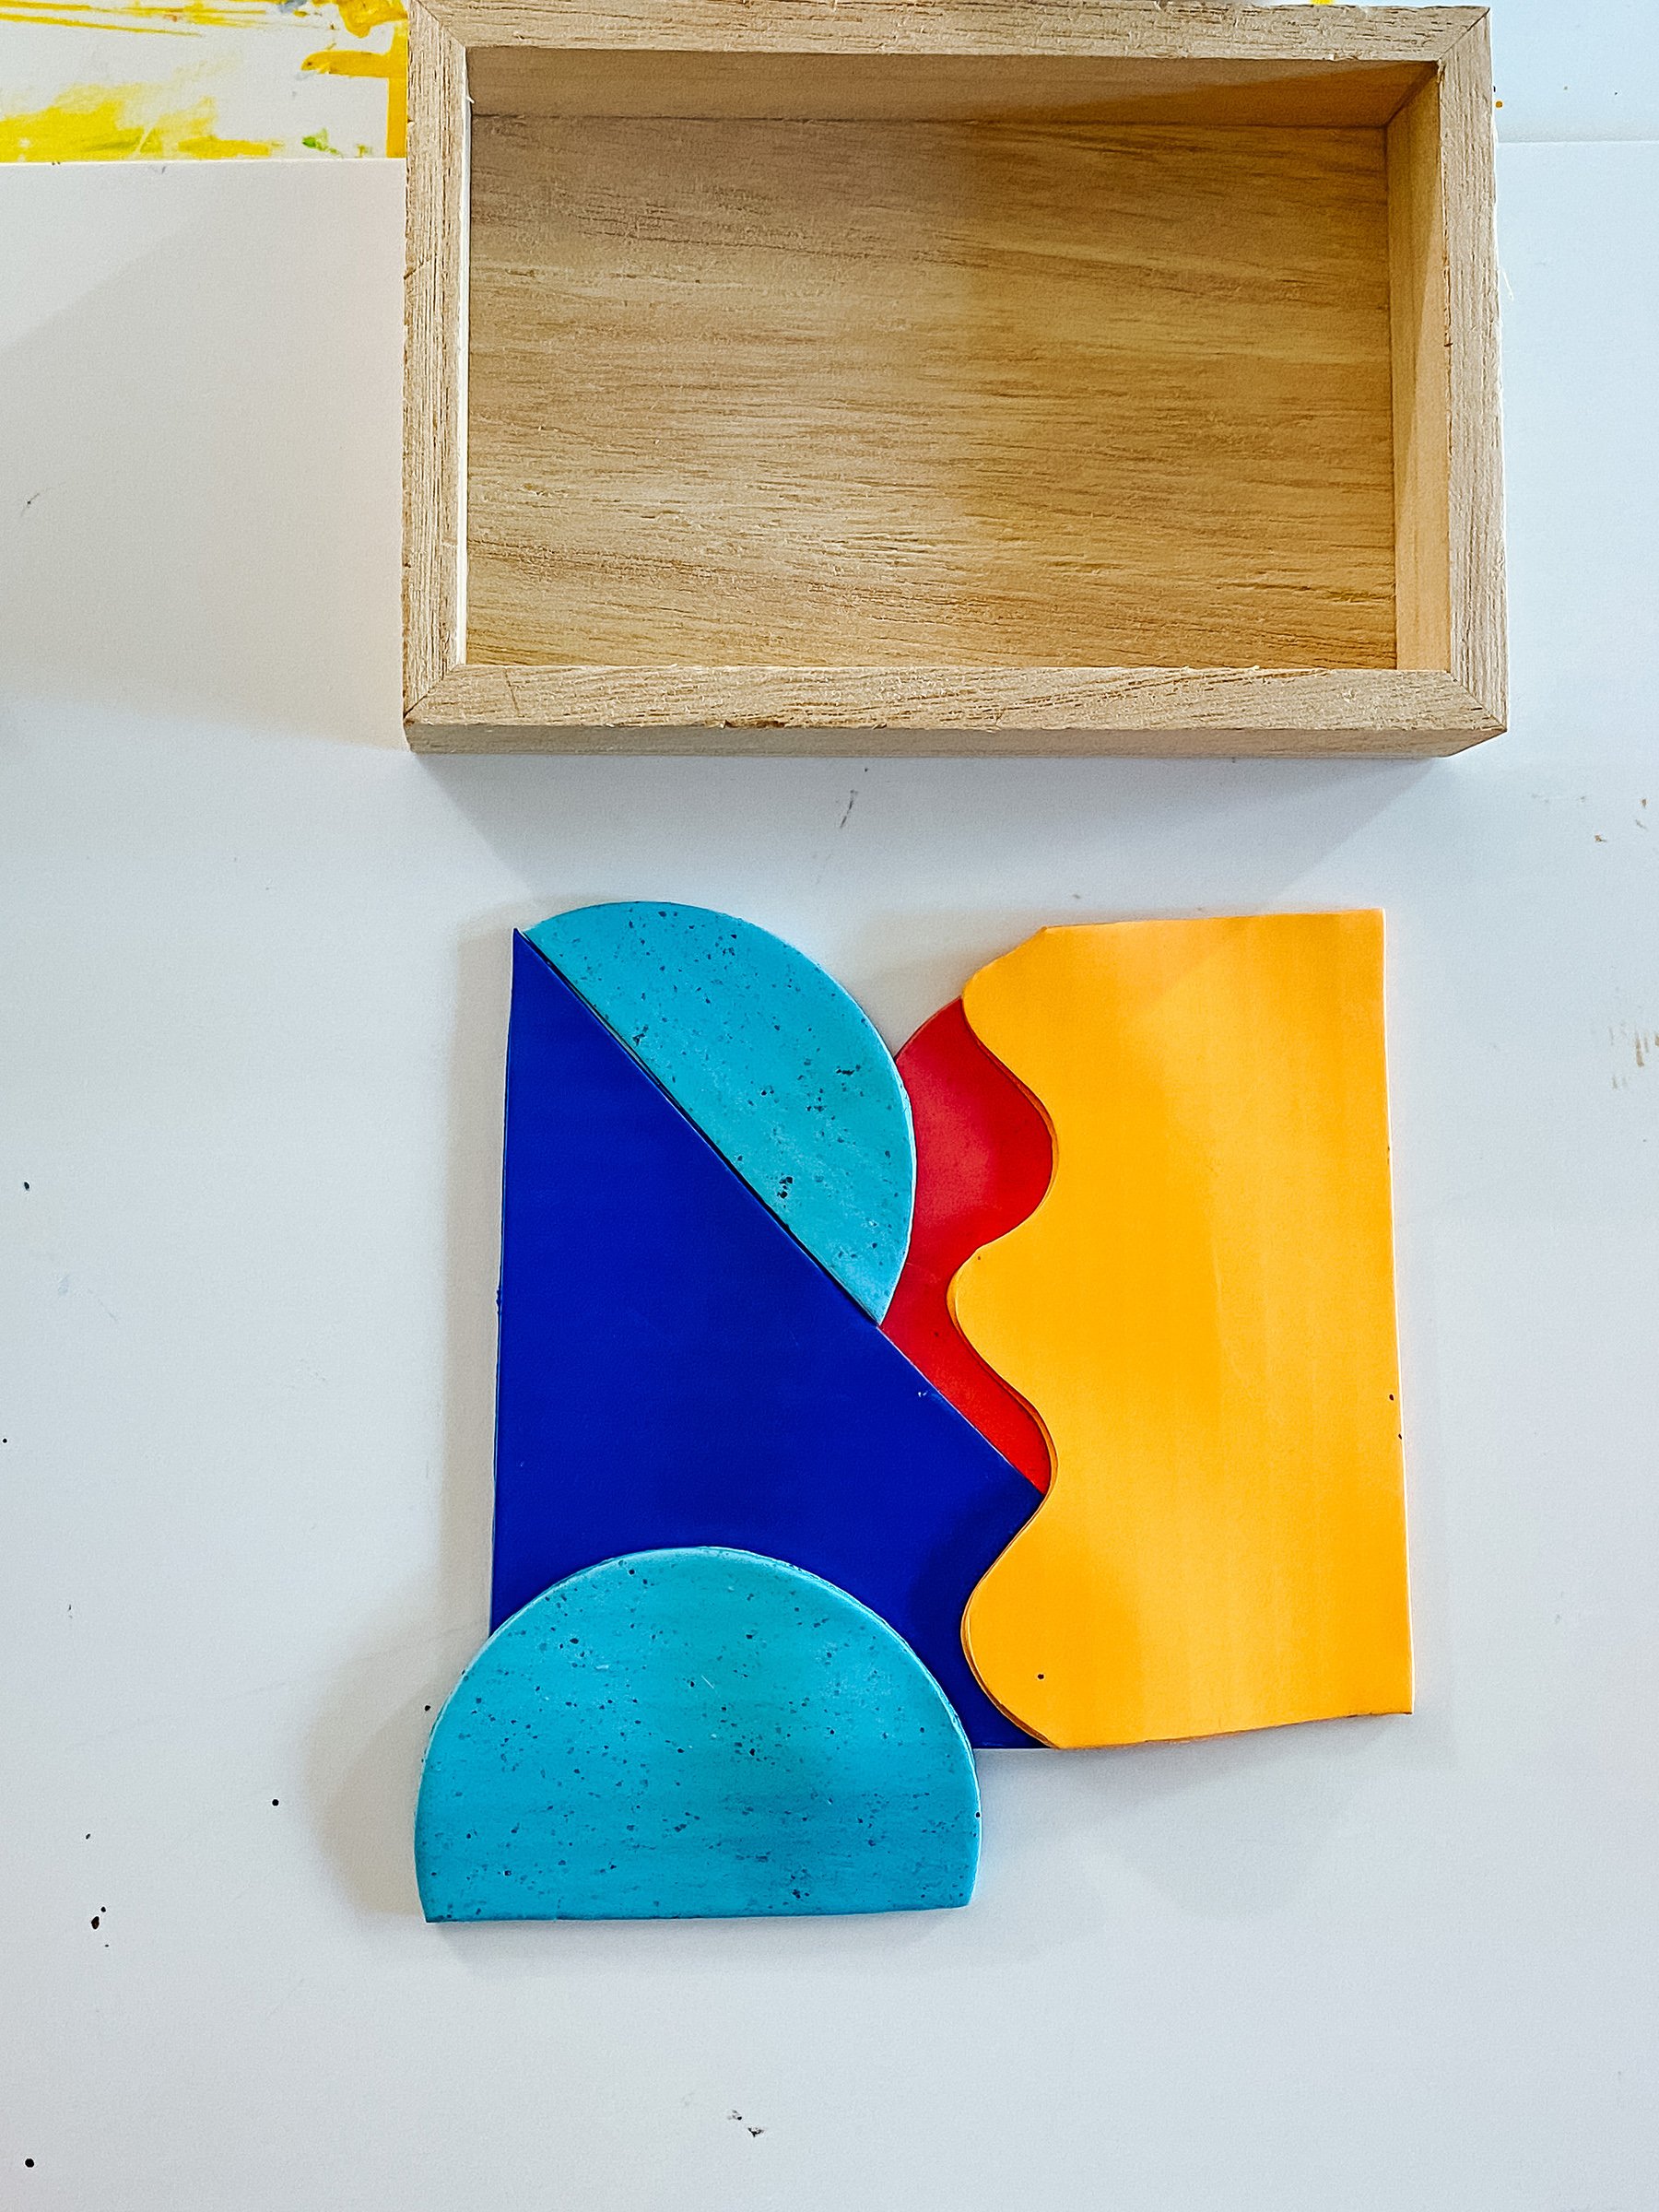
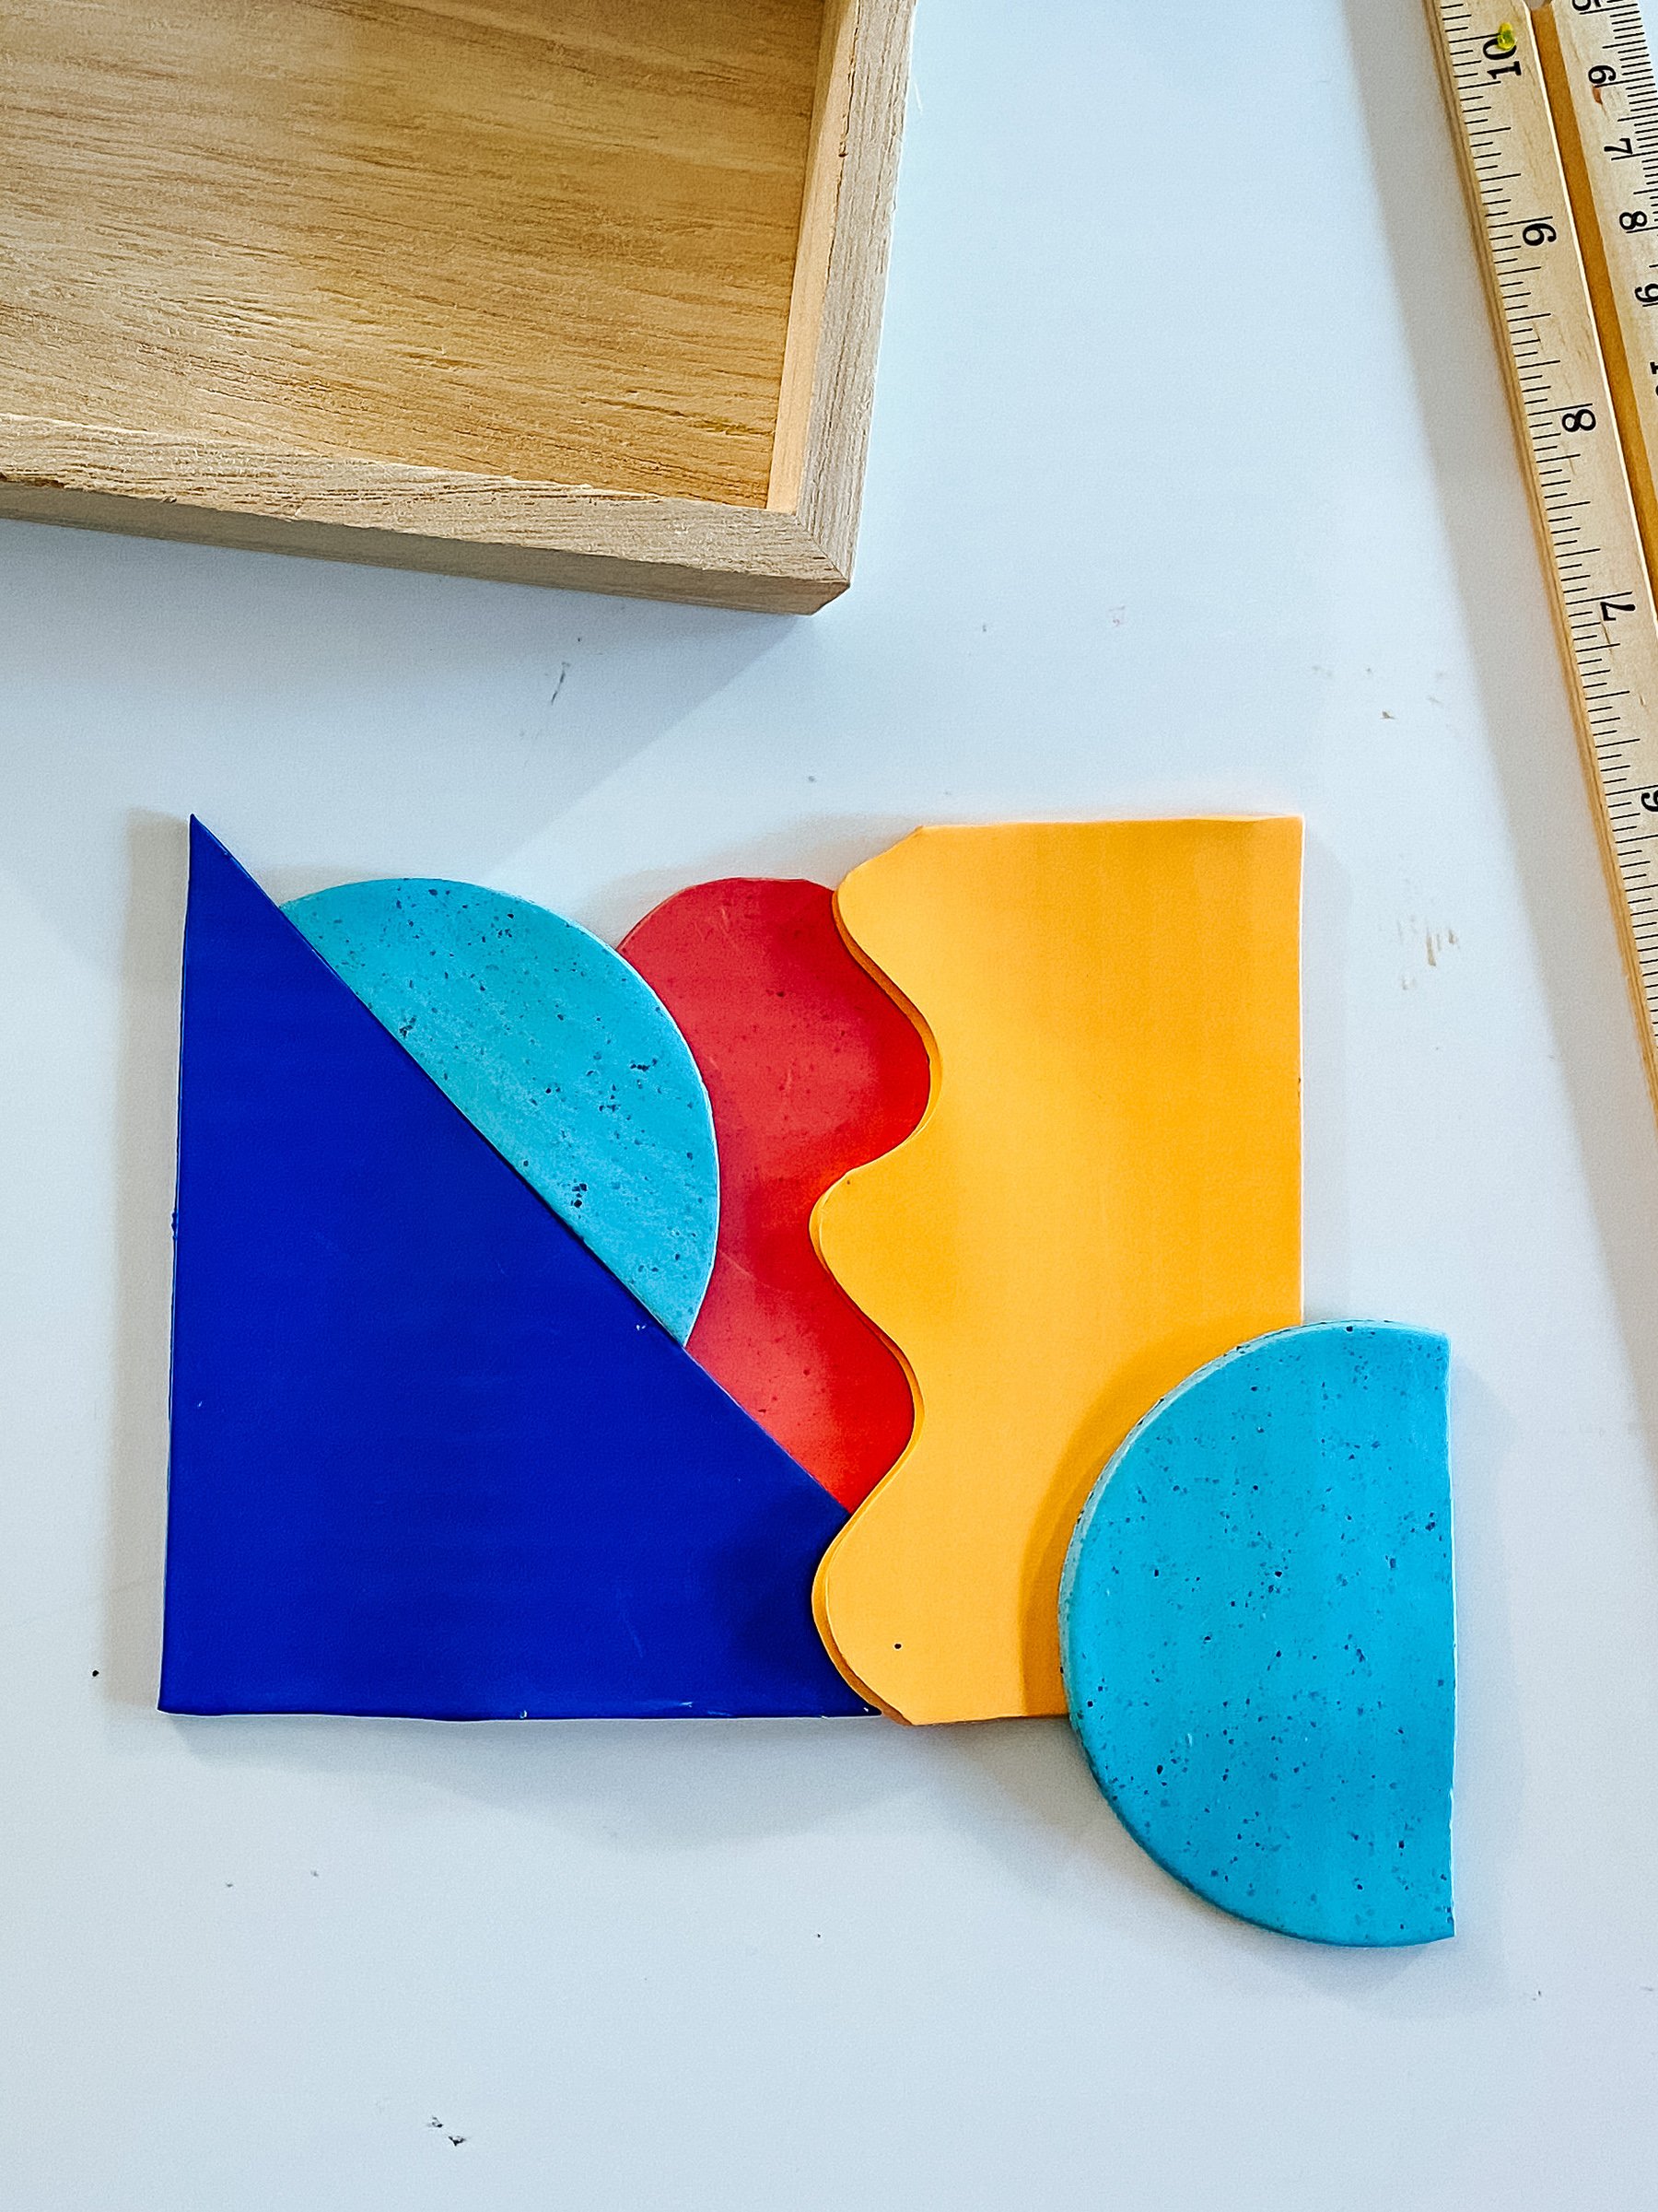
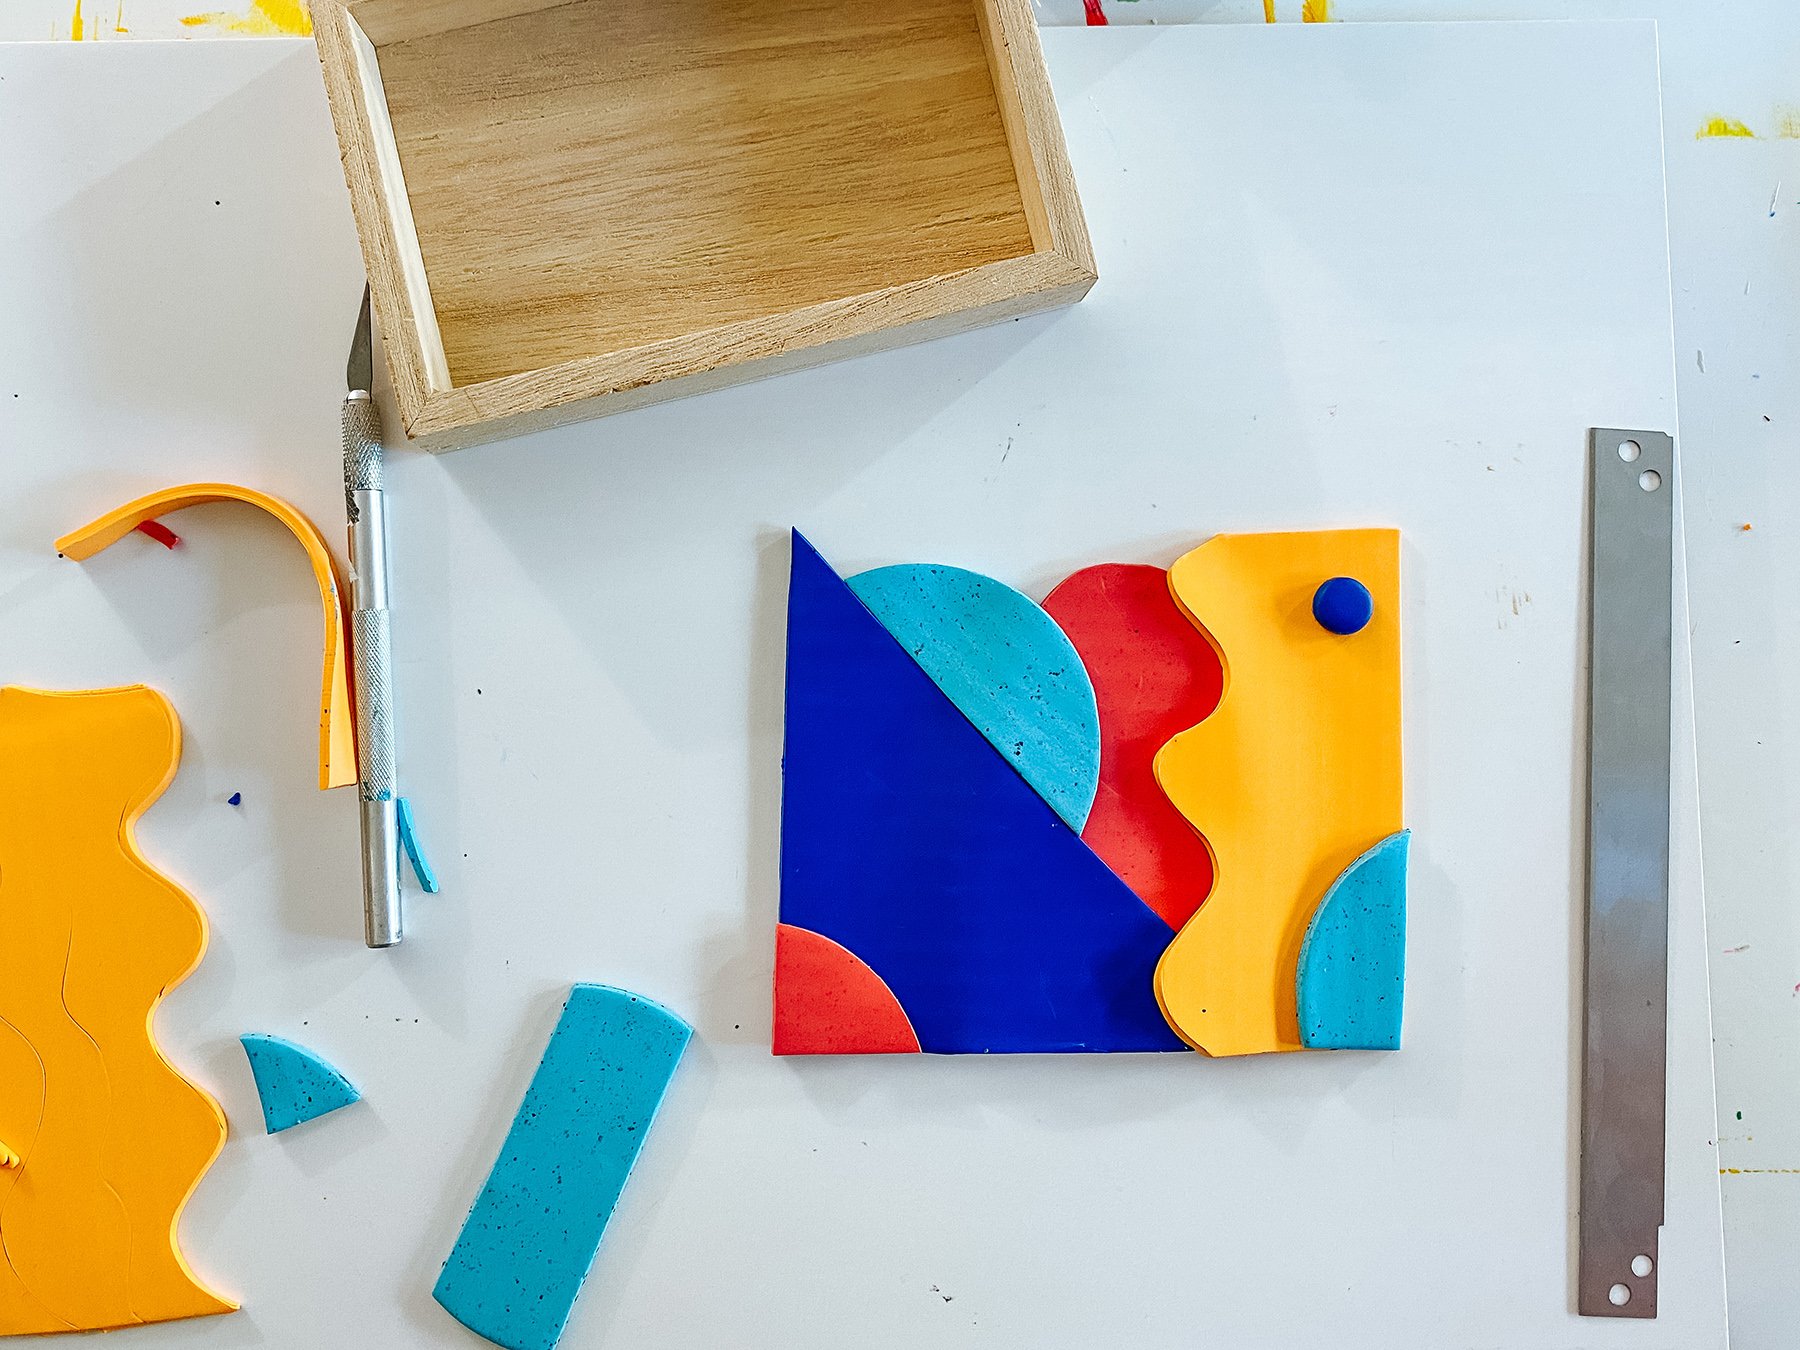
Once I had cut all my shapes and measured them to be sure they would fit into the tray, it was time to do the last few important steps for finishing the pieces before baking them.
Here, you have a few options you'll need to think through depending on your project and your tools.
I used the Sculpey oven-baked adhesive to bond my smaller accent pieces onto the bigger ones but I did not attach the big pieces as they would have become misshaped if I had stacked them in the oven. I attached them after baking them with glue.
HOLES
If you have a Dremel or small drill, you can make your holes after baking. If not, use a paperclip to make holes where you will want your jewelry to hang before baking.
TIP
I use the clay blades to peel the clay off my work surface and transfer the individual pieces onto the baking sheet.

BAKING
Now it’s time to bake! I recommend doing a test bake before you begin. Grab a small chunk of white clay and bake it in your oven at 275°F and check it every 10 minutes for 40 to 50 minutes. Make sure it does not change colors. I bake my clay at 275°F for 50 minutes.
Let the clay cool for about 30 minutes.
CREATE YOUR FINAL DESIGN
CREATE YOUR FINAL DESIGN
For me this was simple and quick as I had already decided on my layout and simply needed to glue each piece together and then glue the whole piece into to the tray. You may want to paint your tray to match before attaching your earring holders!
Once it's all dried and assembled, add your favorite earrings and enjoy this functional and so so cute craft!
I hope you create a lovely piece for your home and maybe even give one as a gift this holiday season! I hope this project brings you lot of joy as you create it and a lot of beauty each day as you use it to get ready.


If you create your own, please show me! Tag me on instagram @laurenlikesblog so I can see.
Thank you so much to Sculpey for partnering with me to create this post. All opinions and ideas are my own and please know that I only work with companies whose products I already own, use, and love.